Development preview — content and features are still being refined.
 Items
Items · Items
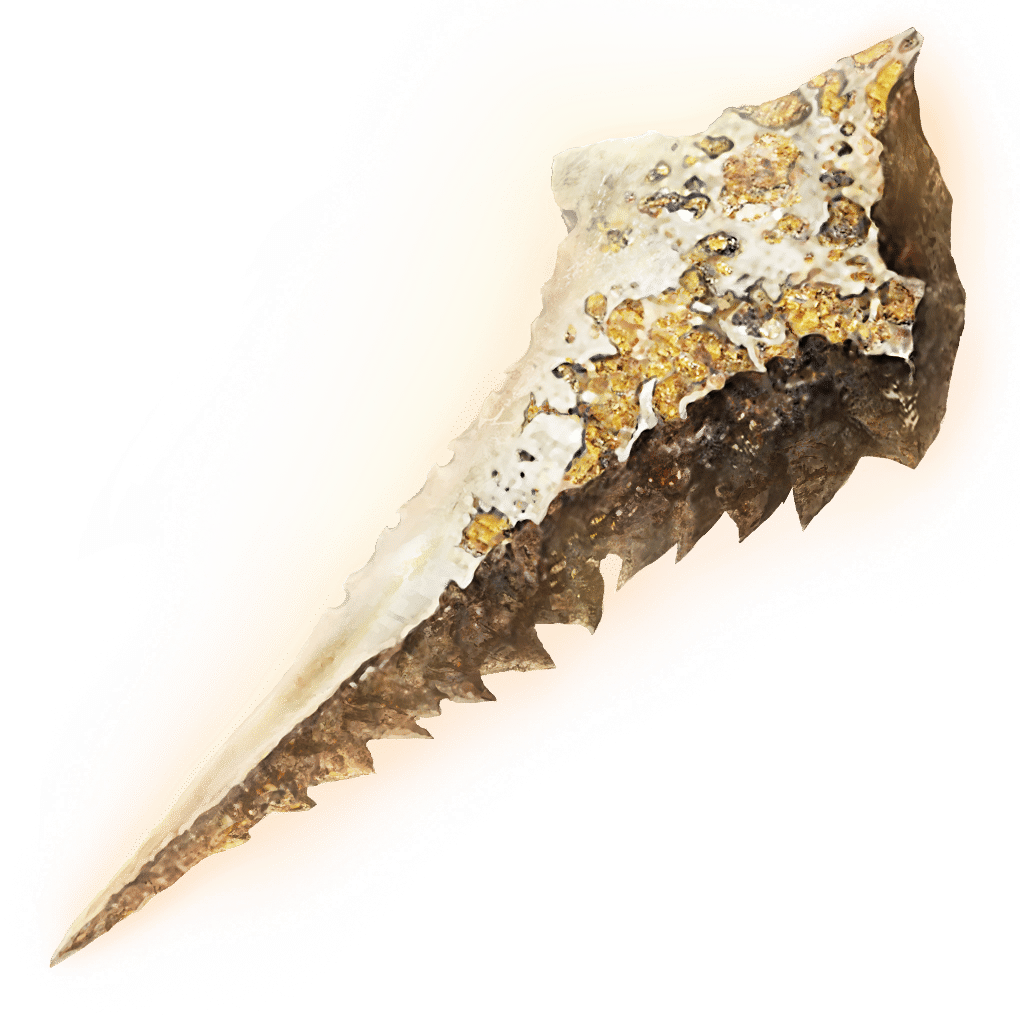
Ancient Dragon Smithing Stone
Items
One stone upgrades an ordinary armament from +24 to its maximum +25, plus the blacksmith's rune fee. It does not replace any of the eight numbered ranks needed to reach +24.
Reference values
- Type
- Upgrade material
About this upgrade material
One stone upgrades an ordinary armament from +24 to its maximum +25, plus the blacksmith's rune fee. It does not replace any of the eight numbered ranks needed to reach +24.
These are finite pickups, purchases and quest rewards per Journey. No Smithing-Stone Miner's Bell Bearing unlocks an unlimited final-rank supply.
Somber Ancient Dragon Smithing Stone serves the special +10 path instead. The two final materials cannot replace one another.
Technical details
- Item Type
- Bolstering Material
- Effect
- Reinforce armaments to +25
In-game description
Smithing stone made by polishing a golden Gravel Stone. A scale of the Ancient Dragonlord, and hidden treasure of Farum Azula.
Strengthens armaments to +25.
The Ancient Dragonlord's seat is said to lie beyond time. This stone lightly twists time, allowing the creation of a weapon capable of slaying a god.
Where to find
Nepheli's throne-room reward and Gostoc's shop
Limgrave
Starting Site of Grace: Godrick the Grafted
Before you go
- Keep Nepheli alive, give her The Stormhawk King and defeat Morgott.
- Keep Gostoc alive if you want his separate purchase.
- Keep Nepheli alive and do not give her the potion from Seluvis. Speak to her in Stormveil, defeat Godrick, then meet her again during the Village of the Albinaurics events and at Roundtable Hold.
- Follow the road along western Liurnia to Foot of the Four Belfries grace. At the fork, take the uphill path northeast through the spirit jellyfish and Troll Knights.
- Keep climbing east and then uphill toward the four bell towers. Activate The Four Belfries grace at the highest part of the hill and open the nearby chest for an Imbued Sword Key.
- Walk downhill to the eastern sending gate with the inscription Precipice of Anticipation. Read the inscription before using the key: the other gates lead to different isolated areas.
- Spend one Imbued Sword Key at its imp statue and use the gate. An ordinary Stonesword Key will not work here.
- Follow the island path and bridge to the original Grafted Scion courtyard. Defeat it if it survived your first visit; it drops Ornamental Straight Sword and Golden Beast Crest Shield together.
- Cross the bridge beyond the courtyard and climb the curved wooden stairs to the chapel where you first started. Before using the main entrance, take the now-open side doorway on its right.
- Climb the stairs to the upper outdoor landing. The Stormhawk King is the item lying outside.
- The item outside is The Stormhawk King. Open the chest through the upper doorway as well if you also want the separate summon, Stormhawk Deenh.
- Give The Stormhawk King to Nepheli below Hewg's room. Defeat Morgott, then finish Nepheli's and Gostoc's available dialogue and rest at Godrick's grace until she moves into Stormveil's throne room.
- Speak to Nepheli in the throne room for one stone. If Gostoc is alive, his shop there sells a second stone for 20,000 runes.
Jerren's reward for opposing Sellen
Liurnia of the Lakes
Starting Site of Grace: Raya Lucaria Grand Library
Before you go
- Reach the final Sellen and Jerren quest choice.
- Find Waypoint Ruins east of Agheel Lake in Limgrave. Enter the cellar among the ruined walls, defeat the Mad Pumpkin Head and open the door behind its arena. Speak to Sellen and agree to study with her.
- From Erdtree-Gazing Hill on Altus Plateau, ride north through Wyndham Ruins and enter the valley beside Mt. Gelmir at Seethewater River. Follow the valley north, then around the mountain toward Seethewater Terminus.
- At Fort Laiedd, continue south along the outside of the fort toward the lava pool. Follow the bank around the Magma Wyrm instead of entering the fort; defeating the wyrm is not required.
- Keep following the mountain path past Hermit's Shack and the nearby Runebear, then continue to Craftsman's Shack and Hermit Village. The enemies along this route are separate from the pickup, so keep moving if you do not want those fights.
- Go through the village and past Demi-Human Queen Maggie to the seated sorcerer with the green crystal head beside Primeval Sorcerer Azur grace. Interact with him and wait through the pause to receive Comet Azur. Do not attack him.
- Return to Sellen at Waypoint Ruins. Show her Azur's sorcery, agree to journey with her and continue her dialogue about Lusat until she gives you the Sellian Sealbreaker.
- From Church of the Plague in eastern Caelid, head northeast to the graveyard at the cliff. Find the large headstone guarded by a battlemage and strike the cliff directly behind it to uncover Sellia Hideaway.
- Activate the cave grace and follow the miners' tunnel. Strike the false walls blocking the way until you reach the large cavern crossed by long crystals. Do not drop into the first deep pit with the Royal Revenant.
- Cross the long crystal bridge, step down to the lower crystal near its far end and reach the rock ledge. Jump the gap ahead and follow the cavern wall until another descending crystal comes into view on your right.
- Look for the crystal snail on that descending crystal. Use the crystals below it to descend into the second pit, then deal with the sorcerer guarding the blue seal at the bottom.
- Interact with the blue seal while carrying the Sellian Sealbreaker. Follow the passage and speak to Lusat to receive Stars of Ruin. The three Crystalian bosses are elsewhere and do not have to be defeated for this room.
- Report Lusat's location to Sellen at Waypoint Ruins and finish her dialogue. After defeating Starscourge Radahn, ask about her real body and agree to help with her next request.
- Travel south from Fourth Church of Marika to Witchbane Ruins on the western Weeping Peninsula. Enter the cellar and speak to the shackled Sellen. Take Sellen's Primal Glintstone when she asks; attacking her is not part of this step.
- After Radahn's festival, speak to Jerren in the chapel area at Redmane Castle until he says he is leaving. If you have already done this, continue to the next step.
- Defeat Royal Knight Loretta at Caria Manor to enter Three Sisters. In the ruins between Ranni's Rise and Renna's Rise, strike or roll over the false floor between the rows of arches to reveal a cellar.
- Go downstairs past the puppets and hit the false wall at the rear. Interact with the spare body resembling Sellen and place her Primal Glintstone in it.
- Return to Witchbane Ruins and finish Jerren's dialogue if he is there. If he has already moved on, check the library signs rather than attacking Sellen's old body.
- After defeating Rennala, go outside Raya Lucaria Grand Library toward the lift. Look beside the library doors for the gold and red summon signs. Stop here before choosing; they lead to opposing quest endings.
- Use the red sign to fight Sellen alongside Jerren. Defeating her gives Witch's Glintstone Crown and Sellen's Bell Bearing, but closes off Glintstone Kris, the new Shard Spiral purchase and the two primeval sorcerers' outfits for this journey.
- Speak to Jerren outside the Grand Library after the fight to receive Ancient Dragon Smithing Stone. Killing him is unnecessary for the stone; doing so afterward gives his outfit and ends his remaining dialogue.
Gurranq's final Deathroot reward
Greyoll's Dragonbarrow
Starting Site of Grace: Bestial Sanctum
Before you go
- Collect all nine Deathroots for the peaceful reward.
- Use the sending gate hidden north of the Third Church of Marika to reach Bestial Sanctum.
- The nine Deathroots come from four Tibia Mariners and five dungeon chests. Keep each one until the handover rather than searching for a repeatable plant or ordinary enemy drop.
- Give Gurranq all nine Deathroots obtained from Tibia Mariners and the relevant dungeon chests. After his temporary hostile phase, deal enough damage for him to calm down rather than killing him.
- His ninth handover awards the stone. Killing him earlier can also give that stone, but ends his remaining Deathroot rewards and does not provide a second copy after the final handover.
Giant skull near the Church of Repose
Mountaintops of the Giants
Starting Site of Grace: Church of Repose
- Reach the Church of Repose near the southern Fire Giant approach.
- Ride southeast to the enormous skull. Check the mouth and loot the corpse inside for the stone.
- The corpse on top of the skull is a different pickup. The Fire Giant does not need to be defeated for this stone.
Night's Cavalry pair guarding the caravan
Consecrated Snowfield
Starting Site of Grace: Inner Consecrated Snowfield
Before you go
- Reach Consecrated Snowfield and fight at night.
- Obtain the right Haligtree Secret Medallion half from Albus in Village of the Albinaurics, beneath southwestern Liurnia's plateau. Follow the village path uphill past the perfumer, reveal the large pot before the bridge and speak to Albus. Stop attacking once he appears.
- Obtain the left half from the rooftop beyond Commander Niall in Castle Sol. After defeating Niall, go through the exit behind his arena, ride the tower lift and collect the half beside the seated spirit. It is a separate pickup from his direct weapon reward.
- Return to the Grand Lift of Rold and switch the action to Hoist secret medallion. Follow Hidden Path to the Haligtree through to the snowy exit. The ordinary Rold Medallion goes to the other part of the Mountaintops.
- Activate Consecrated Snowfield grace near the exit. For Inner Consecrated Snowfield, continue north through the blizzard until the open ground becomes clearer; keep the grace as a safe return point.
- Rest at Inner Consecrated Snowfield and pass time until nightfall. Ride southwest toward the moving caravan pulled by two trolls. One mounted black knight carries a flail and the other a glaive.
- Use a ranged attack to pull one rider away from the caravan. Bring the fight back toward the grace and away from the rest of the escort; going farther south risks drawing in the ghostly Dragonkin.
- Defeat the first rider, then find and defeat the second without resting between them. Watch the caravan's rear guards while drawing him away. Both riders must fall for the combined reward.
- The reward gives the regular helm, armor, gauntlets and greaves together, plus an Ancient Dragon Smithing Stone. The chest on the wagon holds a separate weapon and is not where the outfit is stored.
Yelough Anix Tunnel lower chamber
Consecrated Snowfield
Starting Site of Grace: Yelough Anix Tunnel
- Collect both Haligtree Secret Medallion halves: reveal Albus while he is disguised as a pot in Village of the Albinaurics for the right half, and defeat Commander Niall in Castle Sol before collecting the left half from the tower behind his arena.
- At the Grand Lift of Rold, switch to the secret-medallion action. Pass through Hidden Path to the Haligtree into Consecrated Snowfield, then follow the western cliff north toward Yelough Anix Ruins.
- Find the descending approach to Yelough Anix Tunnel in the cliff south of the ruins. Take the entrance lift and activate the grace.
- Follow the passage to the pit beside a door locked from the other side. Use the ledge along the pit to descend in two short drops, then take the southern tunnel to the wooden walkways.
- Search the lower chamber's northern corner for the corpse holding the stone. Astel at the end of the dungeon is not required.
Cliffs by Great Wyrm Theodorix's waterfall
Consecrated Snowfield
Starting Site of Grace: Cave of the Forlorn
- Follow the snowfield's frozen river east to the waterfall near the Cave of the Forlorn and Great Wyrm Theodorix.
- Use the spiritspring beside the waterfall to reach the ledges above the wyrm's area.
- Follow the upper rocks to the corpse holding the stone. You can collect it without defeating Theodorix if you avoid his attacks.
Two separate ancient-dragon drops
Crumbling Farum Azula
Starting Site of Grace: Crumbling Beast Grave
Before you go
- Reach Farum Azula; defeat the Godskin Duo for the later dragon.
- On the early Farum Azula route, defeat the ancient dragon that lands on the curved, broken platform near Crumbling Beast Grave. It awards one stone.
- Later, after the Godskin Duo, continue from Dragon Temple Rooftop through the Warhawk area.
- Defeat the ancient dragon calling down red lightning on this later approach for another stone. These are separate dragons, rather than a repeatable drop from resting.
Floating room north of Dragon Temple
Crumbling Farum Azula
Starting Site of Grace: Dragon Temple
- Leave Dragon Temple through its northern route and cross the broken ruins toward the passage lined with dragon statues.
- Take the curving stairs on the right. At the top, turn south and look for the floating pillar leading toward a separate ruined room.
- Cross the pillar carefully and loot the corpse in that room for the stone.
Statue plaza near Haligtree Town Plaza
Miquella's Haligtree
Starting Site of Grace: Haligtree Town Plaza
- Obtain the right Haligtree Secret Medallion half from Albus in the Village of the Albinaurics. He is disguised as a pot on the uphill path, before the bridge leading toward the Omenkiller.
- Obtain the left half from the tower beyond Commander Niall at Castle Sol in the northern Mountaintops. After winning, continue behind his arena, ride the lift and loot the rooftop corpse.
- Return to Grand Lift of Rold with both halves and switch to the secret-medallion prompt. The ordinary Rold Medallion sends you to a different destination.
- Take the main stairs through Hidden Path to the Haligtree and leave into Consecrated Snowfield. Continue north through the blizzard, following the road toward Inner Consecrated Snowfield, then on to Ordina, Liturgical Town.
- Activate Ordina's grace and find the evergaol seal toward the back of town. Enter it to light the four statues. Invisible assassins patrol the streets and Albinauric archers fire from the rooftops.
- From the evergaol seal, go left down the stairs and left again to light the street-level statue. Head toward the second stairs leading toward the town grace, but take the path around the building on their right instead of going down.
- Climb the ladder around that building and the next ladder to its rooftop statue. After lighting it, drop from the eastern side onto the red roof, cross the connected rooftops and climb the next pair of ladders to another statue.
- Go down those ladders and return to the evergaol courtyard. Pass the right side of the building, drop to the snowy ground and head west around the next building to the last pair of ladders. Light the fourth statue to lift the seal.
- Back in ordinary Ordina, climb the long northern staircase and use the sending gate at its top. Activate Haligtree Canopy when you arrive.
- From Haligtree Canopy, head east along the branch, climb over the pink mushroom near the envoy and turn south at the junction. Continue past the patrolling envoy to the next junction, then follow its northeastern branch to the end and look southeast for the branch below.
- Drop onto that branch. The larger envoy is to the east; return west toward your landing and look south for the mushroom cluster with a corpse. Descend onto the mushrooms, keeping clear of the edges and using them as cover from bubbles.
- Go north along the branch past the envoys to the ant patrol. Draw the ants onto a wider section before fighting, then turn back south and take the first broad branch east-southeast.
- At its next junction, turn southwest uphill. Just beyond the smaller branch on your left, drop south onto the broad branch below. At the fork, use the southern branch, then turn right onto the thin branch before its far tip.
- Follow the thin branch over the next branch, turn northeast onto that one and climb as it curves north. Pass the envoy and turn southeast toward the next envoy, then return west to the large junction.
- Take the northwestern mushroom ledge with the Preserving Boluses corpse. Drop southwest onto the mushrooms below, then southwest again onto the main branch.
- Head north-northeast. Beyond the branch sticking vertically up on your left, use the mushroom patch on the right to drop onto the branch beneath. Follow it to the larger branch, turn left and continue north-northeast, then northwest at the junction toward the huge envoy firing bubbles.
- Near that huge envoy, drop onto the broad branch below. Follow it north through the rot flowers to the trunk. The stone platform on its left has a ladder; descend it and take the stairs to Haligtree Town grace.
- From Haligtree Town, go northwest down the stairs past the Misbegotten. Continue toward the building below, watching for the enemies waiting beside the doorway and under its stairs.
- Inside, go down the stairs to the lower room. From its northern side, jump north-northeast to the next platform, then turn left across the wooden bridge. Go through the building and out its window.
- Cross the pavilion, keeping clear of the large Misbegotten, and enter the building southwest. Leave southwest across the wooden bridge to Haligtree Town Plaza grace.
- From Haligtree Town Plaza, follow the town route to the small plaza with the red-haired Misbegotten praying before a statue.
- Loot the body at the statue for the stone. Draw the enemy away first if you cannot safely collect it.
Chest after Loretta's arena
Miquella's Haligtree
Starting Site of Grace: Haligtree Promenade
Before you go
- Defeat Loretta, Knight of the Haligtree.
- Obtain the right Haligtree Secret Medallion half from Albus in the Village of the Albinaurics. He is disguised as a pot on the uphill path, before the bridge leading toward the Omenkiller.
- Obtain the left half from the tower beyond Commander Niall at Castle Sol in the northern Mountaintops. After winning, continue behind his arena, ride the lift and loot the rooftop corpse.
- Return to Grand Lift of Rold with both halves and switch to the secret-medallion prompt. The ordinary Rold Medallion sends you to a different destination.
- Take the main stairs through Hidden Path to the Haligtree and leave into Consecrated Snowfield. Continue north through the blizzard, following the road toward Inner Consecrated Snowfield, then on to Ordina, Liturgical Town.
- Activate Ordina's grace and find the evergaol seal toward the back of town. Enter it to light the four statues. Invisible assassins patrol the streets and Albinauric archers fire from the rooftops.
- From the evergaol seal, go left down the stairs and left again to light the street-level statue. Head toward the second stairs leading toward the town grace, but take the path around the building on their right instead of going down.
- Climb the ladder around that building and the next ladder to its rooftop statue. After lighting it, drop from the eastern side onto the red roof, cross the connected rooftops and climb the next pair of ladders to another statue.
- Go down those ladders and return to the evergaol courtyard. Pass the right side of the building, drop to the snowy ground and head west around the next building to the last pair of ladders. Light the fourth statue to lift the seal.
- Back in ordinary Ordina, climb the long northern staircase and use the sending gate at its top. Activate Haligtree Canopy when you arrive.
- From Haligtree Canopy, head east along the branch, climb over the pink mushroom near the envoy and turn south at the junction. Continue past the patrolling envoy to the next junction, then follow its northeastern branch to the end and look southeast for the branch below.
- Drop onto that branch. The larger envoy is to the east; return west toward your landing and look south for the mushroom cluster with a corpse. Descend onto the mushrooms, keeping clear of the edges and using them as cover from bubbles.
- Go north along the branch past the envoys to the ant patrol. Draw the ants onto a wider section before fighting, then turn back south and take the first broad branch east-southeast.
- At its next junction, turn southwest uphill. Just beyond the smaller branch on your left, drop south onto the broad branch below. At the fork, use the southern branch, then turn right onto the thin branch before its far tip.
- Follow the thin branch over the next branch, turn northeast onto that one and climb as it curves north. Pass the envoy and turn southeast toward the next envoy, then return west to the large junction.
- Take the northwestern mushroom ledge with the Preserving Boluses corpse. Drop southwest onto the mushrooms below, then southwest again onto the main branch.
- Head north-northeast. Beyond the branch sticking vertically up on your left, use the mushroom patch on the right to drop onto the branch beneath. Follow it to the larger branch, turn left and continue north-northeast, then northwest at the junction toward the huge envoy firing bubbles.
- Near that huge envoy, drop onto the broad branch below. Follow it north through the rot flowers to the trunk. The stone platform on its left has a ladder; descend it and take the stairs to Haligtree Town grace.
- From Haligtree Town, go northwest down the stairs past the Misbegotten. Continue toward the building below, watching for the enemies waiting beside the doorway and under its stairs.
- Inside, go down the stairs to the lower room. From its northern side, jump north-northeast to the next platform, then turn left across the wooden bridge. Go through the building and out its window.
- Cross the pavilion, keeping clear of the large Misbegotten, and enter the building southwest. Leave southwest across the wooden bridge to Haligtree Town Plaza grace.
- Go south from the plaza and jump to the roof. Cross to its northeastern side, drop onto the branch and continue toward the ants. Turn back toward the building beside that branch and enter it.
- Leave southeast and watch for Spiritcaller Snails around the outside. Their Crystalian summons disappear when their snail dies. Continue southeast and jump to the next roofs, then use the ladders at their eastern side to reach the lower walkway.
- Enter the building southeast of the lower ladder and pass the two Misbegotten. Across the bridges ahead, two battlemages guard the way; use the buildings for cover and draw them apart.
- Cross east to the next building. Its northwestern bridge leads to a lift back up to Haligtree Town. Ride it once to open the shortcut, then return down for a much shorter boss run.
- From the lower lift landing, cross southeast, then turn left onto the northeastern bridge to Loretta's arena. Defeat Loretta, Knight of the Haligtree. The spirit named Royal Knight Loretta in Caria Manor does not award this weapon.
- Descend the long ladder to the tower below. Before riding the lift onward, check the tower's upper terrace.
- Open the chest there for the stone. Malenia is not required.
Dragon's Pit Magma Wyrm
Gravesite Plain
Starting Site of Grace: Dragon's Pit
- From Castle Front, follow the road southeast toward Pillar Path Waypoint. At the fork, use the lower road toward Igon rather than climbing to the Suppressing Pillar.
- Continue south-southwest past the broken dragon statues. An Ancient Dragon-Man invades along this approach. The cave entrance is on the left near the end of the path, marked by a fire.
- Activate Dragon's Pit grace and follow the lit passage down. Watch for skeletons below the first ledge and around the next corner. Strike their glowing remains after knocking them down to stop them getting back up.
- In the large cavern with the pillars, follow the left-hand ledge down and take the passage beside the distant crossbow skeleton. Continue onto the sloping stairs in the next chamber.
- Take the downward route toward the large altar and pit. The stairs going up lead to an optional Magma Wyrm; that fight is not needed to reach the exit.
- Take the upward stairs from the pillar chamber into the optional Magma Wyrm cavern. Defeat it for Ancient Dragon Smithing Stone. The deep pit leads instead to Ancient Dragon-Man.
Chest at the Suppressing Pillar
Gravesite Plain
Starting Site of Grace: Pillar Path Waypoint
- Follow the road south from Castle Front and continue beyond Pillar Path Waypoint toward the tall freestanding pillar.
- Stay on the upper road to reach the pillar's base rather than entering Dragon's Pit.
- Ride the pillar lift to the summit and open the chest for the stone.
Ancient Dragon Senessax
Jagged Peak
Starting Site of Grace: Jagged Peak Mountainside
Before you go
- Reach Jagged Peak through Dragon's Pit.
- Pass through Dragon's Pit, defeat the Ancient Dragon-Man and leave through the rear doors. Follow the eastern mountain route past the fighting drakes.
- Continue uphill using the spiritsprings and pass the rolling-boulder section to reach the flooded cave with Senessax.
- Defeat Ancient Dragon Senessax for a normal Ancient Dragon Smithing Stone and its Somber counterpart. Bayle is not required.
Upper cave on the climb toward the summit
Jagged Peak
Starting Site of Grace: Jagged Peak Mountainside
- From Jagged Peak Mountainside, continue up the mountain using the next spiritsprings.
- Check the cave on the summit approach for the corpse near the top of its initial slope, guarded by electrified oozes.
- Loot the normal Ancient Dragon Smithing Stone. The lower narrow cliff path has a separate Somber stone; do not treat the two pickups as the same item.
Ruined Forge Lava Intake altar
Gravesite Plain
Starting Site of Grace: Ruined Forge Lava Intake
Before you go
- To enter the Realm of Shadow, defeat Starscourge Radahn and Mohg, Lord of Blood, then touch the withered arm in Mohg's arena at Mohgwyn Palace.
- From Castle Front, follow the lower valley southeast through the soldier camps and the groups fighting Bloodfiends. Look for the broken brick entrance built into the rock. Go inside and activate Ruined Forge Lava Intake.
- Take the stairs southeast from the grace and turn right at the bottom. Follow the passage deeper inside. Two burning blobs drop from the ceiling along this route. Go through the doorway behind the second one into the next large chamber.
- In the next large chamber, climb down the ladder to the lower floor. Go up the right-hand stairs, then use the fallen stonework to reach the upper balcony. Watch for another blob at the landing.
- Turn right along that balcony, toward the northwest, and watch for another ceiling blob. Take the ladder down to the ledge with the lever. Pull it to lower the large metal pipe into the lava.
- Get onto the lowered pipe and walk up it. Near the top, jump onto the ledge on your right, toward the southeast, and follow the passage to the altar.
- Examine the altar to receive the Anvil Hammer and an Ancient Dragon Smithing Stone. The nearby return point takes you back to the entrance.
Ruined Forge of Starfall Past altar
Scadu Altus
Starting Site of Grace: Ruined Forge of Starfall Past
Before you go
- To enter the Realm of Shadow, defeat Starscourge Radahn and Mohg, Lord of Blood, then touch the withered arm in Mohg's arena at Mohgwyn Palace.
- Reach Scadu Altus.
- From Moorth Ruins, travel southwest to the ruined forge. Look for the entrance between two burning braziers, with Misbegotten enemies nearby. Go inside and activate this forge grace.
- Cross the bridge in the first chamber and use the lever on the left to lower the large iron gate. Drop to the lower floor and go through the opening. Continue past the golem beside the broken rocks into the next passage, then climb the ladder on the right.
- In the room with the golem and two burning blobs, climb the rubble to the upper doorway. Drop onto the metal platform beyond it and follow the narrow walkway into the next chamber.
- Go past the seated golem and use the second lever to lower the next gate. Use that lever again to raise it, then quickly get onto the moving gate before it rises out of reach. Ride it up and step off onto the upper landing.
- Follow the upper passage to this forge altar and examine it. You receive the Ancient Meteoric Ore Greatsword and an Ancient Dragon Smithing Stone together.
Taylew’s Ruined Forge altar and separate balcony corpse
Rauh Base
Starting Site of Grace: Taylew's Ruined Forge
- From Moorth Ruins grace in Scadu Altus, ride northeast to the small triangular pool. Look for the cave beside a statue of Marika and a Scadutree Fragment.
- Enter the cave and follow it past the perfumers to the glowing golden tree. Take the path to its right down into the swamp.
- Turn left through the route beneath the rock and continue until you emerge into Rauh Base. Activate Ancient Ruins Base grace ahead.
- From Ancient Ruins Base, follow the road north-northeast beneath the enormous bridge to Taylew's Ruined Forge. Enter the structure and activate its grace.
- Inside, go downstairs, cross the small bridge and climb down the ladder. Descend through the gap in the next floor to the enormous tilted metal pipe.
- Before changing the pipe’s tilt, walk up it and jump onto the left balcony. Two Golem Smiths guard the corpse holding a separate Ancient Dragon Smithing Stone. Return to the pipe and take the right balcony to continue to the altar.
- Jump onto the pipe and walk uphill. Take the right-hand platform into the golem room and go up its ramp, watching for slimes dropping from the ceiling.
- Drop over the railing into the corridor below. Follow it toward the archway, turn right and climb the ladder. Go upstairs and pull the lever to reverse the pipe's tilt.
- Use the nearby suspended platform and stairs to return to the pipe. Walk up its newly raised end and jump onto the platform on the left.
- Climb the final ladder and interact with the smithing altar. You receive Taylew and an Ancient Dragon Smithing Stone, and an exit wisp appears.
Notes
- One stone upgrades an ordinary armament from +24 to its maximum +25, plus the blacksmith's rune fee. It does not replace any of the eight numbered ranks needed to reach +24.
- These are finite pickups, purchases and quest rewards per Journey. No Smithing-Stone Miner's Bell Bearing unlocks an unlimited final-rank supply.
- Somber Ancient Dragon Smithing Stone serves the special +10 path instead. The two final materials cannot replace one another.
- Nepheli's throne-room gift and Gostoc's 20,000-rune purchase are separate stones. Killing Gostoc early removes his late shop purchase even when Nepheli can still finish her quest.
- Jerren awards a stone when you challenge Sellen with him. That choice gives up her assistance-ending rewards, so it is not a consequence-free extra pickup.
- Gurranq's ninth Deathroot handover and killing him early are alternatives for his stone. Killing him after already receiving that final reward does not create a second copy.
- The Realm of Shadow adds more opportunities, including ruined-forge altars. Those altar rewards do not require a boss fight, but each altar remains a one-time collection.
- The final stone is consumed for each weapon you finish. Replacing an Ash of War or changing an affinity preserves the weapon’s reinforcement and does not require another final stone.
- You cannot drop these stones for another player. An upgraded weapon is a separate multiplayer item with its own trading restrictions.
- Taylew’s Ruined Forge contains two separate stones: one on the guarded balcony before reversing the pipe, and one with the final altar reward. Collecting only the altar misses the corpse pickup.
- Journey changes let you collect finite rewards again, but do not raise the ordinary weapon cap above +25.