Development preview — content and features are still being refined.
 Items
Items · Items
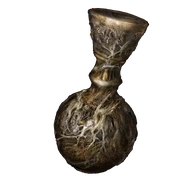
Deathroot
Items
There are nine Deathroots. Give them to Gurranq at Bestial Sanctum for his successive rewards.
Reference values
- Type
- Key
About this item
There are nine Deathroots. Give them to Gurranq at Bestial Sanctum for his successive rewards.
The Beast Eye quivers when one is nearby, but it does not show the exact route.
After the fourth offering, Gurranq can attack on a later visit. Damage him until he yields and stop attacking so you can continue his quest.
Technical details
- facts:
- Entry 1:
- group: Item Type
- label:
- value: Key
- Entry 2:
- group: Effect
- label:
- value: Beast Clergyman seeks and devours these
- Entry 1:
In-game description
A source that gives rise to Those Who Live in Death.
The Beast Clergyman, found at Bestial Sanctum in the distant east, collects and devours these roots.
On the night of the dire plot the stolen Rune of Death enabled the first Death of a demigod. Later, the Rune of Death spread across the Lands Between through the underground roots of the Greattree, sprouting in the form of Deathroot.
Where to find
Tibia Mariner in Summonwater Village
Limgrave
Starting Site of Grace: Summonwater Village Outskirts
- From Stormhill Shack, follow the road northeast past Warmaster's Shack and continue east across Saintsbridge.
- Stay on the road to Summonwater Village Outskirts, then enter the flooded ruins northeast of the grace.
- Fight the Tibia Mariner in the shallow water. Follow the boat when it teleports and keep attacking the boatman rather than trying to clear every skeleton.
- Defeat it to receive the ashes and a Deathroot. The sealed cellar containing the Green Turtle Talisman is separate and does not need to be opened.
Deathtouched Catacombs boss chest
Limgrave
Starting Site of Grace: Deathtouched Catacombs
- From Saintsbridge in northern Limgrave, follow the road west uphill. Before the roadside camp, take the slope on your right to the higher cliffside ledge.
- Look for the double doors with a seated spirit beside them. Open the doors, go inside Deathtouched Catacombs and activate the grace.
- Descend toward the sealed boss door, then take the stairs to the left into the skeleton rooms. Hit fallen skeletons again while they begin glowing to stop them reassembling.
- Continue through the wider main rooms into the lower chamber with skeleton archers. Follow the passage to the statue and lever at the western end.
- Pull the lever to open the sealed entrance boss door. Retrace the main route up the stairs to that door rather than staying in the small side passages.
- Enter the boss room and defeat the Black Knife Assassin, who starts this encounter with some health already missing.
- Open the chest at the back of the boss room for Deathroot. The boss awards Assassin's Crimson Dagger separately; the chest must still be opened.
Tibia Mariner near Carian Study Hall
Liurnia of the Lakes
Starting Site of Grace: Artist's Shack
- From Liurnia Highway North, follow the eastern road toward the shallow pond south of Carian Study Hall. Stay on the raised eastern land rather than heading into the main academy lake.
- Find the Tibia Mariner steering its boat in the pond. Attack it while watching for summoned skeletons and its large water attacks.
- Follow it when it teleports to another part of the pond. You need to defeat the boatman, not clear every skeleton it summons.
- The victory awards the Skeletal Bandit Ashes and a Deathroot. This is the Liurnia Mariner, not the one at Summonwater Village.
Black Knife Catacombs main boss chest
Liurnia of the Lakes
Starting Site of Grace: Black Knife Catacombs
- From Ruined Labyrinth, follow the northeastern ravine to the catacomb entrance guarded by a headless knight. Enter and activate Black Knife Catacombs.
- Descend past the closed boss doors into the skeleton corridors. Kill the necromancers controlling the glowing skeletons so they stop reviving.
- In the room with falling blades, stand on a blade after it strikes the floor and ride it upward. Step off onto the high ledge and follow the upper passage.
- Go to the far end and drop through the opening on the right into the chamber behind the locked gate. Pull the lever to open the boss door and use the other lever to leave this chamber.
- Return to the main boss doors and defeat the Cemetery Shade and its skeletons for the ashes. The Black Knife Assassin behind an upper false wall is a separate optional boss.
- Open the chest in the Cemetery Shade’s arena for Deathroot. Assassin’s Cerulean Dagger comes from the separate hidden assassin and does not replace this chest.
Tibia Mariner in Wyndham Ruins
Altus Plateau
Starting Site of Grace: Erdtree-Gazing Hill
- From Erdtree-Gazing Hill, ride north up the slope into Wyndham Ruins, the flooded ruins above the grace.
- Find and defeat the Tibia Mariner in the ruins. The reward includes Tibia's Summons.
- Attack the boatman and follow him when he teleports around the ruins. The giant spectral skeleton and smaller skeletons are his attacks and summons, rather than the enemy that awards the spell.
- Defeat the Mariner to receive Tibia's Summons and a Deathroot. This is the Altus encounter, not the earlier Mariners in Summonwater Village or eastern Liurnia. Wyndham Catacombs is a separate dungeon and does not need to be cleared.
- Collect the Deathroot awarded by this Tibia Mariner. Its summons are separate enemies, not additional Deathroot drops.
Gelmir Hero's Grave boss chest
Mt. Gelmir
Starting Site of Grace: Gelmir Hero's Grave
- From Bridge of Iniquity on Altus Plateau, follow the road west toward the fighting soldiers and Abductor Virgins. Find the long ladder against the cliff to the south and climb to First Mt. Gelmir Campsite.
- From First Mt. Gelmir Campsite, follow the path west, then around its bend south. Pass the wolves to the large stone entrance at the dead end, enter Gelmir Hero's Grave and ride the lift down to its grace.
- Descend the southern stairs to the first chariot ramp. Move between the wall alcoves after the chariot passes, and clear any skeleton in your shelter so it cannot push you back into the ramp. Hit a fallen skeleton again as it starts to reassemble.
- Near the lower part of this ramp, take the side alcove containing Grave Glovewort and stairs into the dungeon rooms. Use this side route rather than continuing through the long lava channel.
- Clear the Pages and skeletons, climb the stairs and wait for a pause in the flame trap. Cross into the pillar room and strike the pillar to lower it, then take the exit into the second chariot passage.
- Go down the second ramp using its side alcoves. Near the bottom, a Cemetery Shade waits in the corner shelter before the route becomes covered in lava. Keep the chariot in view while dealing with it.
- Return to the narrow stone crossing just before the lava. Look over its side for the ledge below, then drop onto that ledge when the chariot has passed. The corpse with Smoldering Butterflies confirms you are on the lower ledge.
- Follow the passage beneath the ramp into the room with a Bloodhound Knight watching over a corpse. The knight and the guarded corpse give two different outfits.
- Get past the Bloodhound Knight and climb the ladder in its room. At the top, step through the window onto the wooden beams above the second chariot ramp.
- Move to the beams' central crossing and wait for the chariot's flat deck to stop below you as it turns. Drop onto that deck, keeping clear of its wheels and the gap to either side.
- Ride down through the lava. When the chariot reaches the bottom and turns uphill, jump onto the dry stone platform on the right side while facing down the slope.
- Open the large doors and take the stairs to the mist gate. Defeat the Red Wolf of the Champion for Bloodhound Knight Floh. Open the chest at the rear separately if you also want this dungeon's Deathroot.
- After defeating Red Wolf of the Champion, open the chest at the back of the arena for Deathroot. The boss reward ash is separate.
Giants' Mountaintop Catacombs boss chest
Mountaintops of the Giants
Starting Site of Grace: Giants' Mountaintop Catacombs
- Reach the Mountaintops through the Grand Lift of Rold. Follow the main path east from Zamor Ruins until it approaches the narrow stone bridge. Before crossing, turn back onto the lower path southeast of the road and follow it to Giants' Mountaintop Catacombs.
- Activate the grace, descend the stairs past the imps and take the first lift down. The boss doors are near its lower landing. Leave the hidden platform beneath this first lift for the optional Fire Monk Ashes route; it is not the way to the boss-door lever.
- With the boss doors still shut, take the stairs down to the left and continue past the three imps to the second lift. Ride down into the Living Jar rooms.
- Follow the lower passage past the small jars and the large jar dropping from the balcony. Climb the stairs on the west side. Avoid the pressure plate in the corridor, then take the left stairs toward the guillotines.
- Time your movements between the falling blades and keep away from the exploding jars. Climb the next stairs and follow the corridor past the poison-spewing creatures to the large jar at the apparent dead end.
- Return to the previous room and find the western doorway with a hole beside the corpse carrying Stimulating Boluses. Drop through the opening and down to the similar-looking lower room, then head north to its lift.
- At this lift's lower landing, trigger the platform and step off to send it up empty. Drop into the space beneath it. A large jar guards the new landing; leave through the southern passage and turn right onto the balcony.
- Follow the balcony around to the lever and pull it. Drop to the floor below and follow the northern passage back to the lift. Ride up and return to the now-open boss doors.
- Defeat the Ulcerated Tree Spirit for Glovewort Picker's Bell Bearing [2] and a Golden Seed. The Deathroot is in the separate chest in the boss room. Offer the bearing to the Twin Maiden Husks at Roundtable Hold.
- Open the boss-room chest after defeating the Ulcerated Tree Spirit to collect Deathroot. The bell bearing and Golden Seed are separate boss rewards.
Tibia Mariner on the Castle Sol approach
Mountaintops of the Giants
Starting Site of Grace: Snow Valley Ruins Overlook
- After defeating Morgott, use the Rold Medallion at Grand Lift of Rold to enter the Mountaintops. Follow the route through Zamor Ruins, along the narrow mountain bridge and past the early ruins toward Snow Valley Ruins Overlook.
- From Snow Valley Ruins Overlook, travel northwest toward the graveyard and cliff above Castle Sol. Look for the Tibia Mariner in its small boat, with giant skeletons appearing nearby.
- Defeat the Mariner itself to receive Helphen's Steeple. The giant skeletons it summons do not drop this weapon.
- The reward is guaranteed from the Mariner. Killing the enormous skeleton apparitions without defeating the small boat does not finish this encounter.
- This Tibia Mariner also gives Deathroot. The enormous skeletons along the approach are not separate Deathroot rewards.
Hidden boss chest
Hidden Path to the Haligtree
Starting Site of Grace: Hidden Path to the Haligtree
- Obtain the right Haligtree Secret Medallion half from Albus in the Village of the Albinaurics. He is disguised as a pot on the uphill path, before the bridge leading toward the Omenkiller.
- Obtain the left half from the tower beyond Commander Niall at Castle Sol in the northern Mountaintops. After winning, continue behind his arena, ride the lift and loot the rooftop corpse.
- Return to Grand Lift of Rold with both halves and switch to the secret-medallion prompt. The ordinary Rold Medallion sends you to a different destination.
- Inside Hidden Path to the Haligtree, go along the main stairs to the circular platform above the deep central room. Look for the section of railing that has broken away.
- Walk straight off through that gap onto the invisible floor immediately below. Drop a Rainbow Stone first to confirm the landing, and avoid jumping out toward the distant wall.
- Walk north, then turn west when aligned with the enemy and doorway across the gap. Reach that doorway and clear the enemies inside.
- Return to the invisible edge, turn south and drop onto the lower ledge. Go through the open window and follow the lower passage.
- Climb the stairs to the northern upper platform and pull the lever on its rear wall. Watch for the large land octopus dropping into the room.
- Return south through the lower corridor to the opened boss doors. Defeat the Stray Mimic Tear for Amon.
- The chest in the arena contains Deathroot, which is a separate pickup.
Notes
- There are nine Deathroots. Give them to Gurranq at Bestial Sanctum for his successive rewards.
- The Beast Eye quivers when one is nearby, but it does not show the exact route.
- After the fourth offering, Gurranq can attack on a later visit. Damage him until he yields and stop attacking so you can continue his quest.
- The final offering gives an Ancient Dragon Smithing Stone. Killing him early prevents the remaining normal offerings.
- The first offering gives Clawmark Seal and Beast Eye. The second gives Bestial Sling, the third Bestial Vitality and the fourth Beast’s Roar.
- The fifth gives Beast Claw, the sixth Stone of Gurranq, the seventh Beastclaw Greathammer and the eighth Gurranq’s Beast Claw. The ninth gives Ancient Dragon Smithing Stone.
- These rewards follow the number offered, not the order in which you clear the nine locations. A Deathroot from a late dungeon can still be the first one you hand over.
- The four Tibia Mariners give their Deathroots directly. The five dungeon copies are in boss-room chests, so defeating the boss without opening its chest can leave the item behind.
- During Gurranq’s hostile phase, stop as soon as he yields and rest before resuming the handovers. Continuing to attack can kill him and close the remaining rewards.
- Defeating Maliketh does not by itself remove Gurranq from Bestial Sanctum or finish these offerings. His Deathroot rewards and that boss encounter are handled separately.
- Deathroot is a quest delivery item, not an ailment cure, crafting ingredient or consumable attack. Giving it to Gurranq spends that copy.