Development preview — content and features are still being refined.
 Items
Items · Items
Flask of Cerulean Tears +11
Items
Restores 210 FP per drink before equipment or effects that change flask restoration. It only fills the missing part of the bar; any excess is lost.
Reference values
- Type
- Tool
About this item
Restores 210 FP per drink before equipment or effects that change flask restoration. It only fills the missing part of the bar; any excess is lost.
FP is the blue bar used for spells and many weapon skills. This drink restores FP, without directly restoring HP.
The flask stays in your inventory when its charges run out. Rest at a Site of Grace to refill it instead of buying replacement bottles.
Technical details
- facts:
- Entry 1:
- group: Item Type
- label:
- value: Tool
- Entry 2:
- group: Effect
- label:
- value: Restores FP
- Entry 1:
In-game description
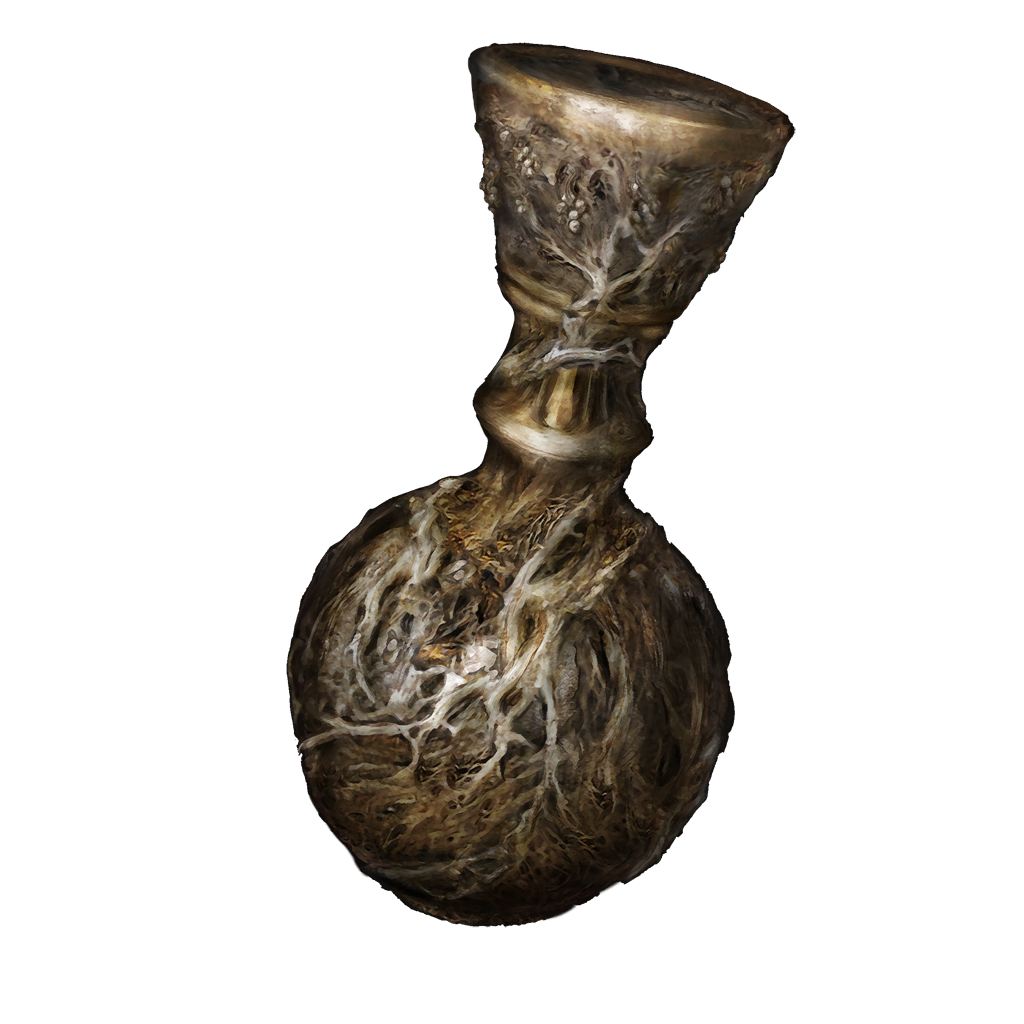
A sacred flask modelled after a golden holy chalice that was once graced by a tear of blessing.
Filled with cerulean tears, this flask restores FP with use.
Rest at a site of grace to replenish.
The one washed up on the gravesite was sure to die, until this flask offered its gift of rejuvenation. To seek the Elden Ring.
Where to find
Sacred Tear upgrades at a Site of Grace
Churches across the Lands Between
Before you go
- Obtain the permanent flask in Stranded Graveyard and spend 11 Sacred Tears in total.
- Reach Stranded Graveyard during the opening sequence to receive the permanent blue flask. The +11 version is an upgrade to it, rather than another bottle hidden in the world.
- Collect 11 Sacred Tears in total. These church pickups each provide one; you can substitute other tears you have already found.
- Third Church of Marika: Follow Limgrave's eastern road northeast through Mistwood to the ruined Third Church of Marika. Activate the grace inside the church and approach the statue at the far end. Pick up the Sacred Tear beneath the statue. The Flask of Wondrous Physick and its tears are separate nearby rewards.
- Church of Pilgrimage: Cross the Bridge of Sacrifice and take the western uphill road through the peninsula. Continue north across the high ground to the church above the forest and lake. Enter the Church of Pilgrimage and collect the tear beneath its statue.
- Fourth Church of Marika: From the peninsula's central western high ground, follow the road toward the western coast. Find Fourth Church of Marika north of the Witchbane Ruins area. Enter the church and pick up the tear beneath the statue.
- Callu Baptismal Church: From Castle Morne Rampart grace beside the main road, head west up the hill toward Ailing Village. Go through the village to the ruined church on its southern side. Frenzied villagers and several rats, including a giant rat, can follow you inside. Clear the area around the statue and collect the Sacred Tear beneath it. The nearby Flame of Frenzy pickup is separate.
- Church of Irith: Leave Stormveil through Godrick's throne-room exit or take the cliffside path around the castle to Lake-Facing Cliffs. Walk southwest to the ruined Church of Irith, where Thops sits. Collect the tear under the statue. His key quest is not required for this pickup.
- Bellum Church: Reach Bellum Highway in northeastern Liurnia. You can use the academy gate seal after obtaining the Academy Glintstone Key, or approach the highway from northern Liurnia. Follow the road north and look for the ruined church to its western side. Enter Bellum Church and gather the tear at the statue.
- Church of Inhibition: Reach Bellum Church on northeastern Liurnia's Bellum Highway. Travel northeast toward the Grand Lift of Dectus, staying near the eastern cliffs until you find the uphill approach toward the Frenzy-Flaming Tower. The tower builds Madness while it can see you. Move between rocks for cover and let the buildup fall before crossing exposed ground. Use Torrent and the spiritspring on the left of the tower to reach the higher ground behind it. Continue through Frenzied Flame Village, then take the rising path from the village's northern end toward the ruined church above. Festering Fingerprint Vyke can invade near the church. Enter the ruined church and activate its grace when it is safe. Pick up the Sacred Tear beneath the statue; the Finger Maiden corpse nearby holds a separate armor set. No ending choice or Hyetta quest step is required.
- Church of the Plague: In Sellia, light the three tower braziers by climbing the roots and rooftops. This removes the magical seals blocking the northern route. Take the uphill road from Sellia Backstreets toward the church above town, watching for the rolling balls on the path. Enter the Church of the Plague and collect the tear under the statue. Healing Millicent is not required.
- Second Church of Marika: From Altus Highway Junction, follow the road north toward the plateau's map marker. Leave the road to the west and descend carefully toward the ruined Second Church of Marika. Collect the tear beneath the statue inside. Eleonora can invade here, so do not stand still in the open if the invasion starts.
- Stormcaller Church: Reach Rampartside Path on the higher ground in eastern Altus Plateau. Stormcaller Church stands southwest of this grace. Follow the high ground southwest toward the ruined church. The cliffs below it prevent a direct climb from Altus Highway Junction, even though the church looks close on the map. Enter the church and collect the Sacred Tear beneath its statue. The nearby lightning attacks make it worth keeping moving until you are inside.
- First Church of Marika: Reach Freezing Lake in the northern Mountaintops. Ride southeast across the frozen lake toward the church on its southern shore. Keep moving if Borealis appears; killing the dragon is not required. Gather the tear beneath the church statue. The nearby corpse outside holds a separate bell bearing.
- Rest at a Site of Grace, open Flasks and choose Increase amount replenished by flasks. Each use spends one Sacred Tear; repeat until the flask displays +11.
- This increases both flask colors together. Use Allocate flask charges at the same menu to give yourself at least one blue charge if you want to use it.
Notes
- Restores 210 FP per drink before equipment or effects that change flask restoration. It only fills the missing part of the bar; any excess is lost.
- FP is the blue bar used for spells and many weapon skills. This drink restores FP, without directly restoring HP.
- The flask stays in your inventory when its charges run out. Rest at a Site of Grace to refill it instead of buying replacement bottles.
- Red and blue flasks share a charge pool. Allocate flask charges at a grace to choose the split; adding a blue charge leaves one fewer red charge and vice versa.
- Golden Seeds increase that shared charge total, up to 14. Sacred Tears increase restoration per drink, up to +12, without adding charges.
- Both colors share the same Sacred Tear upgrade level. Improving one does not require spending another tear on the other color.
- Cerulean Seed Talisman improves FP restored by this flask. Cerulean Amber Medallion increases maximum FP instead; a bigger blue bar does not automatically make each drink restore more.
- Compared with +10, this upgrade restores 10 more FP per drink. Reaching +11 requires 11 Sacred Tears in total, counting any already spent.
- The next Sacred Tear upgrade reaches +12 and restores 220 FP per drink before bonuses.
- Sacred Tears do not improve the Flask of Wondrous Physick. That flask uses its own Crystal Tear mixture and separate use.