Development preview — content and features are still being refined.
 Items
Items · Items
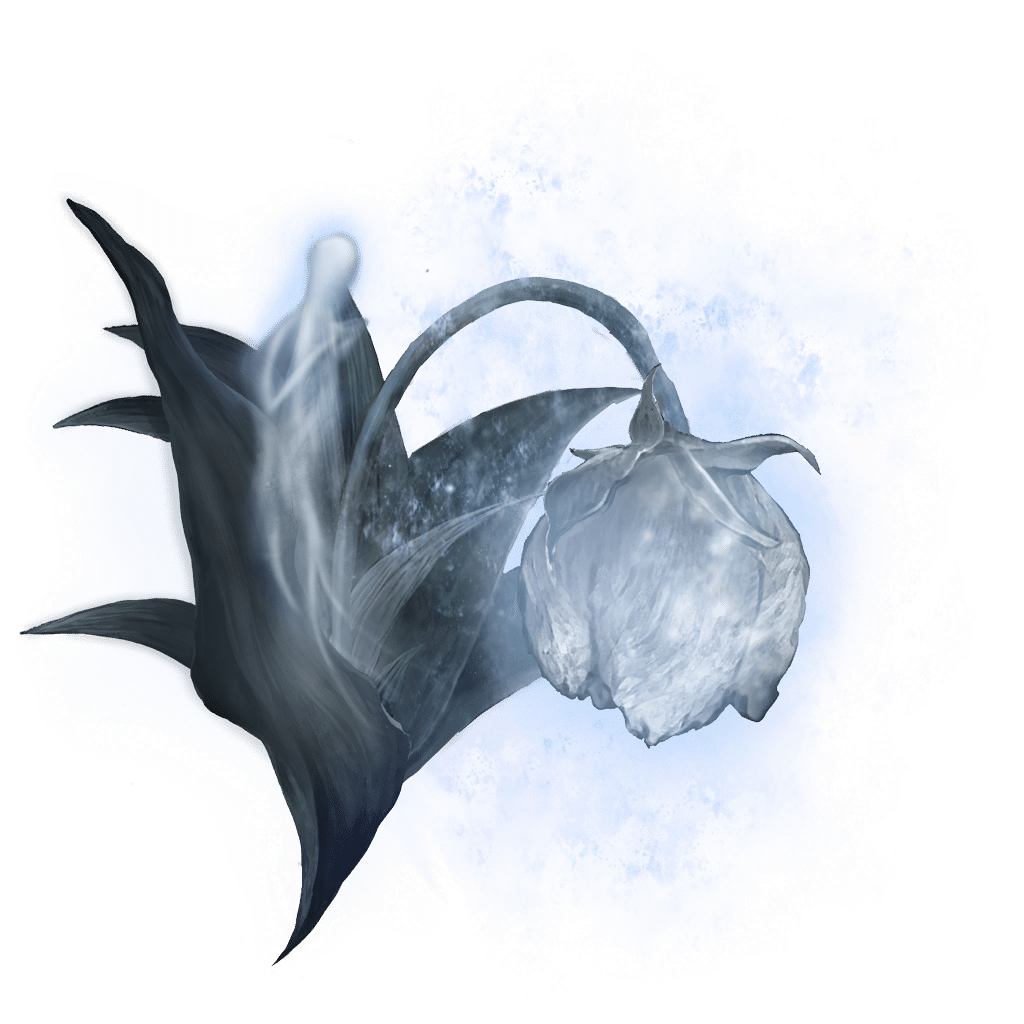
Great Ghost Glovewort
Items
One flower upgrades a compatible special Spirit Ash from +9 to its maximum +10, plus Roderika's tuning fee. The numbered Ghost Gloveworts are still required for the first nine levels.
Reference values
- Type
- Upgrade material
About this upgrade material
One flower upgrades a compatible special Spirit Ash from +9 to its maximum +10, plus Roderika's tuning fee. The numbered Ghost Gloveworts are still required for the first nine levels.
Used for special ashes such as Black Knife Tiche, Banished Knight Oleg and Mimic Tear. Great Grave Glovewort is the separate final material for standard ashes.
The supply is finite per Journey. Ghost-glovewort bell bearings only unlock numbered flowers, so there is no unlimited +10-flower shop.
Technical details
- Item Type
- Bolstering Material
- Effect
- Strengthen renowned ashes to +10
In-game description
White flower that blooms in catacombs.
A spirit nestles close to this grand specimen
Strengthens renowned ashes to +10.
Where to find
Chest beneath the Dragonkin Soldier's giant throne
Ainsel River
Starting Site of Grace: Ainsel River Downstream
Before you go
- Defeat the Dragonkin Soldier of Nokstella.
- On eastern Liurnia's plateau, head north from Eastern Tableland to the round Ainsel River Well building. Ride the lift down and activate Ainsel River Well Depths grace.
- Take the tunnel on the left toward the giant ants. Watch the ceiling as well as the floor; drawing them down one at a time is safer than being surrounded beneath them.
- At the first lit junction, turn right. The left branch ends at a Smithing Stone pickup rather than the route onward.
- At the next split in the chamber full of corpses, take the right branch toward the large stone structure. Climb the path on the right and cross the bridge back to the left.
- Activate Ainsel River Sluice Gate grace in the cave ahead before using the lift directly to the right of the bridge's far end. Ride that lift down instead of jumping from the upper ruins.
- Follow the lower ruins through the Claymen and the lit entrance into the large open chamber. A hanging creature at the far end fires stones across this room.
- Use the stone walls and pillars as cover while approaching the building directly beneath that creature. The Hermit Merchant is sheltering inside; killing the creature is optional.
- Leave the merchant building and follow the water into the tunnel on the western side of the large cavern. Climb onto the raised ground on your right for Ainsel River Downstream grace.
- Continue through the water tunnel past the ant nest. At the split, take the right-hand passage; the left branch ends at a ledge overlooking the Lake of Rot.
- Follow the passage into the huge chamber with the seated skeleton. The Dragonkin Soldier of Nokstella appears as you enter the arena.
- Defeat the Dragonkin Soldier to receive Frozen Lightning Spear automatically. The chest beneath the giant throne contains a separate Great Ghost Glovewort.
- Defeat the Dragonkin Soldier of Nokstella, then open the chest beneath the throne for the flower. This lower-river route is separate from reaching the city of Nokstella.
Fingerslayer Blade chest
Nokron, Eternal City
Starting Site of Grace: Night's Sacred Ground
Before you go
- Agree to serve Ranni at Ranni's Rise.
- Defeat Radahn and reach Night's Sacred Ground.
- Reach the western Liurnia road and follow it north through Kingsrealm Ruins. Strike the illusory wall blocking the road at the northern end, then continue past Iji at Road to the Manor.
- Ride toward the large manor while avoiding the magical strikes falling along the approach. Activate Main Caria Manor Gate grace at the entrance.
- Inside, follow the courtyard path northwest toward the building in the far corner. Fingercreepers hide among the plants and beneath the ground; do not stop on a buried hand.
- Enter the building with the seated spirit and climb its stairs to Manor Lower Level grace.
- Take the elevated walkways east and continue straight along the main route at the first junction. Spectral soldiers appear along the bridges. Reach the far building and take its lift up to Manor Upper Level.
- Leave the upper grace, pass the wolves in the garden and climb the main stone stairway toward the Troll Knight and sorcerers.
- Continue up the stairs beyond the troll and Pages to the large circular courtyard. Defeat Royal Knight Loretta, then activate Royal Moongazing Grounds grace.
- Leave through the rear exit into Three Sisters. Ranni's Rise is the western tower; climb to Ranni and agree to serve her.
- Finish the servant introductions and return to Ranni to complete the conversation. You can now leave Three Sisters and continue toward Radahn.
- Defeat Starscourge Radahn at the Radahn Festival in Redmane Castle. His defeat opens the starfall crater in Limgrave; it is not the sealed Siofra River overlook reached from the Four Belfries.
- Return to the Mistwood near Fort Haight and find the new crater marked by floating rocks. Use the descending ledges and openings to enter Nokron, Eternal City.
- Follow the rooftops down into Nokron's streets, then continue to the Mimic Tear boss. Defeat it and cross the long bridge beyond the arena.
- Leave the bridge on the left where it opens into woodland. Follow the western cliff to Ancestral Woods grace, overlooking the lower rooftops.
- From beside the grace, drop to the roof below. Follow the roofs and narrow building ledges, fighting or avoiding the Silver Tears, until you can cross the broken stone arch into the large church.
- Descend to the church's lower floor and watch the enormous rolling ball. Leave through the main doorway and go down to Night's Sacred Ground grace.
- Follow the lower street past the Silver Tears toward the enormous seated skeleton. Climb the stairs below its throne and open the chest for Fingerslayer Blade. The nearby locked side room for Mimic Tear Ashes is not needed for this chest.
- The chest beneath the giant seated figure contains Great Ghost Glovewort with Fingerslayer Blade. You must agree to serve Ranni before opening it; returning the blade is a later quest action.
Silver Sphere ambush room
Nokstella, Eternal City
Starting Site of Grace: Nokstella, Eternal City
- Give Ranni the Fingerslayer Blade from Nokron, then use the waygate at the top of Renna's Rise to reach Ainsel River Main. Renna's Rise is the northern tower in the Three Sisters area behind Caria Manor, separate from Ranni's own tower.
- Activate Ainsel River Main grace and follow the water through the Claymen toward the hanging creature in Uhl Palace Ruins. Use the ruins on the left as cover from its stone volleys and continue beneath it into the river tunnel.
- Pass the ants, including the flying ones. At the open cavern, follow the river to the right; the left branch returns toward the lower river merchant.
- Go through the doorway on the right and down the steps to Nokstella, Eternal City grace. The ordinary Ainsel River Well in Liurnia does not reach this upper entrance.
- Climb the large stairs beside the grace into the upper city. Continue past the first left-hand side room and along the upper path toward the large bridge.
- Cross the bridge carefully, watching for the rolling silver sphere. On the far side, take the stairs up. The building on the right is a separate room with another sphere and a glovewort chest.
- Enter the room on the right at the far end of the bridge. Another Silver Sphere drops inside, so clear the ambush before opening the chest at the back.
Lower burial area inside the mausoleum cave
Mohgwyn Palace
Starting Site of Grace: Dynasty Mausoleum Midpoint
- Defeat a Shardbearer such as Godrick, then speak to Finger Reader Enia at Roundtable Hold.
- Find Varre at Rose Church on an island southwest of Raya Lucaria Academy in Liurnia. Tell him the Two Fingers did not seem right and receive his Festering Bloody Fingers.
- Attempt three player invasions, or use the red invasion sign at Writheblood Ruins in Altus Plateau to defeat Magnus the Beast Claw. Defeating Magnus once satisfies this stage without online play.
- Return to Varre and accept the anointing to receive Lord of Blood's Favor.
- For maiden's blood without killing a friendly NPC, go to the Church of Inhibition in northeastern Liurnia. Follow the uphill route past Frenzied Flame Village, take cover from the tower's Madness and deal with Vyke if he invades.
- Interact with the dead maiden seated inside the church to stain the favor. Return to Varre at Rose Church and agree to offer your finger.
- After receiving Bloody Finger, continue speaking to Varre. He gives you Pureblood Knight's Medal; do not leave after the finger reward.
- Use Pureblood Knight's Medal to reach Mohgwyn Palace. Activate Dynasty Mausoleum Entrance and climb the broad stairs through the bleeding corpses toward the dark mausoleum passage.
- Follow the passage upward, watching for the Sanguine Nobles inside. Leave the cave at Dynasty Mausoleum Midpoint and activate the grace.
- Go back southwest into the dark cave. Take the southern route toward the large tombstones, then descend east into the lower burial area.
- Gather the glowing flower among the blood-loss-exploding corpses. Mohg is not required, and the chest outside above this area holds a different upgrade material.
Black Knight's room in Fog Rift Catacombs
Gravesite Plain
Starting Site of Grace: Fog Rift Catacombs
- From Castle Front, follow the road north beneath the fort's wooden structures into the foggy woodland. Continue past the Shadow Militiamen to the catacomb doors between two pale braziers. Enter, take the lift down, and activate the grace.
- Pass the first Imp and cross the first spike-ceiling chamber using the side alcove between drops. Continue beneath the walkway occupied by a caster to the room with a cannon-headed Imp above you.
- Take the stairs on the left from that room to the next spike-ceiling ledge. Trigger the trap, wait for it to fall and step onto its flat top. Ride upward instead of dropping to the lower lift route.
- Cross its upper surface to the raised doorway beside the cannon Imp. Follow the passage past the caster and across the overpass above the room you passed through earlier.
- Climb the stairs to the soldiers outside the Black Knight’s room. Draw them out separately, including the soldier hiding inside the doorway, then fight the knight.
- Collect Great Ghost Glovewort behind the Black Knight. The Death Knight boss and lower lifts are not required for this flower.
Basilisk lower room in Scorpion River Catacombs
Rauh Base
Starting Site of Grace: Scorpion River Catacombs
- To enter the Realm of Shadow, defeat Starscourge Radahn and Mohg, Lord of Blood, then touch the withered arm in Mohg's arena at Mohgwyn Palace.
- From Moorth Ruins grace in Scadu Altus, ride northeast to the small triangular pool. Look for the cave beside a statue of Marika and a Scadutree Fragment.
- Enter the cave and follow it past the perfumers to the glowing golden tree. Take the path to its right down into the swamp.
- Turn left through the route beneath the rock and continue until you emerge into Rauh Base. Activate Ancient Ruins Base grace ahead.
- Follow the valley southwest toward Temple Town Ruins. A bow golem and an axe golem guard the approach; fighting them is optional if you can pass their attacks.
- Collect the map beneath the stele near the ruined town. This is the lower valley, not the upper ruins reached through Shadow Keep.
- From Temple Town Ruins, follow the lower river north and northwest past the Pests and Gravebird platforms. Keep following the ravine until you can climb to Ravine North grace.
- Return to the river and follow it west, then south around the bend through the spider scorpions. At the coffin-filled end of the ravine, find the catacomb doors in the cliff. Watch for the militiamen guarding the entrance.
- Enter Scorpion River Catacombs, take the entrance lift down and activate its grace. Bring Rejuvenating Boluses if available; the floating eyes inside build Death Blight, which kills you when its meter fills.
- Pass the cannon-headed Imp and take the left stairs into the larger room. Cross the narrow bridge promptly and get beneath the Basilisk statue at its far end, using the stonework to block its eyes.
- Continue downstairs through the rooms with Imps hiding beside their doorways. Beyond the next cannon Imp, follow the right-hand route down to the first falling spike ceiling.
- Step near the trap to trigger it, retreat until it falls, then cross as it rises. Use the covered archways between the traps and repeat for the second ceiling. Do not wait beneath the spikes.
- Beside the second crusher, climb the ladder in the safe recess on the eastern wall. At the top, the crusher immediately to the left leads to a glovewort detour; it is not the helmet's upper room.
- Continue to the walkway facing the Basilisk eyes. At the corner where the wall meets the railing, edge close enough to trigger the other spike ceiling, then jump onto its flat top after it falls.
- Ride that ceiling upward. The upper ledge to the left holds Imp Head (Lion). For the route onward, return to the trap and step down behind the Basilisk statue, where its eyes cannot see you.
- Follow the short passage behind the statue to the two greatsword-wielding Imps. Clear them and collect Knight's Lightning Spear from the corpse at the end. The Death Knight boss is optional for this spell.
- Return to the passage behind the Basilisk statue and climb its stairs. Clear the Imps above, then drop southwest to the far end of the walkway and take the lift down.
- On the lower floor, use the side recesses to let the wandering Death Blight eyes pass. Continue through the cannon-Imp room to the chamber with two attacking Imps and a caster on the upper ledge.
- Look beside the Yellow Fulgurbloom and Ghost Glovewort [8] for the ladder into the square lower room. Climb down and collect Great Ghost Glovewort from the corpse among three Basilisks. Return up the ladder before their Death Blight clouds fill the room.
Giant Bigmouth Imp in Darklight Catacombs
Scadu Altus
Starting Site of Grace: Darklight Catacombs
- To enter the Realm of Shadow, defeat Starscourge Radahn and Mohg, Lord of Blood, then touch the withered arm in Mohg's arena at Mohgwyn Palace.
- For the main Shadow Keep approach, defeat the Golden Hippopotamus and activate Main Gate Plaza grace. Follow the left-hand route through the keep to the upper courtyard lined with burning boats. Watch for the Militiamen hiding beside them.
- At the southeastern end of the boat courtyard, find the ladder beside the outer railing and descend to the water. Walk behind the waterfall and take the second ladder down to the painting room.
- Strike the false wall beside the Domain of Dragons painting. Follow the revealed passage and rest in the stone coffin to arrive at Castle Watering Hole.
- Head south past Ruins of Unte, avoiding the active Furnace Golem. Follow the eastern, left-hand cliff beside the waterfall to Recluses' River Upstream grace.
- Continue south along the cliff ledges. Where the route changes sides, jump across to the western, right-hand bank and follow it down to Recluses' River Downstream grace. Clear nearby Man-Flies before attempting the drops.
- Use the large gravestones projecting from the cliff to descend to the river below, then continue south to the next descent. Take the lower gravestones one at a time to the wooded valley filled with stone coffins.
- Follow the valley's eastern cliff, keeping the wall on your left, to the catacomb doors marked by two pale flames. Enter Darklight Catacombs and ride the entrance lift to its grace. Bring a lantern or torch.
- From the dungeon grace, take the right-hand doorway beside the Yellow Fulgurbloom. Follow the descending stairs through the Imp rooms. At the lower doorway, deal with the cannon-mouthed Imp before crossing its line of fire.
- The passage behind the stairs leads to the first light-switch lever. Pull it to make the ledges easier to see, then return through the cannon Imp's doorway to the balcony.
- For the main route, take the balcony's left-hand doorway, pass the sorcerer room and descend the ramp to the first internal stone lift. Ride it down. This is separate from the lift at the dungeon entrance.
- In the next main room, take the stairs on the right and follow the left railing toward the next staircase. Look for the narrow broken section at the top of those stairs.
- Look down through the gap and drop carefully onto the thin ledge below. Turn back toward the doorway in the wall instead of dropping into the pit.
- Enter the guarded armor room, then take its ladder down beside the sorcerer. Go through the next door, watching for another sorcerer on the right, and drop to the lower room. Continue east to the next descending lift.
- The next chamber has an enormous cannon Imp on a raised platform. Use pillars for cover while approaching the platform's base, where its shots cannot reach directly beneath it. Clear the smaller Imps nearby.
- From the platform's base, run north to the side doorway and pull the lever inside. This turns on the lights and lowers the giant Imp's platform.
- Defeat the enormous Bigmouth Imp after lowering its platform and collect its Great Ghost Glovewort. The ledge and chest behind it contain Bigmouth Imp Ashes separately; Jori is unnecessary for either pickup.
Notes
- One flower upgrades a compatible special Spirit Ash from +9 to its maximum +10, plus Roderika's tuning fee. The numbered Ghost Gloveworts are still required for the first nine levels.
- Used for special ashes such as Black Knife Tiche, Banished Knight Oleg and Mimic Tear. Great Grave Glovewort is the separate final material for standard ashes.
- The supply is finite per Journey. Ghost-glovewort bell bearings only unlock numbered flowers, so there is no unlimited +10-flower shop.
- The Night's Sacred Ground chest also holds the Fingerslayer Blade and requires agreeing to serve Ranni. Reaching the chest before joining her service does not let you open it.
- The chest beneath the lower Ainsel River Dragonkin's throne is another route. It is separate from reaching the upper city of Nokstella through Ranni's later story.
- Lower the giant Imp's platform in Darklight Catacombs before defeating it so the reward remains reachable. The nearby Bigmouth Imp Ashes chest is a separate pickup.
- Special means the ash’s upgrade family, not simply that it summons one named or powerful spirit. One final flower upgrades the entire compatible ash, even when it calls a group.
- Opening the tuning menu shows the required flower and rune fee before confirmation. Giving an unrelated bell bearing to the shop does not switch an ash between Grave and Ghost families.
- The final flower is consumed, while the +10 reinforcement stays with the ash. A later journey does not let you raise that same ash to +11.
- Cannot be dropped for another player. The underground chests and one-time reward enemies give a limited supply, rather than a normal respawning harvest.