Development preview — content and features are still being refined.
 Items
Items · Items
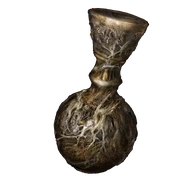
Hefty Cracked Pot
Items
Ten hefty containers are available. They are separate from ordinary Cracked Pots and Ritual Pots.
Reference values
- Type
- Key Item
About this item
Ten hefty containers are available. They are separate from ordinary Cracked Pots and Ritual Pots.
The container is reusable after throwing or storing its crafted contents. Rare ingredients such as Furnace Visages still need replacing.
Container capacity carries into later journeys without exceeding ten.
Technical details
- facts:
- Entry 1:
- group: Item Type
- label:
- value: Key Item
- Entry 1:
In-game description
This hefty empty pot somehow mends itself when broken. Essential vessel for crafting hefty cracked pot items.
The materials and magics sealed within deploy their effects when the pot is thrown.
The greater potentates of Bonny Village craft these and store them in a frozen gaol.
Where to find
Scorched Ruins corpse
Gravesite Plain
Starting Site of Grace: Scorched Ruins
- Search the upper ruined buildings at Scorched Ruins.
- Use the broken walls and roofs to reach the container-bearing corpse.
Three containers in Belurat Gaol
Gravesite Plain
Starting Site of Grace: Belurat Gaol
- To enter the Realm of Shadow, defeat Starscourge Radahn and Mohg, Lord of Blood, then touch the withered arm in Mohg's arena at Mohgwyn Palace.
- From Three-Path Cross, follow the road northwest toward the lake below Belurat. Enter the cage-lined gully on the lake's western side to find Belurat Gaol.
- Follow the left ledge down the stairs, watching the cell doorway for an ambush. When the stairs collapse, cross the bridge ahead and go through the right-hand window in the room of jars.
- Continue through the dining room and along the ledge to the circular shaft. Descend using the hanging jars, checking each landing and keeping clear of their chains.
- In the hanging-pot shaft, look back from your landing for a jar leading to the wooden scaffold. Cross to the scaffold, deal with the small jars and the prisoner ambush, then open the chest for the first container.
- Return below the scaffold and continue through the low doorway, across the bridge and down the collapsing stairs into the jar maze.
- Climb the first pile of broken jars, watching for a prisoner at its top. From the Innard Meat pickup, jump across to the pots holding another Hefty Cracked Pot.
- Return to the floor and follow the gap with the ladder on the left and jar lid on the right. Turn right to the cookbook corpse, then climb over the broken jars beside it.
- Follow the right-hand path past a tilted jar to the cave wall, then turn right again to the dead end with more climbable jars. Collect the third container above them. Onze is unnecessary for all three.
Sleep-pot-throwing troll
Cerulean Coast
Starting Site of Grace: Cerulean Coast West
- From Castle Front, ride south to the crossroads, turn east and follow the road to the next fork. Take the right-hand dirt track, then the left fork downhill toward the southeast.
- Pass the bloodfiends and descend into the shallow poison area. Follow the lower path down toward the river rather than climbing toward the fort; watch for militia and poison traps along the descent.
- At the bottom is a shallow pool with a giant crab. Turn southwest into the opening in the cliff, continue through the cave past the Revered Spirit Ash chamber and activate Ellac River Cave grace.
- Leave by the southern cave exit and turn south along the river. Use Torrent to cross the successive rock ledges beside the waterfall, landing on the nearby rocks rather than jumping to the valley floor.
- Continue down the ledge path past the stone birds, watching for the living ones to attack. Drop down the short rock steps to Ellac River Downstream grace.
- From Downstream, continue south beside the lower falls. Cross the long rock pillar toward the east and use its far side to reach the lower water safely.
- The lower basin opens toward a Furnace Golem. Its fight is optional for reaching the coast, the friendly forager or the lightning-flower pond.
- Head through the eastern wooded side of the basin, then follow the passage southwest through the cliffs to Cerulean Coast grace. The blue-flowered field beyond confirms you have reached the coast.
- From Cerulean Coast, travel west along the coast to Cerulean Coast West and activate the grace.
- Reach the western Cerulean Coast and find the troll throwing large sleep pots.
- Defeat it for a guaranteed container. This is a one-time container reward.
Two bodies in Bonny Village
Scadu Altus
Starting Site of Grace: Bonny Village
- From Highroad Cross in Scadu Altus, follow the road east to Moorth Ruins and activate the grace beside the cross.
- Pass through the large stone arch east-southeast of the grace. At the house ahead, turn left toward the leaning tower. Avoid the large open shaft behind the house, which is too deep for a direct drop.
- Find the smaller gap between the broken building and the rock wall in front of the leaning tower. Drop onto the balcony-like ledge, turn right past the dogs and follow the cave inward.
- In the open chamber at the end, take the back-left ledges down onto the lower roof. Look for the small shrine guarded by three Inquisitors and collect Golden Arcs from the chest inside.
- To continue east, drop from the lower roof to the ground and take the cave beside the building on the left. Follow it to the long ladder and climb out of the well at Bonny Village grace.
- In Bonny Village, search the corpse at the broken bridge for one Hefty Cracked Pot. Cross to the far side using the nearby safe crossing and search beyond that broken bridge for the second body. Neither is a random Greater Potentate drop.
Hidden room in Bonny Gaol
Scadu Altus
Starting Site of Grace: Bonny Gaol
- From Highroad Cross in Scadu Altus, follow the road east to Moorth Ruins and activate the grace beside the cross.
- Pass through the large stone arch east-southeast of the grace. At the house ahead, turn left toward the leaning tower. Avoid the large open shaft behind the house, which is too deep for a direct drop.
- Find the smaller gap between the broken building and the rock wall in front of the leaning tower. Drop onto the balcony-like ledge, turn right past the dogs and follow the cave inward.
- In the open chamber at the end, take the back-left ledges down onto the lower roof. Look for the small shrine guarded by three Inquisitors and collect Golden Arcs from the chest inside.
- To continue east, drop from the lower roof to the ground and take the cave beside the building on the left. Follow it to the long ladder and climb out of the well at Bonny Village grace.
- Cross the southern bridge from Bonny Village and follow the path into Bonny Gaol. Activate its grace and descend to the first Jar Innards beside the open ledge.
- Look below the ledge on the left for the two hanging jars. Drop carefully onto them to reach the lower cell and collect Hefty Cracked Pot.
- Use the floor button to call the jar lift back and ride up. The deeper wooden-hatch route and Curseblade boss are unnecessary for this container.
Lamenter's Gaol
Charo's Hidden Grave
Starting Site of Grace: Lamenter's Gaol
- From Castle Front, follow the road southeast toward Pillar Path Waypoint. At the fork, use the lower road toward Igon rather than climbing to the Suppressing Pillar.
- Continue south-southwest past the broken dragon statues. An Ancient Dragon-Man invades along this approach. The cave entrance is on the left near the end of the path, marked by a fire.
- Activate Dragon's Pit grace and follow the lit passage down. Watch for skeletons below the first ledge and around the next corner. Strike their glowing remains after knocking them down to stop them getting back up.
- In the large cavern with the pillars, follow the left-hand ledge down and take the passage beside the distant crossbow skeleton. Continue onto the sloping stairs in the next chamber.
- Take the downward route toward the large altar and pit. The stairs going up lead to an optional Magma Wyrm; that fight is not needed to reach the exit.
- At the bottom, approach the message beside the deep chasm. Walk straight off this lowest ledge into the pit to land safely by the boss mist. Do not jump from the higher rooms or aim toward the side walls.
- Defeat the Ancient Dragon-Man behind the mist. Open the large doors at the back of the arena instead of using the return-to-entrance exit, then follow the tunnel to Dragon's Pit Terminus grace.
- Leave Dragon's Pit Terminus and descend to the lake bed with a Jagged Peak Drake. You can ride past the drake; follow the southern canyon toward the enormous dead dragon.
- Pass the dragon statues and emerge beside the ruined structure north of Grand Altar of Dragon Communion. The huge stone bowl and dead dragon identify the altar.
- At the altar, head west over the dead dragon and continue west-southwest toward the red flowers. This leads into the upper hidden grave, not the blue-flowered coast below.
- The entrance meets the lowest section of a shallow river. The river climbs northwest through several pools separated by small waterfalls.
- Continue northwest up the river past the Mariner pools. At the upper end, follow the red-flowered trail on the western bank to Charo's Hidden Grave grace.
- From Charo's Hidden Grave, continue northwest through the red-flowered graveyard toward the cliff entrance of Lamenter's Gaol. Enter and activate its grace.
- From the gaol grace, follow the passage to the first fork. The right-hand gate is locked, so take the left passage and check the second cell on the right.
- Deal with the enemies in that cell and open its chest for Gaol Upper Level Key. Return to the first fork and use it on the locked gate.
- Unlock the upper gate and climb down its ladder. In the icy chamber, pass the first cell and continue toward the northern side, watching for Jar Innards emerging from their pots.
- Climb the natural icy slope on the east side and go through the doorway. Continue into the next rooms until the weak floor collapses into the bottom level.
- Clear the shades and leave the fallen cell. Go up the stairs and note the first side passage, which leads toward Call of Tibia and the hidden lower cell.
- For the key, continue upstairs to the next doorway on the right. Follow its passage, jump the small gap and enter the large chamber of Living Jars.
- In the large jar chamber, collect Hefty Cracked Pot from the mound of bodies among the small Living Jars. The chest holds Gaol Lower Level Key separately; Lamenter is not required.
Trauma ward beneath the Storehouse
Shadow Keep
Starting Site of Grace: Storehouse, First Floor
- Enter the Realm of Shadow after defeating Starscourge Radahn and Mohg, Lord of Blood, by touching the withered arm in Mohg's arena.
- From Highroad Cross in Scadu Altus, follow the main road north to Shadow Keep's southern gate. Ride the entrance lift and activate Shadow Keep Main Gate grace.
- Defeat Golden Hippopotamus in the plaza. This is the front-door route; the flooded Church District provides a different way into the keep.
- From Main Gate Plaza, leave through the west-northwest doorway, pass through the armory and climb the stairs. Continue up the wooden steps to the dining hall, where two Black Knights guard the route.
- Leave the dining hall through its southeastern exit to the upper rampart. Follow the rampart past the burning boats and watch for the small Shadow Militiamen hiding beside them.
- Take the stairs leading north-northeast toward the large lift, passing the Fire Knight in front of it. Ride up and activate Storehouse, First Floor grace.
- From Storehouse, First Floor, take the western lift down toward the jar-filled rooms on the West Rampart route.
- Search the trauma ward beneath the Storehouse for the large mass of fused flesh.
- Collect the container from that mass before continuing toward the western rampart.
Notes
- Ten hefty containers are available. They are separate from ordinary Cracked Pots and Ritual Pots.
- The container is reusable after throwing or storing its crafted contents. Rare ingredients such as Furnace Visages still need replacing.
- Container capacity carries into later journeys without exceeding ten.
- Hefty Furnace Pots need both their cookbook and their ingredients. Finding a hefty container alone does not unlock that recipe.
- Every filled hefty pot uses one hefty container. It does not use a normal Cracked Pot merely because both are thrown.
- The ten-container limit is shared across hefty recipes. Storing a prepared item can free a carried container, while taking it back out occupies capacity again.
- A large blast does not make every hefty recipe the same damage type. The cookbook recipe and ingredients determine the effect.
- The sleep-pot-throwing troll’s container is a one-time reward. Repeatedly defeating a respawning troll does not let you exceed ten.
- The Belurat Gaol chest and two jar-maze bodies are three separate containers. Collecting Greatjar or defeating Onze does not automatically collect any of those three.