Development preview — content and features are still being refined.
 Items
Items · Items
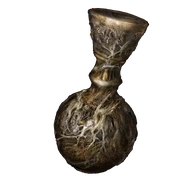
Memory Stone
Items
Each stone permanently adds one memory slot as soon as it is obtained. You do not equip it as a talisman or manually consume it from the tools menu.
Reference values
- Type
- Key
About this item
Each stone permanently adds one memory slot as soon as it is obtained. You do not equip it as a talisman or manually consume it from the tools menu.
There are eight stones. Together they raise the starting two slots to ten; Moon of Nokstella adds two more while equipped, for twelve in total.
Rest at a Site of Grace and choose Memorize spell to change the loadout. Some spells use several slots, so ten slots does not always mean ten different spells.
Technical details
- facts:
- Entry 1:
- group: Item Type
- label:
- value: Key
- Entry 2:
- group: Effect
- label:
- value: Increases memory slots
- Entry 1:
In-game description
A black, lightly beguiling stone.
Prized by the sorcerers who produce them.
Increases memory slots.
Said to be a fragment of the black moon that once hung above the Eternal City.
Where to find
Twin Maiden Husks
Roundtable Hold
Starting Site of Grace: Table of Lost Grace
Before you go
- 3,000 runes.
- Accept Melina's invitation to Roundtable Hold when available. From its central table, take the corridor to the Twin Maiden Husks.
- Open their regular purchase menu and buy the one Memory Stone for 3,000 runes. No bell bearing is required.
Oridys's Rise
Weeping Peninsula
Starting Site of Grace: Beside the Crater-Pocked Glade
- Cross Bridge of Sacrifice into the Weeping Peninsula. Reach Beside the Crater-Pocked Glade on its eastern raised ground, then head toward Oridys's Rise.
- Read the imp-book message to start the three-wise-beasts puzzle. Strike the spirit turtle visible on the approach to the tower.
- Find the second turtle hidden in the bushes beside the entrance stairs. Search the pond beside the tower for the invisible third turtle; its ripples reveal where to strike.
- Once the seal opens, enter the tower, climb the ladder and stairs and open the upper chest for its Memory Stone.
Testu's Rise
Liurnia of the Lakes
Starting Site of Grace: Sorcerer's Isle
- Ride across northern Liurnia's lake to Sorcerer's Isle, north of Raya Lucaria. Activate the grace beside Testu's Rise and read the imp-book message.
- Find the spirit turtle on the northern side of the tower. The slow spectral enemies are hazards while searching, rather than the three puzzle targets.
- Look over the southern edge for the turtle on the lower ledge. The third clings to a tree on the eastern side, so use a ranged attack to reach it.
- After striking all three, enter the unsealed tower and open the chest above for the stone.
Converted Tower
Liurnia of the Lakes
Starting Site of Grace: Converted Tower
- Reach Converted Tower on western Liurnia's plateau, north of the southwestern Minor Erdtree area. Activate the grace beside the ruined building.
- Use Torrent to get onto the broken outer wall. Follow it upward and jump from its high section to the tower's roof, then enter the upper floor.
- Climb to the chest and collect Memory Stone. Alternatively, performing Erudition before the ground-floor statue reveals the ladder.
- This is Converted Tower, rather than Converted Fringe Tower in northeastern Liurnia. The latter has a different puzzle and spell rewards.
Lenne's Rise
Dragonbarrow
Starting Site of Grace: Lenne's Rise
- Reach the Third Church of Marika in northeastern Limgrave. Behind the church, follow the shallow stream into the bushes to find the sending gate against the cliff. Use it to reach Bestial Sanctum in Dragonbarrow.
- Activate Bestial Sanctum grace inside, then ride south past the Black Blade Kindred outside. Follow the road downhill to Farum Greatbridge and activate its grace before crossing.
- Stay on the northern side of Farum Greatbridge and take the eastern downhill route toward Lenne's Rise. The narrow lower bridge may have a Night's Cavalry after dark; the fight is optional for the tower.
- Activate Lenne's Rise grace and find the spiritspring beside the building. Jump with Torrent onto the tower roof, then drop carefully onto its upper balcony.
- Enter through the balcony and climb the stairs to the top chest. The broken imp-book seal is not solved by finding three more spirit turtles.
- Collect Memory Stone. The creature inside the lower room is separate and unnecessary for the chest.
Seluvis's Rise
Liurnia of the Lakes
Starting Site of Grace: Ranni's Rise
- Reach the western Liurnia road and follow it north through Kingsrealm Ruins. Strike the illusory wall blocking the road at the northern end, then continue past Iji at Road to the Manor.
- Ride toward the large manor while avoiding the magical strikes falling along the approach. Activate Main Caria Manor Gate grace at the entrance.
- Inside, follow the courtyard path northwest toward the building in the far corner. Fingercreepers hide among the plants and beneath the ground; do not stop on a buried hand.
- Enter the building with the seated spirit and climb its stairs to Manor Lower Level grace.
- Take the elevated walkways east and continue straight along the main route at the first junction. Spectral soldiers appear along the bridges. Reach the far building and take its lift up to Manor Upper Level.
- Leave the upper grace, pass the wolves in the garden and climb the main stone stairway toward the Troll Knight and sorcerers.
- Continue up the stairs beyond the troll and Pages to the large circular courtyard. Defeat Royal Knight Loretta, then activate Royal Moongazing Grounds grace.
- Leave through the rear exit into Three Sisters. Ranni's Rise is the western tower; climb to Ranni and agree to serve her.
- Speak to the servant projections downstairs, including Seluvis, then return to finish Ranni's conversation. Go to Seluvis's Rise, the tower southwest of hers.
- Enter Seluvis's Rise and climb its ladder and upper stairs. Open the top chest for Memory Stone.
- You do not need to administer the potion to anyone or buy a puppet for this chest. His later death does not convert this fixed tower pickup into a bell-bearing purchase.
Red Wolf of Radagon
Raya Lucaria Academy
Starting Site of Grace: Schoolhouse Classroom
- At Temple Quarter in western Liurnia, ride north to the rocky island where Glintstone Dragon Smarag is resting. Take the Academy Glintstone Key from the corpse behind the dragon; fighting Smarag is optional.
- Examine the seal at South Raya Lucaria Gate with the key in your inventory. At Main Academy Gate, ride the lift up and climb the stairs past the two sorcerers into the church. Activate Church of the Cuckoo grace in its side passage.
- Leave through the side passage into the graveyard. Follow the descending path across the wooden bridge, then climb the path on the right. Watch for enemies grabbing at you from the ground.
- At the far end, go through the passage to the huge waterwheel. Ride an ascending platform and step off at the upper landing. Enter the building on the left for Schoolhouse Classroom grace; riding down goes to a different area.
- Leave the classroom and follow the corridor through the sorcerers to the large room with a Living Jar. Use the corridor on its right, climb the stairs and continue upstairs to the boss fog.
- Defeat Red Wolf of Radagon and activate Debate Parlor grace. Leave into the open courtyard, keeping the large curved staircase on your right in view.
- The Red Wolf victory awards the stone directly. The chest farther along the roof route and Rennala's later reward are separate.
Demi-Human Queen Maggie beyond Hermit Village
Mt. Gelmir
Starting Site of Grace: Primeval Sorcerer Azur
- From Erdtree-Gazing Hill on Altus Plateau, ride north through Wyndham Ruins and enter the valley beside Mt. Gelmir at Seethewater River. Follow the valley north, then around the mountain toward Seethewater Terminus.
- At Fort Laiedd, continue south along the outside of the fort toward the lava pool. Follow the bank around the Magma Wyrm instead of entering the fort; defeating the wyrm is not required.
- Keep following the mountain path past Hermit's Shack and the nearby Runebear, then continue to Craftsman's Shack and Hermit Village. The enemies along this route are separate from the pickup, so keep moving if you do not want those fights.
- Cross Hermit Village to Demi-Human Queen Maggie near Primeval Sorcerer Azur. Clear the supporting sorcerers if they are interrupting you, then defeat Maggie for Memory Stone.
- Azur is the seated figure beside the grace. His Comet Azur dialogue is a separate reward that does not replace Maggie's stone.
Notes
- Each stone permanently adds one memory slot as soon as it is obtained. You do not equip it as a talisman or manually consume it from the tools menu.
- There are eight stones. Together they raise the starting two slots to ten; Moon of Nokstella adds two more while equipped, for twelve in total.
- Rest at a Site of Grace and choose Memorize spell to change the loadout. Some spells use several slots, so ten slots does not always mean ten different spells.
- Slots do not raise Intelligence, Faith, Arcane, FP or spell damage. You still need the spell's attributes, enough FP and a compatible casting tool.
- The Twin Maiden Husks sell one for 3,000 runes. The other seven are fixed tower chests or enemy rewards, rather than renewable shop stock.
- The permanent increases carry into later journeys. Repeating the pickups cannot raise the permanent limit beyond the eight-stone increase.
- Converted Tower can be reached through its outer wall or Erudition ladder. Lenne's Rise uses a spiritspring entry, while Oridys's Rise and Testu's Rise each have their own three-turtle puzzle.
- Seluvis's potion choices are unnecessary for his tower chest. Maggie and Red Wolf award their stones through defeat, rather than a nearby unrelated corpse.