Development preview — content and features are still being refined.
 Items
Items · Items
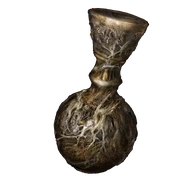
Moore's Bell Bearing
Items
Transfers Moore's remaining shop to the Twin Maiden Husks. Purchased quantities stay purchased; a limited item does not become unlimited or refill when you hand over the bearing.
Reference values
- Type
- Bell bearing
About this bell bearing
Transfers Moore's remaining shop to the Twin Maiden Husks. Purchased quantities stay purchased; a limited item does not become unlimited or refill when you hand over the bearing.
The initial supplies include three Rune Arcs for 8,000 runes each, two of each of the four Pickled Livers for 4,000 each, and one Well-Pickled Turtle Neck for 2,000.
His initial materials are ten Rada Fruit at 800 runes each, eight Redflesh Mushrooms at 1,500, six Whiteflesh Mushrooms at 2,000, five Knot Resin at 1,500, eight Black Pyreflies at 1,800 and four Sanguine Amaryllis at 1,800.
Technical details
- Item Type
- Bell Bearing
In-game description
Moore's bell bearing, found upon his perished flesh.
Offer to the Twin Maiden Husks at the Roundtable Hold to gain access to new items.
Where to find
Moore beside the northern Church of the Crusade forager
Scadu Altus
Starting Site of Grace: Highroad Cross
Before you go
- Choose Remain sad forever after the great rune and charm break.
- To enter the Realm of Shadow, defeat Starscourge Radahn and Mohg, Lord of Blood, then touch the withered arm in Mohg's arena at Mohgwyn Palace.
- From Three-Path Cross in Gravesite Plain, take the western road through the rocky passage toward Belurat. Activate Main Gate Cross and speak to Moore, the heavily armored merchant sitting near the cross.
- Finish any shopping, Black Syrup business and friendly Forager Brood cookbook collection you want before deciding his outcome. Approaching Shadow Keep breaks Miquella's great rune and charm, which makes the later conversation available.
- Return to Moore after the charm-breaking message. If you want more time, answer I do not know or leave the choice unanswered; the other answers lead to his two different final locations.
- Choose Remain sad forever. Rest or travel away so the area reloads; this choice ends his friendly role rather than moving his shop to another camp.
- From Highroad Cross, ride northwest uphill toward Church of the Crusade, west of the main road to Shadow Keep. If Fire Knight Queelign invades near the church, deal with the invasion before trying to rest or travel.
- Go around the church's northern side toward the cliff edge. Look for the curled-up Forager Brood member near the small pools; Moore's body is beside it after he moves.
- Loot Moore's body for his bell bearing, along with the Verdigris equipment. Offer the bearing to the Twin Maiden Husks at Roundtable Hold to open his remaining shop.
Moore after the battle with Leda and her allies
Enir-Ilim
Starting Site of Grace: Cleansing Chamber Anteroom
Before you go
- Choose Put it behind you and reach the Enir-Ilim confrontation.
- To enter the Realm of Shadow, defeat Starscourge Radahn and Mohg, Lord of Blood, then touch the withered arm in Mohg's arena at Mohgwyn Palace.
- From Three-Path Cross in Gravesite Plain, take the western road through the rocky passage toward Belurat. Activate Main Gate Cross and speak to Moore, the heavily armored merchant sitting near the cross.
- Finish any shopping, Black Syrup business and friendly Forager Brood cookbook collection you want before deciding his outcome. Approaching Shadow Keep breaks Miquella's great rune and charm, which makes the later conversation available.
- Return to Moore after the charm-breaking message. If you want more time, answer I do not know or leave the choice unanswered; the other answers lead to his two different final locations.
- Choose Put it behind you. Moore later joins Leda's opposing group in Enir-Ilim rather than leaving his equipment beside the northern forager.
- Enter the Realm of Shadow after defeating Starscourge Radahn and Mohg, Lord of Blood, by touching the withered arm in Mohg's arena. Defeat Messmer in Shadow Keep for his kindling and Romina at Church of the Bud in the Ancient Ruins of Rauh.
- Finish the companion quest steps you want before burning the Sealing Tree behind Romina with Messmer's Kindling. This advances their quests and carries you to Enir-Ilim: Outer Wall.
- From Outer Wall, climb northeast to the large balcony, then southwest up the next stairs. Turn southeast toward the Divine Bird Warrior and enter the building beyond it. Climb the broken ledges and cross the balcony to First Rise grace.
- From First Rise, take the stairs upward through the building and use the southwest doorway toward the courtyard route. Continue through to the courtyard with the large patrolling inquisitor and the smaller enemies praying below.
- Take the upward stairs on the courtyard's southeastern side, rather than the lower tree detour. Use the stone railings for cover from the inquisitors' rapid spells, then continue up beside the large tree to the Divine Beast Warrior.
- Get past the warrior and climb northwest. Keep moving when the upper inquisitors cast attacks beneath your feet. Open the large double doors at the top of the stairs and activate Spiral Rise grace.
- Climb the spiral stairs and leave through the window before the broken floor. Follow the roof southwest around the building, then jump west to the wider roof. Draw out the Gravebirds one at a time instead of fighting all three at the corner.
- Continue northwest from the roofs onto the platform with another bird and stairs. Climb the northern stairs, then the next flight toward the frost-wielding Divine Beast Warrior. The drop over the railing is an optional Spirit Ash detour.
- Get past the warrior. From the small structure northwest of it, go east to the corpse with Sunwarmth Stones and climb the roof beside it. Enter the tower through its southeastern windows.
- Climb the stairs inside the tower and clear the inquisitors around the lift. This is the lift above the large altar, before the final wind-wielding warrior and Cleansing Chamber Anteroom.
- Continue south-southwest up the tower's stairs and go outside. Get past the wind-wielding Divine Beast Warrior on the large platform and enter the building above it for Cleansing Chamber Anteroom grace. The lift down to the altar is an optional helmet detour.
- Climb the stairs east from Cleansing Chamber Anteroom and enter the sandy chamber. Finish Leda's dialogue. Use any available gold ally signs if you want help, then interact with the red sign to begin the battle against her and her allies.
- Defeat the group and return to your world. Loot the bodies left around the chamber before taking the eastern exit.
- Loot Moore's body for his bell bearing, along with the Verdigris equipment. Offer the bearing to the Twin Maiden Husks at Roundtable Hold to open his remaining shop.
Notes
- Transfers Moore's remaining shop to the Twin Maiden Husks. Purchased quantities stay purchased; a limited item does not become unlimited or refill when you hand over the bearing.
- The initial supplies include three Rune Arcs for 8,000 runes each, two of each of the four Pickled Livers for 4,000 each, and one Well-Pickled Turtle Neck for 2,000.
- His initial materials are ten Rada Fruit at 800 runes each, eight Redflesh Mushrooms at 1,500, six Whiteflesh Mushrooms at 2,000, five Knot Resin at 1,500, eight Black Pyreflies at 1,800 and four Sanguine Amaryllis at 1,800.
- Arrows cost 20 runes, Bolts 40, Great Arrows 300 and Ballista Bolts 300, with unlimited stock. Note: Sealed Spiritsprings costs 1,000 runes for one copy.
- Thiollier's move to the southern coast unlocks additional supplies. These include Deadly Poison Perfume Bottle for 6,000 runes, five Poison Grease at 1,000 each, five Drawstring Poison Grease at 800, twenty Poisonbone Darts at 120, ten Poisoned Stones at 150 and five Poisoned Stone Clumps at 250.
- That later stock also includes twenty Altus Bloom at 500 runes each, ten Miranda Powder at 800, ten Poisonbloom at 1,000, ten Toxic Mushrooms at 500, five Toxic Mosslings at 2,000 and three Trina's Lilies at 1,000.
- Unlimited Thiollier's Concoction costs 30,000 runes each and additionally requires the Black Syrup exchange with Thiollier. Owning Moore's bearing does not replace that quest condition. Finish the syrup business while both characters are available.
- Finish the friendly Forager Brood cookbook rewards before ending Moore's story. The bearing preserves a shop, not the conversations that award the books. Attacking the friendly foragers can make Moore hostile and close those rewards.
- After the great rune and charm break, Remain sad forever leads to his body north of Church of the Crusade. Put it behind you sends him to Leda's opposing group in Enir-Ilim. Leaving the choice unresolved gives you more time to finish his friendly business.
- On the church branch, no fight with Moore is needed. On the Enir-Ilim branch, win the group battle and loot his body afterward. His equipment and bearing are separate pickups from the friendly foragers' books.
- This NPC bearing and its transferred shop do not carry into the next Journey. Starting another Journey requires obtaining the merchant unlock again.