Development preview — content and features are still being refined.
 Items
Items · Items
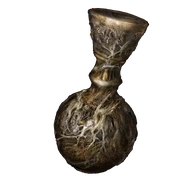
Scadutree Fragment
Items
Spend fragments through Shadow Realm Blessing at a Site of Grace to raise Scadutree Blessing. Carrying them without using the menu does not increase the blessing.
Reference values
- Type
- Upgrade material
About this upgrade material
Spend fragments through Shadow Realm Blessing at a Site of Grace to raise Scadutree Blessing. Carrying them without using the menu does not increase the blessing.
The blessing improves the player's damage and damage negation within the Realm of Shadow. It does not add Rune Levels, waive equipment requirements or reinforce the weapon itself.
The cap is blessing level 20. Higher levels cost more fragments, so one collected fragment does not always buy a full level.
Technical details
- Item Type
- Bolstering Material
In-game description
A splinter of the Scadutree that contains golden brilliance. Acquired at the Church of Marika and other places in the realm of shadow. Consume these at sites of grace to bolster your Scadutree Blessing. The Scadutree Blessing bolsters the bearer's ability to deal and negate damage but has no influence outside the realm of shadow. It is said that when the Scadutree crumbles from its core that it will scatter across the entire realm of shadow. The people of the Erdtree collect the splinters and use them in prayer.
Where to find
Church of Consolation, early crosses and pot bearers
Gravesite Plain
Starting Site of Grace: Gravesite Plain
- From the starting grace, ride east to the Church of Consolation. Collect the two fragments at its statue, watching for the Black Knight.
- Go north to Scorched Ruins. In the graveyard east of the ruins, kill the shadow carrying a sparkling pot before it vanishes and collect its fragment.
- Follow the main road north to Three-Path Cross and collect the fragment beside Miquella's cross. Head west through the great arch to Main Gate Cross outside Belurat for another.
- From Main Gate Cross, take the cliff path south toward Cliffroad Terminus. Search the hill south of that grace for the second sparkling pot bearer and kill it for a fragment.
Castle Front, Castle Ensis Checkpoint and Pillar Path Cross
Gravesite Plain
Starting Site of Grace: Castle Front
- From Castle Front, cross the northeastern bridge toward Castle Ensis. Pass or defeat the Troll Knight at the far end, then climb the large stairs on the left.
- Follow the path left at the top. Soldiers and dogs wait around the fires and stairway, so draw them out before climbing farther.
- Continue through the cave beyond the first campfire. Climb the ledges at its far exit, then follow the uphill path past the patrolling Black Knight.
- At the top is a closed gate with Miquella's Cross beside it. Activate Castle Ensis Checkpoint grace before attempting the detour.
- Cross Ellac Greatbridge toward Castle Ensis. Check the statue in the soldiers' camp at the road junction just before Castle Front for a fragment.
- Follow the road southeast from Castle Front. Take the branch leading to Pillar Path Cross, where another fragment lies beside the cross.
- For the castle's fragment, enter Castle Ensis and follow its main route through the first Black Knight's area to Castle Ensis Checkpoint. Collect the fragment beside the cross there.
Hidden cross room
Belurat, Tower Settlement
Starting Site of Grace: Small Private Altar
- From Small Private Altar, climb past the patrolling Horned Warrior and follow the upper route to the waterfall and the ladder inside a house.
- Climb the ladder and continue to the broken bridge. Take the path left of it toward the small scorpions.
- Climb over the rubble on the right to find the hidden room with Miquella's cross. Collect the fragment beside it.
Coast cross, side cave and Coffin Fissure cross
Cerulean Coast
Starting Site of Grace: Cerulean Coast
- From Castle Front, ride south to the crossroads, turn east and follow the road to the next fork. Take the right-hand dirt track, then the left fork downhill toward the southeast.
- Pass the bloodfiends and descend into the shallow poison area. Follow the lower path down toward the river rather than climbing toward the fort; watch for militia and poison traps along the descent.
- At the bottom is a shallow pool with a giant crab. Turn southwest into the opening in the cliff, continue through the cave past the Revered Spirit Ash chamber and activate Ellac River Cave grace.
- Leave by the southern cave exit and turn south along the river. Use Torrent to cross the successive rock ledges beside the waterfall, landing on the nearby rocks rather than jumping to the valley floor.
- Continue down the ledge path past the stone birds, watching for the living ones to attack. Drop down the short rock steps to Ellac River Downstream grace.
- From Downstream, continue south beside the lower falls. Cross the long rock pillar toward the east and use its far side to reach the lower water safely.
- The lower basin opens toward a Furnace Golem. Its fight is optional for reaching the coast, the friendly forager or the lightning-flower pond.
- Head through the eastern wooded side of the basin, then follow the passage southwest through the cliffs to Cerulean Coast grace. The blue-flowered field beyond confirms you have reached the coast.
- From Cerulean Coast, travel west along the coast to Cerulean Coast West and activate the grace.
- Reach the coast by descending through Ellac River Cave and following the river's lower waterfall route. Go south to Cerulean Coast Cross and collect its fragment.
- From Cerulean Coast West, head north into the ravine and take the left branch. Check the cave on the right for a corpse holding another fragment, guarded by Demi-Humans.
- At the coast's southern tip, descend the large fissure using its stone ledges. Once Miquella's charm has broken, the sealed way opens; follow the dungeon to Fissure Cross and collect its fragment.
Hippopotamus in the red-flowered lake
Charo's Hidden Grave
Starting Site of Grace: Charo's Hidden Grave
- From Castle Front, follow the road southeast toward Pillar Path Waypoint. At the fork, use the lower road toward Igon rather than climbing to the Suppressing Pillar.
- Continue south-southwest past the broken dragon statues. An Ancient Dragon-Man invades along this approach. The cave entrance is on the left near the end of the path, marked by a fire.
- Activate Dragon's Pit grace and follow the lit passage down. Watch for skeletons below the first ledge and around the next corner. Strike their glowing remains after knocking them down to stop them getting back up.
- In the large cavern with the pillars, follow the left-hand ledge down and take the passage beside the distant crossbow skeleton. Continue onto the sloping stairs in the next chamber.
- Take the downward route toward the large altar and pit. The stairs going up lead to an optional Magma Wyrm; that fight is not needed to reach the exit.
- At the bottom, approach the message beside the deep chasm. Walk straight off this lowest ledge into the pit to land safely by the boss mist. Do not jump from the higher rooms or aim toward the side walls.
- Enter the boss mist and defeat Ancient Dragon-Man to receive Dragon-Hunter's Great Katana automatically. The road invader is a separate encounter and does not give this weapon.
- After collecting it, the large doors at the rear lead onward toward Jagged Peak. The return exit sends you back to the cave entrance instead.
- Use the dead dragon to cross onto the western red-flowered plateau and reach Charo's Hidden Grave.
- Defeat the hippopotamus in the lake near the center of this area for one fragment.
Corpse on the rolling-boulder path
Jagged Peak
Starting Site of Grace: Foot of the Jagged Peak
- Pass through Dragon's Pit and follow the mountain route east past the fighting drakes.
- Use the spiritsprings to continue uphill. In the narrow section where large boulders roll down, use the side space to avoid them.
- Loot the corpse along this climb for the fragment. Bayle is not required.
Highroad Cross, Church of the Crusade and northern camp
Scadu Altus
Starting Site of Grace: Highroad Cross
- After Castle Ensis, collect the fragment beside Highroad Cross.
- Ride northwest to the Church of the Crusade and collect the two fragments at its statue. Queelign can invade here, so clear the invasion if needed.
- Return to the highway and ride north toward Shadow Keep. Check the statue in the soldiers' camp beside the road, near the Furnace Golem, for another fragment.
Moorth area, cave and Scaduview Cross
Scadu Altus
Starting Site of Grace: Moorth Ruins
- Ride east from Highroad Cross to Moorth Ruins and collect the fragment at its cross.
- Check the soldiers' camp immediately west across the road for a fragment at its altar. Search south through the ruins for the sparkling pot bearer carrying another.
- Go north from Moorth Ruins to the pond and cave leading toward Rauh Base. Collect the fragment at the statue near the cave entrance.
- For Scaduview Cross, follow the southeastern plateau to the sealed spiritspring below the high hill. Break the nearby stone pile to unseal it, then use Torrent to reach the cross and its fragment.
Lower Recluses' River waterfall and two hippopotami
Scadu Altus
Starting Site of Grace: Recluses' River Upstream
- To enter the Realm of Shadow, defeat Starscourge Radahn and Mohg, Lord of Blood, then touch the withered arm in Mohg's arena at Mohgwyn Palace.
- For the main Shadow Keep approach, defeat the Golden Hippopotamus and activate Main Gate Plaza grace. Follow the left-hand route through the keep to the upper courtyard lined with burning boats. Watch for the Militiamen hiding beside them.
- At the southeastern end of the boat courtyard, find the ladder beside the outer railing and descend to the water. Walk behind the waterfall and take the second ladder down to the painting room.
- Strike the false wall beside the Domain of Dragons painting. Follow the revealed passage and rest in the stone coffin to arrive at Castle Watering Hole.
- Head south past Ruins of Unte, avoiding the active Furnace Golem. Follow the eastern, left-hand cliff beside the waterfall to Recluses' River Upstream grace.
- Continue south along the cliff ledges. Where the route changes sides, jump across to the western, right-hand bank and follow it down to Recluses' River Downstream grace. Clear nearby Man-Flies before attempting the drops.
- From Recluses' River Upstream, follow the cliff ledges until you can descend to the river below the first waterfall. Check behind the poisonous Miranda Flowers for the fragment.
- Continue downriver toward the lower lake beneath the Eastern Nameless Mausoleum. Use the cliff's descending gravestones where the path drops away.
- Defeat both hippopotami in this lake. Each awards one fragment. Darklight Catacombs is farther down the route.
Main gate, fourth floor and Messmer's approach
Shadow Keep
Starting Site of Grace: Main Gate Plaza
- Enter the Realm of Shadow after defeating Starscourge Radahn and Mohg, Lord of Blood, by touching the withered arm in Mohg's arena.
- From Highroad Cross in Scadu Altus, follow the main road north to Shadow Keep's southern gate. Ride the entrance lift and activate Shadow Keep Main Gate grace.
- Defeat Golden Hippopotamus in the plaza. This is the front-door route; the flooded Church District provides a different way into the keep.
- From Main Gate Plaza, leave through the west-northwest doorway, pass through the armory and climb the stairs. Continue up the wooden steps to the dining hall, where two Black Knights guard the route.
- Leave the dining hall through its southeastern exit to the upper rampart. Follow the rampart past the burning boats and watch for the small Shadow Militiamen hiding beside them.
- Take the stairs leading north-northeast toward the large lift, passing the Fire Knight in front of it. Ride up and activate Storehouse, First Floor grace.
- Inside the storehouse, use the stairs behind the central specimen to climb through the book-lined galleries. Stay on the ascending route rather than taking the side lift toward West Rampart.
- On the third-floor walkway, get past the Fire Knight and the small ambushers. Jump onto the feet of the large hanging specimen, climb along its body and jump from the head to the balcony with Storehouse, Fourth Floor grace.
- Leave the fourth-floor room through its open window-door, turn left and climb the outside stairs. Follow the balcony past the bats and go back inside through the next doorway.
- Follow the inner gallery around the bookshelves and climb the stairs past the Fire Knights and shadow scholars to Storehouse, Seventh Floor grace, in the room where Freyja can appear.
- Leave that grace room and cross the northeastern wooden bridge. Follow the walkway to the hanging bull, then reach the lower gallery beside it and pull the lever that moves the central specimens.
- From the balcony near the lever, jump onto the newly positioned wooden beam. Follow it inward, cross the raised specimen platforms and climb the next specimen's tail and back to jump from its head onto the upper balcony.
- Go through the small room and back outside. Turn right, climb the stairs and cross the outer bridge toward the large closed doors. Defeat Fire Knight Kood, who guards this approach and awards Winged Serpent Helm and Flame Spear.
- Open the doors, climb the stairs and activate Dark Chamber Entrance grace. Messmer is through the nearby double doors.
- Collect the two fragments awarded by the Golden Hippopotamus if using this main-gate approach, the fragment beside the fourth-floor cross, and the fragment at the statue before Dark Chamber Entrance. Messmer is not required for those pickups.
Church District statue, back gate and Scadutree Chalice
Shadow Keep
Starting Site of Grace: Church District Entrance
Before you go
- Defeat Commander Gaius for the five chalice fragments.
- From Highroad Cross in Scadu Altus, follow the road east to Moorth Ruins and activate the grace beside the cross.
- Pass through the large stone arch east-southeast of the grace. At the house ahead, turn left toward the leaning tower. Avoid the large open shaft behind the house, which is too deep for a direct drop.
- Find the smaller gap between the broken building and the rock wall in front of the leaning tower. Drop onto the balcony-like ledge, turn right past the dogs and follow the cave inward.
- At the open chamber, use the back-left ledges to reach the lower roof. The shrine below is a landmark; its optional chest is not needed to continue east.
- To continue east, drop from the lower roof to the ground and take the cave beside the building on the left. Follow it to the long ladder and climb out of the well at Bonny Village grace.
- Go east through Bonny Village, watching for the large cleaver-wielding villagers, and cross the two suspension bridges. The second brings you to Bridge Leading to the Village grace.
- Follow the road north through the woods to Church District Highroad grace. Take the northwestern road through the entrance tunnel and activate Church District Entrance inside Shadow Keep. This eastern entrance leads to the flooded district, rather than the main-gate Hippopotamus arena.
- Jump from the entrance ledge onto the first roof below. Follow its northwestern edge and jump from the raised roof section to the stone wall opposite, rather than taking the southwestern log platforms toward different loot.
- Follow the wall around and climb its northeastern rise. Jump to the next roof northwest, where a Fire Knight patrols. Clear it or make enough room to continue safely.
- Cross toward the next large church and jump onto the sloping stone support on your left. Walk southwest up that support to the high roof, then use the broken roof opening to drop onto the central beam below.
- Follow the beam to the adjoining upper corridor and drop through the opening in its floor onto the raised church passage. Stay above the water and continue northwest; the Prayer Room door is a separate side destination.
- Before leaving the church’s upper passage, look toward the large Marika statue in the flooded nave. Jump carefully onto its projecting arm and collect the fragment in its hand. Draining the district first makes a missed jump safer; it does not remove the fragment. Return to the upper corridor afterward.
- Pass the small side room holding a Rune of an Unsung Hero and continue into the corridor patrolled by two Fire Knights. The first left exit leads toward the drainage wheel, while the later left exit leads to the Storehouse lift.
- Take the later left exit in the Fire Knight corridor, cross to the lift and ride it up into the rear storehouse. Use the doorway on the left to reach Storehouse, Back Section grace. The earlier left exit goes to the drainage wheel instead.
- Go west across the small wooden bridge and climb the ladder on its right. At the top, go east up the stone stairs, watching the Fire Knight above.
- Continue northeast past the bookshelves toward the room with Fire Serpent. Use the hole in the southern wall, turn right outside and climb the wooden walkway and stairs to Storehouse, Loft grace.
- Ride the small lift north of the Loft grace up to the rafters. Turn left toward the west-northwestern beams and work around to the ladder leading to the upper rafters. Deal with the bat before climbing; fighting it while balanced on a narrow beam can knock you off.
- From the upper rafters, look north-northwest for the arched doorway on a lower platform against the outer wall. Follow the beams until you can drop onto the lower beam and platform beside that doorway. The paired interior lifts and their extra loot are a different detour.
- Go through the doorway and use the small exterior lift on the right. Follow the wooden walkway and stairs southeast to the larger stone lift, then ride down to Shadow Keep, Back Gate grace.
- In the side room beside Shadow Keep, Back Gate grace, collect the fragment at the Marika statue. O Mother opens a separate passage here; the gesture is unnecessary for taking this fragment.
- Go through the large doorway out onto the rear field and defeat Commander Gaius. The Marika statue and O Mother passage lead to Hinterland instead and are not required for this fight.
- Activate Scaduview grace after the fight. Neither Messmer nor the Scadutree Avatar is required on this eastern entrance route, and you do not need to drain the Church District.
- From Scaduview, pass through the large arch on the northwestern side of the battlefield. Follow the dirt road toward the enormous structure beyond the keep.
- Continue uphill to the Scadutree Chalice and collect the five fragments at its base. These are separate from the Church District statue and Back Gate pickups.
Temple Town Ruins upper ledge
Rauh Base
Starting Site of Grace: Temple Town Ruins
- From Moorth Ruins grace in Scadu Altus, ride northeast to the small triangular pool. Look for the cave beside a statue of Marika and a Scadutree Fragment.
- Enter the cave and follow it past the perfumers to the glowing golden tree. Take the path to its right down into the swamp.
- Turn left through the route beneath the rock and continue until you emerge into Rauh Base. Activate Ancient Ruins Base grace ahead.
- Follow the valley southwest toward Temple Town Ruins. A bow golem and an axe golem guard the approach; fighting them is optional if you can pass their attacks.
- Approach the southern wall of the ruins and find the gap beside the hanging cloth.
- Enter through the gap and climb the broken stairs and rooftops toward the upper room.
- At the upper rooftops, look for the lower balcony beneath the final chest room. The Horned Warrior guards the higher approach, so avoid drawing it into a fight while lining up the drop.
- Before the final chest climb, drop from the roof onto the lower upper-wall ledge and collect the Scadutree Fragment. The chest higher in Temple Town Ruins contains Two-Handed Sword Talisman instead.
Upper ruins cross, roaming enemies and western altar
Ancient Ruins of Rauh
Starting Site of Grace: Rauh Ancient Ruins, East
- Enter the Realm of Shadow after defeating Starscourge Radahn and Mohg, Lord of Blood, by touching the withered arm in Mohg's arena.
- From Highroad Cross in Scadu Altus, follow the main road north to Shadow Keep's southern gate. Ride the entrance lift and activate Shadow Keep Main Gate grace.
- Defeat Golden Hippopotamus in the plaza. This is the front-door route; the flooded Church District provides a different way into the keep.
- From Main Gate Plaza, leave through the west-northwest doorway, pass through the armory and climb the stairs. Continue up the wooden steps to the dining hall, where two Black Knights guard the route.
- Leave the dining hall through its southeastern exit to the upper rampart. Follow the rampart past the burning boats and watch for the small Shadow Militiamen hiding beside them.
- Take the stairs leading north-northeast toward the large lift, passing the Fire Knight in front of it. Ride up and activate Storehouse, First Floor grace.
- At Storehouse, First Floor, take the western side passage and lift down to the lower jar rooms. This is the West Rampart branch, rather than the stairs climbing toward Messmer.
- Follow the hallway through the rooms with living jars and the larger jar-filled ward. Watch for the smaller enemies waiting beside doorways, then use the western exit and stairs to reach West Rampart grace.
- Cross the long bridge west toward the Ancient Ruins of Rauh. Salza waits at the far end and calls down fire as you approach. Use the bridge's sheltered sections to interrupt his view, or ride Torrent to close the distance.
- Defeat Salza at the western gate to receive Rain of Fire and Salza's Hood together. Messmer and Romina are not required for this selected route.
- Backtrack northwest into the flooded ruins. In the right-hand passage, go past the first spiritspring to the second and use it to reach the upper sparkling pot bearer. Kill it for another fragment.
- From the ruins' upper southern opening, descend to the outdoor plateau and pond south of Viaduct Minor Tower. Defeat the hippopotamus for a fragment.
- Later, from Rauh Ancient Ruins, West, climb the stairs into the ruins. Continue through the room with red bouncing-projectile casters to the altar before the outside exit and collect the final fragment in this region.
Abandoned Church and northern woodland tree
Abyssal Woods
Starting Site of Grace: Church Ruins
- Descend Recluses' River to Darklight Catacombs and defeat Jori to reach Abyssal Woods. Torrent cannot be summoned in this region.
- Follow the main woodland route southeast toward the map stele and Abandoned Church. Collect the two fragments at the church altar.
- For the third, search the northern woods north-northwest of Abyssal Woods grace for the corpse beneath a tree near the inquisitors. Avoid the Aging Untouchables rather than trying ordinary attacks on them.
Main route crosses and rooftop altar
Enir-Ilim
Starting Site of Grace: Spiral Rise
Before you go
- Burn the sealing tree after defeating Romina.
- Defeat Messmer in Shadow Keep for his kindling and Romina at Church of the Bud in the Ancient Ruins of Rauh.
- Finish the companion quest steps you want before burning the Sealing Tree behind Romina with Messmer's Kindling. This advances their quests and carries you to Enir-Ilim: Outer Wall.
- From Outer Wall, climb northeast to the large balcony, then southwest up the next stairs. Turn southeast toward the Divine Bird Warrior and enter the building beyond it. Climb the broken ledges and cross the balcony to First Rise grace.
- From First Rise, take the stairs upward through the building and use the southwest doorway toward the courtyard route. Continue through to the courtyard with the large patrolling inquisitor and the smaller enemies praying below.
- Take the upward stairs on the courtyard's southeastern side, rather than the lower tree detour. Use the stone railings for cover from the inquisitors' rapid spells, then continue up beside the large tree to the Divine Beast Warrior.
- Get past the warrior and climb northwest. Keep moving when the upper inquisitors cast attacks beneath your feet. Open the large double doors at the top of the stairs and activate Spiral Rise grace.
- Collect the fragment beside the cross at Spiral Rise.
- Climb the spiral stairs and leave through the window before the broken floor. Follow the roof southwest around the building, then jump west to the wider roof. Draw out the Gravebirds one at a time instead of fighting all three at the corner.
- Continue northwest from the roofs onto the platform with another bird and stairs. Climb the northern stairs, then the next flight toward the frost-wielding Divine Beast Warrior. The drop over the railing is an optional Spirit Ash detour.
- Before continuing to the frost-wielding warrior, enter the small side room beside the rooftop stairs and collect the fragment at its altar.
- Get past the warrior. From the small structure northwest of it, go east to the corpse with Sunwarmth Stones and climb the roof beside it. Enter the tower through its southeastern windows.
- Climb the stairs inside the tower and clear the inquisitors around the lift. This is the lift above the large altar, before the final wind-wielding warrior and Cleansing Chamber Anteroom.
- Continue south-southwest up the tower's stairs and go outside. Get past the wind-wielding Divine Beast Warrior on the large platform and enter the building above it for Cleansing Chamber Anteroom grace. The lift down to the altar is an optional helmet detour.
- Collect the fragment beside the cross at Cleansing Chamber Anteroom. The follower battle beyond the grace is unnecessary for these three pickups.
Hidden descent back toward Belurat
Enir-Ilim
Starting Site of Grace: Spiral Rise
Before you go
- Reach Enir-Ilim.
- From Spiral Rise, go down toward the lightning caster. Take the lower stairs and continue straight to the broken end of the passage.
- Drop to the stairs below, then go up to the broken railing beside the large chalice. Drop onto the ledge beneath it and work across the stone arches, checking each landing before jumping.
- Use the lower broken arch to reach the next set of arches. Follow them around the wall to the tower with its roof broken open, then descend by the projecting statues and ruined floor.
- At the next corpse and stairs, turn toward the open window below on the tower's side. Make the running jump into the window.
- Continue outside to the small altar plaza and collect the fragment. A large scorpion ambushes this area. The route leads toward Belurat and is separate from the main Enir-Ilim stairs.
Notes
- Spend fragments through Shadow Realm Blessing at a Site of Grace to raise Scadutree Blessing. Carrying them without using the menu does not increase the blessing.
- The blessing improves the player's damage and damage negation within the Realm of Shadow. It does not add Rune Levels, waive equipment requirements or reinforce the weapon itself.
- The cap is blessing level 20. Higher levels cost more fragments, so one collected fragment does not always buy a full level.
- Its benefits are inactive outside the Realm of Shadow. Returning to the base map does not delete the blessing you already bought.
- Revered Spirit Ash is the separate material for spirits and Torrent. Neither blessing material replaces the other.
- Sparkling pot bearers can flee and disappear. Kill the actual carrier and collect its reward; ordinary shadows nearby are not interchangeable fragment drops.
- Some pickups hold several fragments, including the five beyond Commander Gaius. Count materials collected rather than assuming every marker represents one fragment.
- Burning the sealing tree opens Enir-Ilim and changes follower quests. Finish the quest steps you want before advancing that story event for the final-area fragments.
- There are 50 fragments available. The first blessing level costs one, levels 2 through 9 cost two each, and levels 10 through 20 cost three each.
- Bought blessing levels remain after death and into later journeys. Revisiting a new journey’s fragments does not raise the blessing beyond level 20.
- Its defense benefit reduces incoming damage through the blessing system. It does not grant extra dodge invulnerability, prevent status buildup or make deep falls safe.
- Cannot be dropped for another player. Multiplayer follows the host world’s blessing context rather than letting an overleveled visitor bypass the host’s progression with a personal fragment count.