Development preview — content and features are still being refined.
 Items
Items · Items
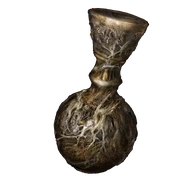
Seedbed Curse
Items
Give five curses to the Dung Eater in his sewer cell to obtain the Mending Rune of the Fell Curse.
Reference values
- Type
- Key
About this item
Give five curses to the Dung Eater in his sewer cell to obtain the Mending Rune of the Fell Curse.
Six exist. You can complete the five offerings without Boggart's death if you collect the other five.
Both Royal Capital pickups disappear when Leyndell becomes the Ashen Capital after Maliketh. Collect them early if you want to keep Boggart alive.
Technical details
- facts:
- Entry 1:
- group: Item Type
- label:
- value: Key
- Entry 2:
- group: Effect
- label:
- value: Curse grown on a body defiled by the Dung Eater
- Entry 1:
In-game description
Curse grown on a corpse killed and defiled by the Dung Eater.
A tender pox afflicted with omen horns.
The Dung Eater cultivates the seedbed curse on corpses.
By doing so he prevents dead souls returning to the Erdtree, leaving them forever cursed. One of the most loathsome things found in all the Lands Between.
Where to find
Upper floor after the first capital lift
Leyndell, Royal Capital
Starting Site of Grace: East Capital Rampart
- Enter Leyndell, Royal Capital after obtaining two Great Runes and defeating the Draconic Tree Sentinel outside its northeastern entrance. Cross the bridge, follow the building's stairs and activate East Capital Rampart.
- From East Capital Rampart, follow the outer walkway past the Oracle Envoys. Continue through the building at the end and take the lift down to the next part of the capital.
- Enter the large building ahead of the lift. Climb the ladder on the right, then the stairs to the upper room. Search the body tied to a chair for a Seedbed Curse. Collect this capital pickup before defeating Maliketh.
Dung Eater's counterpart room in Fortified Manor
Leyndell, Royal Capital
Starting Site of Grace: West Capital Rampart
- Reach West Capital Rampart in Leyndell while the city is still the Royal Capital.
- Leave the grace room and look to the right of the stairway for the broken wall leading down to the lower walkway. Drop carefully rather than jumping straight to the distant courtyard.
- Follow the lower route toward the small broken buildings beside Fortified Manor. Use their roofs to reach the opening in the manor wall.
- Inside the manor’s upper floor, follow the passages to the room matching Dung Eater’s Roundtable Hold room. Collect Seedbed Curse from the body tied to the chair before Maliketh changes the capital.
Lower room beyond the imp seal
Volcano Manor
Starting Site of Grace: Temple of Eiglay
- At Scenic Isle in southern Liurnia, head east toward the stone gazebo near the telescope. Speak to Rya about her stolen necklace before entering Volcano Manor, which ends this early meeting.
- Ride northwest across the shallow lake to Boilprawn Shack. Talk to Boggart beside the cooking pot, ask for the necklace and choose Deal to open the purchase.
- Buy Rya's Necklace for 1,000 runes. Buying it keeps Boggart alive and opens his prawn shop; purchase at least one Boiled Prawn if you want his later move and crab stock.
- Return to Rya in the gazebo and give her the necklace. Finish her dialogue to receive Volcano Manor Invitation.
- Reach Altus Plateau through the Grand Lift of Dectus with the medallion halves from Fort Haight and Fort Faroth, or by defeating Magma Wyrm Makar at Ruin-Strewn Precipice. Rya waits at the top of Dectus for lift arrivals, or by Lux Ruins near Erdtree-Gazing Hill for the precipice route. Speak to her and accept her hand to travel to Volcano Manor.
- If you have not entered the dungeon yet, speak to Tanith in Volcano Manor and accept her invitation to get the Drawing-Room Key. Open the first room on the right in the corridor. Roll into or strike the illusory wall in the back-right corner to reveal a passage. Follow it downstairs, past the snails and Bloodhound Knight, to the Prison Town Church grace.
- Leave the church through its large doors and take the path downhill to the right. Follow the outer wall, watching for the Abductor Virgin. When the path splits at the stairs, cross the bridge toward the large building guarded by a Man-Serpent. Its front door is locked, so go around the right side to the ladder.
- From the roof, go south and look over the western edge for the balcony with an open doorway and lantern. Drop onto it and enter the room with the Omenkiller.
- Clear the Omenkiller, leave through the southern door and climb the ladder on the left. Follow the balcony left and drop onto the adjoining roof. Continue through the side entrance into the building and open its main door as a shortcut.
- Go southeast down the interior stairs. At the bottom, follow the corridor into the room on the right and activate Guest Hall grace.
- Return to the lower corridor and leave through its large northeastern door. Climb down the ladder on the right to the lava-side ground.
- Use the solid ground and the sloping roof of the building east of you to cross toward the northeastern rooftops. Follow the rampart toward the western building, then turn southeast to the stairs guarded by a Man-Serpent.
- At the top, use the cage lift that takes you upward toward the temple. The other lift descends toward an optional Magma Wyrm and is not the route to the Godskin Noble.
- Pass the Blackflame Monk on the upper stairs. Before entering the temple, turn left and activate the bridge mechanism to raise the shortcut back toward Prison Town Church.
- Enter Temple of Eiglay and defeat the Godskin Noble. Activate Temple of Eiglay grace afterward. Rykard is not required for this part of the dungeon.
- Take the lift on the right inside Temple of Eiglay and go out onto its upper balcony. Drop over the barrier onto the solid ground beside the lava rather than into the pool.
- Follow the narrow volcanic path past the fire slugs. Before the corpse at its end, drop left onto the lower ledge, then follow it around and uphill toward the larger lava pool.
- Cross toward the western building, avoid the Abductor Virgin, and enter through the open window around its right side. The ladder inside descends to the prison and is not needed for Rya or the ashes.
- Open the forward door, pass the Man-Serpent and climb the stairs on the right. Use the doorway on the left at the top to reach the shortcut lift.
- Activate the shortcut lift back toward Temple of Eiglay, then return to the upper route. Continue along the main stairs past the nobles, which can release poison when killed, and the Man-Serpents.
- Enter the large hall and deal with the magma-whip serpent before moving north. Go through the eastern doorway into the room where nobles kneel around a corpse and Man-Serpents can rush down the stairs.
- Climb the eastern stairs toward the throne room and the sending gate to Audience Pathway. Before using the gate, go up the side stairs to the imp seal.
- Use two Stonesword Keys and enter the hanging-cage shaft. Descend from cage to cage and onto the lower beams; inspect each landing rather than jumping straight to the bottom.
- At the bottom, clear the enemies and collect Seedbed Curse from the seated corpse. The early right-hand ledge is the Dagger Talisman route instead, and Rykard is unnecessary.
Balcony overlooking the ballista courtyard
Elphael, Brace of the Haligtree
Starting Site of Grace: Prayer Room
- Obtain the right Haligtree Secret Medallion half from Albus in the Village of the Albinaurics. He is disguised as a pot on the uphill path, before the bridge leading toward the Omenkiller.
- Obtain the left half from the tower beyond Commander Niall at Castle Sol in the northern Mountaintops. After winning, continue behind his arena, ride the lift and loot the rooftop corpse.
- Return to Grand Lift of Rold with both halves and switch to the secret-medallion prompt. The ordinary Rold Medallion sends you to a different destination.
- Take the main stairs through Hidden Path to the Haligtree and leave into Consecrated Snowfield. Continue north through the blizzard, following the road toward Inner Consecrated Snowfield, then on to Ordina, Liturgical Town.
- Activate Ordina's grace and find the evergaol seal toward the back of town. Enter it to light the four statues. Invisible assassins patrol the streets and Albinauric archers fire from the rooftops.
- From the evergaol seal, go left down the stairs and left again to light the street-level statue. Head toward the second stairs leading toward the town grace, but take the path around the building on their right instead of going down.
- Climb the ladder around that building and the next ladder to its rooftop statue. After lighting it, drop from the eastern side onto the red roof, cross the connected rooftops and climb the next pair of ladders to another statue.
- Go down those ladders and return to the evergaol courtyard. Pass the right side of the building, drop to the snowy ground and head west around the next building to the last pair of ladders. Light the fourth statue to lift the seal.
- Back in ordinary Ordina, climb the long northern staircase and use the sending gate at its top. Activate Haligtree Canopy when you arrive.
- From Haligtree Canopy, head east along the branch, climb over the pink mushroom near the envoy and turn south at the junction. Continue past the patrolling envoy to the next junction, then follow its northeastern branch to the end and look southeast for the branch below.
- Drop onto that branch. The larger envoy is to the east; return west toward your landing and look south for the mushroom cluster with a corpse. Descend onto the mushrooms, keeping clear of the edges and using them as cover from bubbles.
- Go north along the branch past the envoys to the ant patrol. Draw the ants onto a wider section before fighting, then turn back south and take the first broad branch east-southeast.
- At its next junction, turn southwest uphill. Just beyond the smaller branch on your left, drop south onto the broad branch below. At the fork, use the southern branch, then turn right onto the thin branch before its far tip.
- Follow the thin branch over the next branch, turn northeast onto that one and climb as it curves north. Pass the envoy and turn southeast toward the next envoy, then return west to the large junction.
- Take the northwestern mushroom ledge with the Preserving Boluses corpse. Drop southwest onto the mushrooms below, then southwest again onto the main branch.
- Head north-northeast. Beyond the branch sticking vertically up on your left, use the mushroom patch on the right to drop onto the branch beneath. Follow it to the larger branch, turn left and continue north-northeast, then northwest at the junction toward the huge envoy firing bubbles.
- Near that huge envoy, drop onto the broad branch below. Follow it north through the rot flowers to the trunk. The stone platform on its left has a ladder; descend it and take the stairs to Haligtree Town grace.
- From Haligtree Town, go northwest down the stairs past the Misbegotten. Continue toward the building below, watching for the enemies waiting beside the doorway and under its stairs.
- Inside, go down the stairs to the lower room. From its northern side, jump north-northeast to the next platform, then turn left across the wooden bridge. Go through the building and out its window.
- Cross the pavilion, keeping clear of the large Misbegotten, and enter the building southwest. Leave southwest across the wooden bridge to Haligtree Town Plaza grace.
- Go south from the plaza and jump to the roof. Cross to its northeastern side, drop onto the branch and continue toward the ants. Turn back toward the building beside that branch and enter it.
- Leave southeast and watch for Spiritcaller Snails around the outside. Their Crystalian summons disappear when their snail dies. Continue southeast and jump to the next roofs, then use the ladders at their eastern side to reach the lower walkway.
- Enter the building southeast of the lower ladder and pass the two Misbegotten. Across the bridges ahead, two battlemages guard the way; use the buildings for cover and draw them apart.
- Cross east to the next building. Its northwestern bridge leads to a lift back up to Haligtree Town. Ride it once to open the shortcut, then return down for a much shorter boss run.
- From the lower lift landing, cross southeast, then turn left onto the northeastern bridge to Loretta's arena. Defeat Loretta, Knight of the Haligtree. Royal Knight Loretta in Caria Manor is a separate fight.
- After Loretta, activate Haligtree Promenade and leave through its northern gateway. Follow the stairs winding down beside the trunk, then descend the long ladder.
- Enter the tower below and take its lift down. Cross the bridge toward the Cleanrot Knight at the far doorway and activate Prayer Room inside before continuing into Elphael.
- Leave Prayer Room through the northeastern doorway and follow the outside walkway down its stairs. At the railing corner with a corpse hanging over it, jump onto the sloping stone support below and across to the platform with a gazebo.
- From the northern corner of the gazebo platform, jump northwest to the next stone support and climb left onto the upper ledge. The room immediately beside you has a chest; continue northwest outside, around the curve to the corpse sitting in a chair.
- The seated corpse on the curved upper ledge overlooking the ballista courtyard holds Seedbed Curse. It is separate from the nearby Somber Ancient Dragon Smithing Stone chest.
Room below the Cleanrot Knights
Elphael, Brace of the Haligtree
Starting Site of Grace: Prayer Room
- Obtain the right Haligtree Secret Medallion half from Albus in the Village of the Albinaurics. He is disguised as a pot on the uphill path, before the bridge leading toward the Omenkiller.
- Obtain the left half from the tower beyond Commander Niall at Castle Sol in the northern Mountaintops. After winning, continue behind his arena, ride the lift and loot the rooftop corpse.
- Return to Grand Lift of Rold with both halves and switch to the secret-medallion prompt. The ordinary Rold Medallion sends you to a different destination.
- Take the main stairs through Hidden Path to the Haligtree and leave into Consecrated Snowfield. Continue north through the blizzard, following the road toward Inner Consecrated Snowfield, then on to Ordina, Liturgical Town.
- Activate Ordina's grace and find the evergaol seal toward the back of town. Enter it to light the four statues. Invisible assassins patrol the streets and Albinauric archers fire from the rooftops.
- From the evergaol seal, go left down the stairs and left again to light the street-level statue. Head toward the second stairs leading toward the town grace, but take the path around the building on their right instead of going down.
- Climb the ladder around that building and the next ladder to its rooftop statue. After lighting it, drop from the eastern side onto the red roof, cross the connected rooftops and climb the next pair of ladders to another statue.
- Go down those ladders and return to the evergaol courtyard. Pass the right side of the building, drop to the snowy ground and head west around the next building to the last pair of ladders. Light the fourth statue to lift the seal.
- Back in ordinary Ordina, climb the long northern staircase and use the sending gate at its top. Activate Haligtree Canopy when you arrive.
- From Haligtree Canopy, head east along the branch, climb over the pink mushroom near the envoy and turn south at the junction. Continue past the patrolling envoy to the next junction, then follow its northeastern branch to the end and look southeast for the branch below.
- Drop onto that branch. The larger envoy is to the east; return west toward your landing and look south for the mushroom cluster with a corpse. Descend onto the mushrooms, keeping clear of the edges and using them as cover from bubbles.
- Go north along the branch past the envoys to the ant patrol. Draw the ants onto a wider section before fighting, then turn back south and take the first broad branch east-southeast.
- At its next junction, turn southwest uphill. Just beyond the smaller branch on your left, drop south onto the broad branch below. At the fork, use the southern branch, then turn right onto the thin branch before its far tip.
- Follow the thin branch over the next branch, turn northeast onto that one and climb as it curves north. Pass the envoy and turn southeast toward the next envoy, then return west to the large junction.
- Take the northwestern mushroom ledge with the Preserving Boluses corpse. Drop southwest onto the mushrooms below, then southwest again onto the main branch.
- Head north-northeast. Beyond the branch sticking vertically up on your left, use the mushroom patch on the right to drop onto the branch beneath. Follow it to the larger branch, turn left and continue north-northeast, then northwest at the junction toward the huge envoy firing bubbles.
- Near that huge envoy, drop onto the broad branch below. Follow it north through the rot flowers to the trunk. The stone platform on its left has a ladder; descend it and take the stairs to Haligtree Town grace.
- From Haligtree Town, go northwest down the stairs past the Misbegotten. Continue toward the building below, watching for the enemies waiting beside the doorway and under its stairs.
- Inside, go down the stairs to the lower room. From its northern side, jump north-northeast to the next platform, then turn left across the wooden bridge. Go through the building and out its window.
- Cross the pavilion, keeping clear of the large Misbegotten, and enter the building southwest. Leave southwest across the wooden bridge to Haligtree Town Plaza grace.
- Go south from the plaza and jump to the roof. Cross to its northeastern side, drop onto the branch and continue toward the ants. Turn back toward the building beside that branch and enter it.
- Leave southeast and watch for Spiritcaller Snails around the outside. Their Crystalian summons disappear when their snail dies. Continue southeast and jump to the next roofs, then use the ladders at their eastern side to reach the lower walkway.
- Enter the building southeast of the lower ladder and pass the two Misbegotten. Across the bridges ahead, two battlemages guard the way; use the buildings for cover and draw them apart.
- Cross east to the next building. Its northwestern bridge leads to a lift back up to Haligtree Town. Ride it once to open the shortcut, then return down for a much shorter boss run.
- From the lower lift landing, cross southeast, then turn left onto the northeastern bridge to Loretta's arena. Defeat Loretta, Knight of the Haligtree. Royal Knight Loretta in Caria Manor is a separate fight.
- After Loretta, activate Haligtree Promenade and leave through its northern gateway. Follow the stairs winding down beside the trunk, then descend the long ladder.
- Enter the tower below and take its lift down. Cross the bridge toward the Cleanrot Knight at the far doorway and activate Prayer Room inside before continuing into Elphael.
- Leave Prayer Room through the northeastern doorway and follow the outside walkway down its stairs. At the railing corner with a corpse hanging over it, jump onto the sloping stone support below and across to the platform with a gazebo.
- From the northern corner of the gazebo platform, jump northwest to the next stone support and climb left onto the upper ledge. The room immediately beside you has a chest; continue northwest outside, around the curve to the corpse sitting in a chair.
- Drop northwest from this ledge onto the branch, then south onto the platform below. Continue around the corner, drop southeast and enter the room with the two Cleanrot Knights.
- Use the southeastern doorway, turn left over the railing onto the sloping support and drop to the balcony below. Go inside and down the dark stairs, using a light so you can see the lower landing.
- Halfway down the dark stairs, drop from the right onto the ledge with the seated corpse. Collect its Seedbed Curse before dropping farther into the Crystalian room.
Boggart at the outer moat
Capital Outskirts
Starting Site of Grace: Outer Wall Battleground
Before you go
- Allow Boggart’s death through Dung Eater’s released-prisoner quest branch. This is optional; five other curses exist.
- Progress Boggart's prawn trade so he moves to the capital's outer moat.
- Free the Dung Eater from his sewer cell, then speak to Boggart at the moat about the threat.
- Reload and return to Boggart. His death during this quest can provide another curse.
Notes
- Give five curses to the Dung Eater in his sewer cell to obtain the Mending Rune of the Fell Curse.
- Six exist. You can complete the five offerings without Boggart's death if you collect the other five.
- Both Royal Capital pickups disappear when Leyndell becomes the Ashen Capital after Maliketh. Collect them early if you want to keep Boggart alive.
- Giving the Dung Eater Seluvis's Potion or killing him ends the normal curse-offering route.
- Showing the first curse to the red Dung Eater at Roundtable Hold unlocks the Sewer-Gaol Key. The actual offerings are made later to his physical body in the sewer cell.
- The curse you show is not automatically spent on that conversation. Keep the five copies needed for the later handover rather than treating the introductory dialogue as a separate extra offering.
- The Volcano Manor copy lies at the bottom of the hanging-cage shaft behind a two-key seal. Dagger Talisman is a different upper ledge in the same shaft.
- The two Elphael copies are fixed seated corpses near the Prayer Room route. They do not require defeating Malenia or killing an NPC.
- Giving five completes the handover requirement. The sixth is an alternative rather than a way to obtain a second Mending Rune in the same journey.
- The Boggart copy comes with a friendly NPC’s death. Choose the five nonviolent corpse pickups if you want his crab shop and survival preserved.