Development preview — content and features are still being refined.
 Items
Items · Items
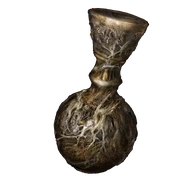
Sellen's Bell Bearing
Items
Transfers the sorceries already available through Sellen's teaching shop, including scroll spells you unlocked with her.
Reference values
- Type
- Bell bearing
About this bell bearing
Transfers the sorceries already available through Sellen's teaching shop, including scroll spells you unlocked with her.
Choosing Jerren's side ends Sellen's quest on the opposing branch. It prevents her Glintstone Kris and Shard Spiral reward on this journey.
Helping Sellen through the gold sign preserves her later shop instead and does not award this bearing.
Technical details
- Effect
- Offer to Twin Maiden Husks for new item access
In-game description
Sorceress Sellen's bell bearing, found upon her perished flesh.
Offer to the Twin Maiden Husks at the Roundtable Hold to gain access to new items.
Where to find
Red summon sign outside the Grand Library
Liurnia of the Lakes
Starting Site of Grace: Raya Lucaria Grand Library
Before you go
- Progress Sellen's quest and choose the stated final branch.
- Find Waypoint Ruins east of Agheel Lake in Limgrave. Enter the cellar among the ruined walls, defeat the Mad Pumpkin Head and open the door behind its arena. Speak to Sellen and agree to study with her.
- From Erdtree-Gazing Hill on Altus Plateau, ride north through Wyndham Ruins and enter the valley beside Mt. Gelmir at Seethewater River. Follow the valley north, then around the mountain toward Seethewater Terminus.
- At Fort Laiedd, continue south along the outside of the fort toward the lava pool. Follow the bank around the Magma Wyrm instead of entering the fort; defeating the wyrm is not required.
- Keep following the mountain path past Hermit's Shack and the nearby Runebear, then continue to Craftsman's Shack and Hermit Village. The enemies along this route are separate from the pickup, so keep moving if you do not want those fights.
- Go through the village and past Demi-Human Queen Maggie to the seated sorcerer with the green crystal head beside Primeval Sorcerer Azur grace. Interact with him and wait through the pause to receive Comet Azur. Do not attack him.
- Return to Sellen at Waypoint Ruins. Show her Azur's sorcery, agree to journey with her and continue her dialogue about Lusat until she gives you the Sellian Sealbreaker.
- From Church of the Plague in eastern Caelid, head northeast to the graveyard at the cliff. Find the large headstone guarded by a battlemage and strike the cliff directly behind it to uncover Sellia Hideaway.
- Activate the cave grace and follow the miners' tunnel. Strike the false walls blocking the way until you reach the large cavern crossed by long crystals. Do not drop into the first deep pit with the Royal Revenant.
- Cross the long crystal bridge, step down to the lower crystal near its far end and reach the rock ledge. Jump the gap ahead and follow the cavern wall until another descending crystal comes into view on your right.
- Look for the crystal snail on that descending crystal. Use the crystals below it to descend into the second pit, then deal with the sorcerer guarding the blue seal at the bottom.
- Interact with the blue seal while carrying the Sellian Sealbreaker. Follow the passage and speak to Lusat to receive Stars of Ruin. The three Crystalian bosses are elsewhere and do not have to be defeated for this room.
- Report Lusat's location to Sellen at Waypoint Ruins and finish her dialogue. After defeating Starscourge Radahn, ask about her real body and agree to help with her next request.
- Travel south from Fourth Church of Marika to Witchbane Ruins on the western Weeping Peninsula. Enter the cellar and speak to the shackled Sellen. Take Sellen's Primal Glintstone when she asks; attacking her is not part of this step.
- After Radahn's festival, speak to Jerren in the chapel area at Redmane Castle until he says he is leaving. If you have already done this, continue to the next step.
- Defeat Royal Knight Loretta at Caria Manor to enter Three Sisters. In the ruins between Ranni's Rise and Renna's Rise, strike or roll over the false floor between the rows of arches to reveal a cellar.
- Go downstairs past the puppets and hit the false wall at the rear. Interact with the spare body resembling Sellen and place her Primal Glintstone in it.
- Return to Witchbane Ruins and finish Jerren's dialogue if he is there. If he has already moved on, check the library signs rather than attacking Sellen's old body.
- After defeating Rennala, go outside Raya Lucaria Grand Library toward the lift. Look beside the library doors for the gold and red summon signs. Stop here before choosing; they lead to opposing quest endings.
- Use the red sign to fight Sellen alongside Jerren. Defeating her gives Witch's Glintstone Crown and Sellen's Bell Bearing, but closes off Glintstone Kris, the new Shard Spiral purchase and the two primeval sorcerers' outfits for this journey.
- Offer Sellen's Bell Bearing to the Twin Maiden Husks at Roundtable Hold to open the retained spell stock. Speak to Jerren outside the library for his separate stone reward.
Notes
- Transfers the sorceries already available through Sellen's teaching shop, including scroll spells you unlocked with her.
- Choosing Jerren's side ends Sellen's quest on the opposing branch. It prevents her Glintstone Kris and Shard Spiral reward on this journey.
- Helping Sellen through the gold sign preserves her later shop instead and does not award this bearing.
- The Twin Maiden Husks cannot receive a new sorcery scroll through the bearing. Keep another living teacher available for scrolls you have not handed in.
- Hitting her chained body early is not a replacement for the final quest choice and can disrupt her progression.
- Her unlocked sorceries remain purchases. Receiving the bearing does not give you every spell for free, and it does not unlock scroll spells you never taught her.
- The red-sign ending also gives Witch's Glintstone Crown. Speak to Jerren outside the library for an Ancient Dragon Smithing Stone; the stone is his dialogue reward, rather than part of the bearing's shop stock.
- The opposing choice also closes off Azur's and Lusat's outfit pickups on this journey. Get any already available spells you want before making that final decision.
- This NPC shop handover is tied to the current journey. Buy the spells you want before starting another journey; the learned spells carry over, but this is not one of the permanent material-shop bearings.