Development preview — content and features are still being refined.
 Items
Items · Items
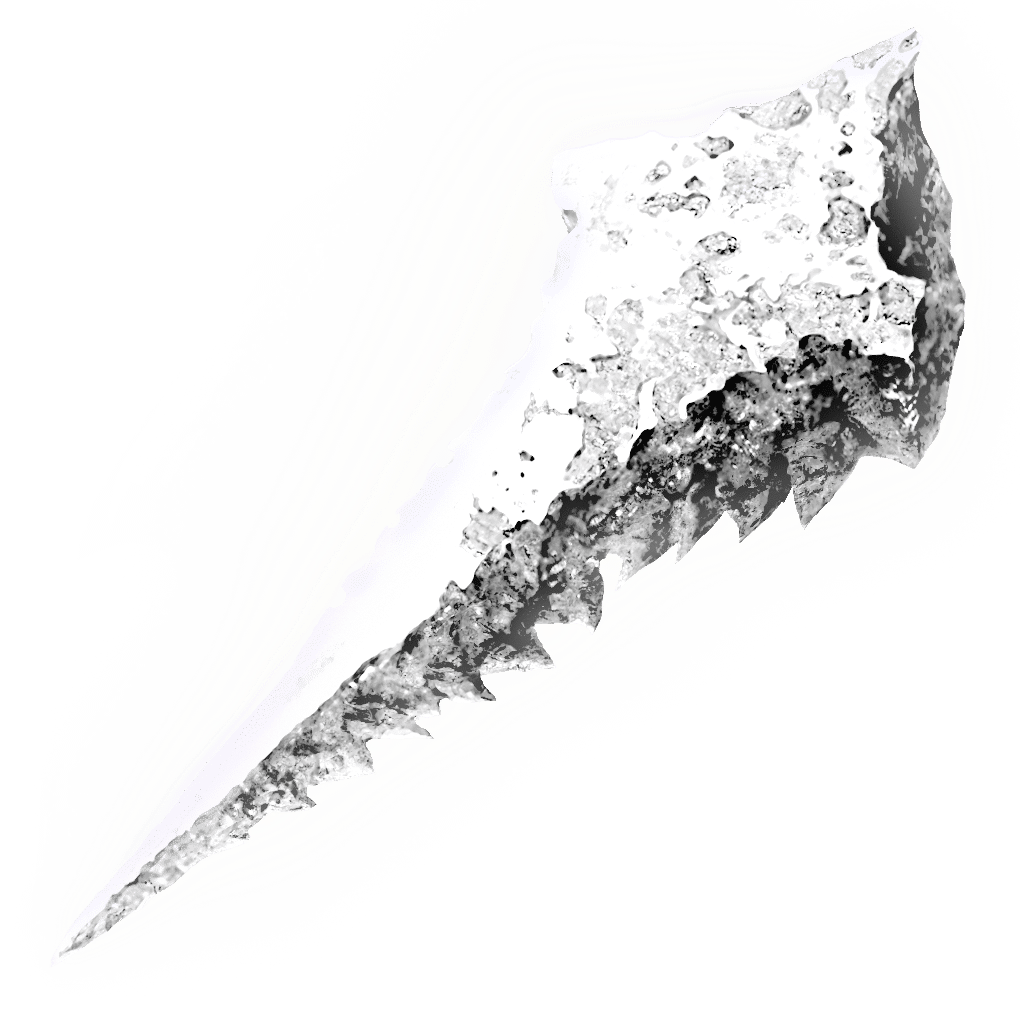
Somber Ancient Dragon Smithing Stone
Items
One stone upgrades a special armament from +9 to its maximum +10, plus the blacksmith's rune fee. The earlier nine Somber ranks must already be complete.
Reference values
- Type
- Upgrade material
About this upgrade material
One stone upgrades a special armament from +9 to its maximum +10, plus the blacksmith's rune fee. The earlier nine Somber ranks must already be complete.
These are finite rewards and pickups per Journey. Somberstone Miner's Bell Bearing [5] only makes Somber Smithing Stone [9] unlimited, not this final material.
The ordinary Ancient Dragon Smithing Stone is for +25 on a different upgrade path. Neither final material replaces the other.
Technical details
- Item Type
- Bolstering Material
- Effect
- Reinforce special armaments to +10
In-game description
Ancient dragonrock smithing stone drained of color. A scale of the Ancient Dragonlord, and hidden treasure of Farum Azula.
Strengthens special armaments to +10.
The Ancient Dragonlord's seat is said to lie beyond time. This stone lightly twists time, allowing the creation of a weapon capable of slaying a god.
Where to find
Latenna's final quest reward
Consecrated Snowfield
Starting Site of Grace: Apostate Derelict
Before you go
- Accept Latenna's request before obtaining the left secret-medallion half.
- Reach the shallow lake in southern Liurnia, then ride west beneath the enormous plateau. The village is in the shaded cavern below that plateau, not on the unreachable upper ground above it.
- From southern Liurnia's lake, travel under the huge western cliff to the poisoned village beneath it. Follow the rising path past the hanging bodies to Village of the Albinaurics grace.
- Continue uphill past the perfumer, but stop before crossing the stone bridge toward the Omenkiller.
- Look beside the path for a large pot. Roll into it or strike it once to reveal Albus, then speak to him until he hands over the medallion half.
- After Albus appears, stop attacking and finish his dialogue to receive the right half. The Omenkiller across the bridge is unnecessary for this conversation.
- From Scenic Isle in southern Liurnia, ride south across the shallow water to the cliff. Lakeside Crystal Cave opens at lake level, rather than on the cliff above. Enter and activate the grace.
- Look into the large shaft near the entrance and descend using the illuminated rocks. Take the short drops separately, then move east onto the outcrop marked by fire and a candle. The upper Demi-Human rooms and Spear Talisman chest are an optional detour.
- Enter the passage from that outcrop and watch for three Crystal Snails. Their crystal breath can catch you while you stand still. Continue along the right side of the next corridor to avoid the larger group on the left.
- When the tunnel opens back onto the shaft, drop onto the ledge to the left. A corpse with Soft Cotton confirms this landing. Heal before taking the remaining drop to the group of three item-bearing corpses below.
- Follow the lower passage past the last three snails to the boss fog. Defeat the Bloodhound Knight to receive the medallion.
- After defeating the Bloodhound Knight, use the passage beyond its arena instead of the return-to-entrance wisp. Outside, activate Slumbering Wolf's Shack.
- Speak to Latenna beside her dead wolf and show that you have Albus's medallion half. Agree to take her along to receive her Spirit Ashes.
- Do this before collecting the left medallion half at Castle Sol if you want her full quest and its later Somber Ancient Dragon Smithing Stone. Ashes left after her death are not the same as preserving that quest.
- Later, defeat Commander Niall at Castle Sol, collect the left medallion half beyond his arena and use both halves at the Grand Lift of Rold's secret-medallion option.
- Travel to Apostate Derelict in the snowfield's far northwest. Approach the giant Albinauric woman and use the special Summon Latenna interaction, rather than casting her Spirit Ash normally.
- Finish Latenna's dialogue for the stone. If she died before you accepted her request, merely collecting her ashes does not preserve this quest reward.
Anastasia's frozen-river invasion
Consecrated Snowfield
Starting Site of Grace: Inner Consecrated Snowfield
- Reach the snowfield using both halves of the Haligtree Secret Medallion.
- From Inner Consecrated Snowfield, follow the frozen river west toward the area below Ordina.
- Defeat Anastasia when she invades along the river. This snowfield invasion awards the stone, rather than her earlier appearances.
Chest below Mohg's arena
Mohgwyn Palace
Starting Site of Grace: Dynasty Mausoleum Midpoint
- Defeat a Shardbearer such as Godrick, then speak to Finger Reader Enia at Roundtable Hold.
- Find Varre at Rose Church on an island southwest of Raya Lucaria Academy in Liurnia. Tell him the Two Fingers did not seem right and receive his Festering Bloody Fingers.
- Attempt three player invasions, or use the red invasion sign at Writheblood Ruins in Altus Plateau to defeat Magnus the Beast Claw. Defeating Magnus once satisfies this stage without online play.
- Return to Varre and accept the anointing to receive Lord of Blood's Favor.
- For maiden's blood without killing a friendly NPC, go to the Church of Inhibition in northeastern Liurnia. Follow the uphill route past Frenzied Flame Village, take cover from the tower's Madness and deal with Vyke if he invades.
- Interact with the dead maiden seated inside the church to stain the favor. Return to Varre at Rose Church and agree to offer your finger.
- After receiving Bloody Finger, continue speaking to Varre. He gives you Pureblood Knight's Medal; do not leave after the finger reward.
- Use Pureblood Knight's Medal to reach Mohgwyn Palace. Activate Dynasty Mausoleum Entrance and climb the broad stairs through the bleeding corpses toward the dark mausoleum passage.
- Follow the passage upward, watching for the Sanguine Nobles inside. Leave the cave at Dynasty Mausoleum Midpoint and activate the grace.
- Open the large chest at the statue behind the Sanguine Noble. It contains the stone. Mohg does not need to be defeated.
Chest above the gazebo
Elphael, Brace of the Haligtree
Starting Site of Grace: Prayer Room
- Obtain the right Haligtree Secret Medallion half from Albus in the Village of the Albinaurics. He is disguised as a pot on the uphill path, before the bridge leading toward the Omenkiller.
- Obtain the left half from the tower beyond Commander Niall at Castle Sol in the northern Mountaintops. After winning, continue behind his arena, ride the lift and loot the rooftop corpse.
- Return to Grand Lift of Rold with both halves and switch to the secret-medallion prompt. The ordinary Rold Medallion sends you to a different destination.
- Take the main stairs through Hidden Path to the Haligtree and leave into Consecrated Snowfield. Continue north through the blizzard, following the road toward Inner Consecrated Snowfield, then on to Ordina, Liturgical Town.
- Activate Ordina's grace and find the evergaol seal toward the back of town. Enter it to light the four statues. Invisible assassins patrol the streets and Albinauric archers fire from the rooftops.
- From the evergaol seal, go left down the stairs and left again to light the street-level statue. Head toward the second stairs leading toward the town grace, but take the path around the building on their right instead of going down.
- Climb the ladder around that building and the next ladder to its rooftop statue. After lighting it, drop from the eastern side onto the red roof, cross the connected rooftops and climb the next pair of ladders to another statue.
- Go down those ladders and return to the evergaol courtyard. Pass the right side of the building, drop to the snowy ground and head west around the next building to the last pair of ladders. Light the fourth statue to lift the seal.
- Back in ordinary Ordina, climb the long northern staircase and use the sending gate at its top. Activate Haligtree Canopy when you arrive.
- From Haligtree Canopy, head east along the branch, climb over the pink mushroom near the envoy and turn south at the junction. Continue past the patrolling envoy to the next junction, then follow its northeastern branch to the end and look southeast for the branch below.
- Drop onto that branch. The larger envoy is to the east; return west toward your landing and look south for the mushroom cluster with a corpse. Descend onto the mushrooms, keeping clear of the edges and using them as cover from bubbles.
- Go north along the branch past the envoys to the ant patrol. Draw the ants onto a wider section before fighting, then turn back south and take the first broad branch east-southeast.
- At its next junction, turn southwest uphill. Just beyond the smaller branch on your left, drop south onto the broad branch below. At the fork, use the southern branch, then turn right onto the thin branch before its far tip.
- Follow the thin branch over the next branch, turn northeast onto that one and climb as it curves north. Pass the envoy and turn southeast toward the next envoy, then return west to the large junction.
- Take the northwestern mushroom ledge with the Preserving Boluses corpse. Drop southwest onto the mushrooms below, then southwest again onto the main branch.
- Head north-northeast. Beyond the branch sticking vertically up on your left, use the mushroom patch on the right to drop onto the branch beneath. Follow it to the larger branch, turn left and continue north-northeast, then northwest at the junction toward the huge envoy firing bubbles.
- Near that huge envoy, drop onto the broad branch below. Follow it north through the rot flowers to the trunk. The stone platform on its left has a ladder; descend it and take the stairs to Haligtree Town grace.
- From Haligtree Town, go northwest down the stairs past the Misbegotten. Continue toward the building below, watching for the enemies waiting beside the doorway and under its stairs.
- Inside, go down the stairs to the lower room. From its northern side, jump north-northeast to the next platform, then turn left across the wooden bridge. Go through the building and out its window.
- Cross the pavilion, keeping clear of the large Misbegotten, and enter the building southwest. Leave southwest across the wooden bridge to Haligtree Town Plaza grace.
- Go south from the plaza and jump to the roof. Cross to its northeastern side, drop onto the branch and continue toward the ants. Turn back toward the building beside that branch and enter it.
- Leave southeast and watch for Spiritcaller Snails around the outside. Their Crystalian summons disappear when their snail dies. Continue southeast and jump to the next roofs, then use the ladders at their eastern side to reach the lower walkway.
- Enter the building southeast of the lower ladder and pass the two Misbegotten. Across the bridges ahead, two battlemages guard the way; use the buildings for cover and draw them apart.
- Cross east to the next building. Its northwestern bridge leads to a lift back up to Haligtree Town. Ride it once to open the shortcut, then return down for a much shorter boss run.
- From the lower lift landing, cross southeast, then turn left onto the northeastern bridge to Loretta's arena. Defeat Loretta, Knight of the Haligtree. The spirit named Royal Knight Loretta in Caria Manor does not award this weapon.
- Leave Loretta’s arena, descend the long ladder and ride the tower lift into Elphael. Activate Prayer Room in the first building.
- Leave Prayer Room along the soldier-lined outer walkway. At the stairs near its end, jump over the railing onto the sloping support and cross toward the courtyard with the gazebo.
- From the gazebo area, climb the diagonal buttress on the far side to the upper walkway.
- Enter the small room ahead and open its chest for the stone. Malenia is not required.
Corpse behind the patrolling Putrid Avatar
Elphael, Brace of the Haligtree
Starting Site of Grace: Prayer Room
- Obtain the right Haligtree Secret Medallion half from Albus in the Village of the Albinaurics. He is disguised as a pot on the uphill path, before the bridge leading toward the Omenkiller.
- Obtain the left half from the tower beyond Commander Niall at Castle Sol in the northern Mountaintops. After winning, continue behind his arena, ride the lift and loot the rooftop corpse.
- Return to Grand Lift of Rold with both halves and switch to the secret-medallion prompt. The ordinary Rold Medallion sends you to a different destination.
- Take the main stairs through Hidden Path to the Haligtree and leave into Consecrated Snowfield. Continue north through the blizzard, following the road toward Inner Consecrated Snowfield, then on to Ordina, Liturgical Town.
- Activate Ordina's grace and find the evergaol seal toward the back of town. Enter it to light the four statues. Invisible assassins patrol the streets and Albinauric archers fire from the rooftops.
- From the evergaol seal, go left down the stairs and left again to light the street-level statue. Head toward the second stairs leading toward the town grace, but take the path around the building on their right instead of going down.
- Climb the ladder around that building and the next ladder to its rooftop statue. After lighting it, drop from the eastern side onto the red roof, cross the connected rooftops and climb the next pair of ladders to another statue.
- Go down those ladders and return to the evergaol courtyard. Pass the right side of the building, drop to the snowy ground and head west around the next building to the last pair of ladders. Light the fourth statue to lift the seal.
- Back in ordinary Ordina, climb the long northern staircase and use the sending gate at its top. Activate Haligtree Canopy when you arrive.
- From Haligtree Canopy, head east along the branch, climb over the pink mushroom near the envoy and turn south at the junction. Continue past the patrolling envoy to the next junction, then follow its northeastern branch to the end and look southeast for the branch below.
- Drop onto that branch. The larger envoy is to the east; return west toward your landing and look south for the mushroom cluster with a corpse. Descend onto the mushrooms, keeping clear of the edges and using them as cover from bubbles.
- Go north along the branch past the envoys to the ant patrol. Draw the ants onto a wider section before fighting, then turn back south and take the first broad branch east-southeast.
- At its next junction, turn southwest uphill. Just beyond the smaller branch on your left, drop south onto the broad branch below. At the fork, use the southern branch, then turn right onto the thin branch before its far tip.
- Follow the thin branch over the next branch, turn northeast onto that one and climb as it curves north. Pass the envoy and turn southeast toward the next envoy, then return west to the large junction.
- Take the northwestern mushroom ledge with the Preserving Boluses corpse. Drop southwest onto the mushrooms below, then southwest again onto the main branch.
- Head north-northeast. Beyond the branch sticking vertically up on your left, use the mushroom patch on the right to drop onto the branch beneath. Follow it to the larger branch, turn left and continue north-northeast, then northwest at the junction toward the huge envoy firing bubbles.
- Near that huge envoy, drop onto the broad branch below. Follow it north through the rot flowers to the trunk. The stone platform on its left has a ladder; descend it and take the stairs to Haligtree Town grace.
- From Haligtree Town, go northwest down the stairs past the Misbegotten. Continue toward the building below, watching for the enemies waiting beside the doorway and under its stairs.
- Inside, go down the stairs to the lower room. From its northern side, jump north-northeast to the next platform, then turn left across the wooden bridge. Go through the building and out its window.
- Cross the pavilion, keeping clear of the large Misbegotten, and enter the building southwest. Leave southwest across the wooden bridge to Haligtree Town Plaza grace.
- Go south from the plaza and jump to the roof. Cross to its northeastern side, drop onto the branch and continue toward the ants. Turn back toward the building beside that branch and enter it.
- Leave southeast and watch for Spiritcaller Snails around the outside. Their Crystalian summons disappear when their snail dies. Continue southeast and jump to the next roofs, then use the ladders at their eastern side to reach the lower walkway.
- Enter the building southeast of the lower ladder and pass the two Misbegotten. Across the bridges ahead, two battlemages guard the way; use the buildings for cover and draw them apart.
- Cross east to the next building. Its northwestern bridge leads to a lift back up to Haligtree Town. Ride it once to open the shortcut, then return down for a much shorter boss run.
- From the lower lift landing, cross southeast, then turn left onto the northeastern bridge to Loretta's arena. Defeat Loretta, Knight of the Haligtree. The spirit named Royal Knight Loretta in Caria Manor does not award this weapon.
- Leave Loretta’s arena, descend the long ladder and ride the tower lift into Elphael. Activate Prayer Room in the first building.
- Leave Prayer Room and follow the outer walkways down toward the lower ring around the tower.
- Use the sloping tower supports to descend carefully to the ring walkway with the patrolling Putrid Avatar.
- Move to the southern end beyond its patrol and loot the corpse for the stone. Draw the Avatar away if you cannot safely reach the pickup.
Millicent's needle returned to Malenia's flower
Elphael, Brace of the Haligtree
Starting Site of Grace: Malenia, Goddess of Rot
Before you go
- Assist Millicent at her final quest choice and recover the needle.
- Defeat Malenia.
- From Southern Aeonia Swamp Bank, follow the road north through Sellia Gateway. Watch for the giant throwing rocks above the gateway. Gowry's wooden shack is off the road on the right, before the town.
- Speak to Gowry and agree to help Millicent. Keep the large dog away from the shack so its attacks do not interrupt the conversation.
- Go west into the Swamp of Aeonia toward the clearing enclosed by large pale branches. Activate Inner Aeonia nearby and defeat Commander O'Neil in the Heart of Aeonia for the broken Unalloyed Gold Needle.
- Return the needle to Gowry and finish his dialogue. He gives Sellia's Secret and needs time to repair the needle. Rest or reload, then speak to him again for the repaired version.
- Continue north into Sellia, Town of Sorcery. Activate Sellia Under-Stair on the southwestern edge and follow the main street north, watching for sorcerers appearing beside the buildings.
- Climb the stairs at the far end toward the golden sapling and the sealed upper gate. The large roots beside these steps provide the way onto the roofs.
- Near the sapling, look southwest through the broken railing for a root leading toward the nearest candle tower. Follow it, climb the tower ladder and interact with the flame at the top.
- Return to the upper steps and use the root again, this time stepping onto the adjoining roofs. Work south and east across the roofs and branches toward the eastern tower. Use Torrent's double jump for the gaps and climb the ladder to light its flame.
- From that eastern roof route, head back across the connecting roots and roofs toward the southern tower on the western side. The narrow approach has a corpse with a Stonesword Key. Climb the ladder and light the third flame.
- Take the now-open upper gate beside the golden sapling to Sellia Backstreets grace. Follow the uphill road beyond town, watching for the rolling boulders and the enemies on the bends.
- At the top, go to Church of the Plague on the eastern cliff. Watch for the two Kindred of Rot outside, enter through the broken wall and activate the grace.
- Give Millicent the repaired Unalloyed Gold Needle. Rest at Church of the Plague, then speak to her after she recovers and finish her dialogue to receive Prosthesis-Wearer Heirloom.
- Return to Gowry's Shack and speak to Millicent when she visits. Reload and speak to Gowry when he returns; his first three sorceries become available during these early handovers.
- Reach Altus Plateau through the Grand Lift of Dectus with both medallion halves, or by defeating Magma Wyrm Makar at Ruin-Strewn Precipice. Find Millicent on the hill just north of Erdtree-Gazing Hill grace and finish her conversation.
- From Erdtree-Gazing Hill in Altus Plateau, ride east down into the valley, then follow it north between the cliffs. Stay on the lower ground rather than climbing toward Mt. Gelmir's campsites.
- Continue through the narrow gap until the Shaded Castle appears in its poison swamp. Use the rocks beside the broken southern wall to climb inside, then follow the wall right to Shaded Castle Ramparts grace.
- Drop into the lower courtyard and head toward the center, keeping out of the poison where you can. At the next open area, climb the ladder on the raised platform to the right, beside a Wraith Caller.
- At the top of the courtyard ladder, follow the rampart left toward the western side of the castle. Continue to the northwestern room guarded by a Cleanrot Knight rather than dropping through the gap toward Inner Gate.
- Draw the knight out or defeat it, then open the chest in its room for the prosthesis. Elemer is farther inside the castle and does not need to be defeated.
- Return to Millicent north of Erdtree-Gazing Hill and give her Valkyrie's Prosthesis. It is the quest arm from the chest, rather than either Dexterity talisman.
- Return to Gowry if you want Pest Threads. Giving Millicent the arm unlocks this later spell; buying it and speaking to Gowry again also opens his related dialogue.
- Reach Altus Plateau with the Dectus Medallion halves from Fort Haight and Fort Faroth, or defeat Magma Wyrm Makar at the top of Ruin-Strewn Precipice.
- From Altus Highway Junction, follow the road north past the map monument to Forest-Spanning Greatbridge. The waygate beside that grace brings you to the northern end of the broken bridge.
- Leave the northern bridge end and follow the road east across northern Altus, toward the windmills. At the village junction, take the uphill path through the wooden entrance arch and activate Windmill Village grace.
- Follow Dominula's main path uphill past the dancing celebrants to the highest windmill. Defeat the Godskin Apostle, then activate Windmill Heights.
- Rest or reload and speak to Millicent beside Windmill Heights. Keep her alive to continue the assistance route. Killing her here gives Millicent's Prosthesis but closes the later assistance rewards.
- Defeat Morgott in Leyndell and receive the Rold Medallion from Melina. Follow the eastern capital exit through Forbidden Lands to the Grand Lift of Rold and hoist the ordinary medallion.
- Follow the Mountaintops route past Zamor Ruins and the long narrow bridge. Speak to Millicent beside Ancient Snow Valley Ruins grace and finish her dialogue before continuing toward the Haligtree.
- Obtain the right Haligtree Secret Medallion half from Albus in the Village of the Albinaurics. He is disguised as a pot on the uphill path, before the bridge leading toward the Omenkiller.
- Obtain the left half from the tower beyond Commander Niall at Castle Sol in the northern Mountaintops. After winning, continue behind his arena, ride the lift and loot the rooftop corpse.
- Return to Grand Lift of Rold with both halves and switch to the secret-medallion prompt. The ordinary Rold Medallion sends you to a different destination.
- Take the main stairs through Hidden Path to the Haligtree and leave into Consecrated Snowfield. Continue north through the blizzard, following the road toward Inner Consecrated Snowfield, then on to Ordina, Liturgical Town.
- Activate Ordina's grace and find the evergaol seal toward the back of town. Enter it to light the four statues. Invisible assassins patrol the streets and Albinauric archers fire from the rooftops.
- From the evergaol seal, go left down the stairs and left again to light the street-level statue. Head toward the second stairs leading toward the town grace, but take the path around the building on their right instead of going down.
- Climb the ladder around that building and the next ladder to its rooftop statue. After lighting it, drop from the eastern side onto the red roof, cross the connected rooftops and climb the next pair of ladders to another statue.
- Go down those ladders and return to the evergaol courtyard. Pass the right side of the building, drop to the snowy ground and head west around the next building to the last pair of ladders. Light the fourth statue to lift the seal.
- Back in ordinary Ordina, climb the long northern staircase and use the sending gate at its top. Activate Haligtree Canopy when you arrive.
- From Haligtree Canopy, head east along the branch, climb over the pink mushroom near the envoy and turn south at the junction. Continue past the patrolling envoy to the next junction, then follow its northeastern branch to the end and look southeast for the branch below.
- Drop onto that branch. The larger envoy is to the east; return west toward your landing and look south for the mushroom cluster with a corpse. Descend onto the mushrooms, keeping clear of the edges and using them as cover from bubbles.
- Go north along the branch past the envoys to the ant patrol. Draw the ants onto a wider section before fighting, then turn back south and take the first broad branch east-southeast.
- At its next junction, turn southwest uphill. Just beyond the smaller branch on your left, drop south onto the broad branch below. At the fork, use the southern branch, then turn right onto the thin branch before its far tip.
- Follow the thin branch over the next branch, turn northeast onto that one and climb as it curves north. Pass the envoy and turn southeast toward the next envoy, then return west to the large junction.
- Take the northwestern mushroom ledge with the Preserving Boluses corpse. Drop southwest onto the mushrooms below, then southwest again onto the main branch.
- Head north-northeast. Beyond the branch sticking vertically up on your left, use the mushroom patch on the right to drop onto the branch beneath. Follow it to the larger branch, turn left and continue north-northeast, then northwest at the junction toward the huge envoy firing bubbles.
- Near that huge envoy, drop onto the broad branch below. Follow it north through the rot flowers to the trunk. The stone platform on its left has a ladder; descend it and take the stairs to Haligtree Town grace.
- From Haligtree Town, go northwest down the stairs past the Misbegotten. Continue toward the building below, watching for the enemies waiting beside the doorway and under its stairs.
- Inside, go down the stairs to the lower room. From its northern side, jump north-northeast to the next platform, then turn left across the wooden bridge. Go through the building and out its window.
- Cross the pavilion, keeping clear of the large Misbegotten, and enter the building southwest. Leave southwest across the wooden bridge to Haligtree Town Plaza grace.
- Go south from the plaza and jump to the roof. Cross to its northeastern side, drop onto the branch and continue toward the ants. Turn back toward the building beside that branch and enter it.
- Leave southeast and watch for Spiritcaller Snails around the outside. Their Crystalian summons disappear when their snail dies. Continue southeast and jump to the next roofs, then use the ladders at their eastern side to reach the lower walkway.
- Enter the building southeast of the lower ladder and pass the two Misbegotten. Across the bridges ahead, two battlemages guard the way; use the buildings for cover and draw them apart.
- Cross east to the next building. Its northwestern bridge leads to a lift back up to Haligtree Town. Ride it once to open the shortcut, then return down for a much shorter boss run.
- From the lower lift landing, cross southeast, then turn left onto the northeastern bridge to Loretta's arena. Defeat Loretta, Knight of the Haligtree. The spirit named Royal Knight Loretta in Caria Manor does not unlock this armor.
- After Loretta, activate Haligtree Promenade and leave through its northern gateway. Follow the stairs winding down beside the trunk, then descend the long ladder.
- Enter the tower below and ride its lift down. Cross the bridge past the Cleanrot Knight and activate Prayer Room grace inside.
- Find Millicent in Prayer Room and finish her dialogue about Malenia. If she has not arrived, return to her earlier meeting places and finish any remaining conversations.
- Leave Prayer Room through the northeastern doorway and follow the outside walkway down its stairs. At the railing corner with a corpse hanging over it, jump onto the sloping stone support below and across to the platform with a gazebo.
- From the northern corner of the gazebo platform, jump northwest to the next stone support and climb left onto the upper ledge. The room immediately beside you has a chest; continue northwest outside, around the curve to the corpse sitting in a chair.
- Drop northwest from this ledge onto the branch, then south onto the platform below. Continue around the corner, drop southeast and enter the room with the two Cleanrot Knights.
- Use the southeastern doorway, turn left over the railing onto the sloping support and drop to the balcony below. Go inside and down the dark stairs, using a light so you can see the lower landing.
- Halfway down the next stairs, drop from the right side to the ledge with a seated corpse. Drop into the room below, where three Crystalians guard treasure, and leave through the doorway in its northern corner.
- Face northwest along the lower street and pass the Revenant toward the ladder leading up to a balcony. Climb it, then wait for the Cleanrot patrol inside to move away before entering the building.
- Leave through the northwestern doorway and take the stairs east to the ballista operators. From their left side, climb the sloping stone support west and jump west-northwest onto the balcony with an open door.
- From the upper room, drop west from its ledge, then turn left, south, to activate Elphael Inner Wall. This reaches the grace behind the Avatar without requiring you to defeat it.
- From Elphael Inner Wall, go south down the stairs and turn right into the long hall. Climb the large root running up through a hole in the eastern wall, then follow it down into the rot-filled interior.
- Cross the rot toward the dry broken masonry on the southeastern side. Pests hide among the flowers and smaller ones gather in the liquid; clear a route from dry ground if you can. The small central island offers a place to stop, but is not free of enemies.
- From the far dry ledge, drop southwest onto the root below. Follow it southeast, descend to the next root and continue onto solid ground. Enter the doorway on the right, go down the ladder and follow the tunnel east to Drainage Channel grace.
- From Drainage Channel, backtrack west through the tunnel and climb the ladder. Leave through the western doorway, then turn right up the northwestern slope and clear the pest at its crest.
- Turn south-southwest onto the large root crossing the pit. Drop from its end toward the isolated Scarlet Rot pool. An Ulcerated Tree Spirit appears when you approach; this is the enemy needed for Millicent's final signs.
- Defeat the Tree Spirit, rest and return to the high ground above the pool's northwestern edge. The gold sign helps Millicent against her four sisters; the nearby red sign challenges her instead. Read the prompt before confirming.
- Use the gold sign and help Millicent defeat her four sisters. Keep her alive throughout the fight to receive Rotten Winged Sword Insignia.
- Back in your world, approach Millicent beside the pool on foot. Do not jump onto her or attack her. Finish her dialogue, rest or reload, and collect the returned Unalloyed Gold Needle from her body.
- Leave Drainage Channel east and turn left onto the root running north. At its end, drop east onto the stone support, go down it and drop north onto the next root.
- Cross to the next support and climb southwest. Near its top, take the root north to the church roof. Drop through the roof hole onto the wooden platform, rather than falling straight to the church floor.
- Pests fire up from the balconies. Drop to a balcony, clear a landing and descend to the floor. Take the southwestern doorway and stairs to the lift, then ride down to Haligtree Roots.
- Activate Haligtree Roots. The passage and stairs southwest lead to Malenia's fog door, while the room southeast contains a large orange flower and a separate armor pickup.
- From Haligtree Roots, take the southwestern stairs and defeat both phases of Malenia. Rest or reload afterward and return to the large scarlet flower inside her boss arena.
- Interact with that flower to return the recovered Unalloyed Gold Needle. You receive Miquella's Needle and a Somber Ancient Dragon Smithing Stone. The separate orange flower near the Traveler clothing is not this exchange.
Corpse on the elevated walkway by the gargoyle
Leyndell, Ashen Capital
Starting Site of Grace: Leyndell, Capital of Ash
- Defeat Maliketh so Leyndell changes into the Ashen Capital.
- From the main ash-covered grace, go west alongside the dead dragon and enter the building beyond it.
- Climb the ladder, then check over the railing to the right. Loot the corpse near the gargoyle for the stone.
Gazebo behind the lightning dragon
Crumbling Farum Azula
Starting Site of Grace: Dragon Temple Rooftop
- After the Godskin Duo, follow the ruins to Dragon Temple Rooftop.
- Descend through the Warhawks toward the ancient dragon calling red lightning. Defeat it or get safely past its position.
- Check the gazebo behind the dragon for the stone. This pickup is separate from the ordinary Ancient Dragon Smithing Stone the dragon drops.
Ghostflame Dragon at the northern lake
Gravesite Plain
Starting Site of Grace: Greatbridge, North
- From the starting plain, follow the road north past Scorched Ruins to Greatbridge, North.
- Ride west into the shallow lake below the Abandoned Ailing Village. The Ghostflame Dragon rests near the Great Katana pickup.
- Defeat the dragon for a Somber Ancient Dragon Smithing Stone. The katana is a separate ground pickup and does not award the stone.
Ghostflame Dragon north of Fort of Reprimand
Scadu Altus
Starting Site of Grace: Moorth Highway, South
- Reach Scadu Altus and follow the highway south from Moorth Ruins.
- Find the Ghostflame Dragon fighting soldiers on the battlefield north of Fort of Reprimand.
- Defeat the dragon for the stone. The surrounding soldiers are not the reward enemies.
Ghostflame Dragon south of the coast grace
Cerulean Coast
Starting Site of Grace: Cerulean Coast
- From Castle Front, ride south to the crossroads, turn east and follow the road to the next fork. Take the right-hand dirt track, then the left fork downhill toward the southeast.
- Pass the bloodfiends and descend into the shallow poison area. Follow the lower path down toward the river rather than climbing toward the fort; watch for militia and poison traps along the descent.
- At the bottom is a shallow pool with a giant crab. Turn southwest into the opening in the cliff, continue through the cave past the Revered Spirit Ash chamber and activate Ellac River Cave grace.
- Leave by the southern cave exit and turn south along the river. Use Torrent to cross the successive rock ledges beside the waterfall, landing on the nearby rocks rather than jumping to the valley floor.
- Continue down the ledge path past the stone birds, watching for the living ones to attack. Drop down the short rock steps to Ellac River Downstream grace.
- From Downstream, continue south beside the lower falls. Cross the long rock pillar toward the east and use its far side to reach the lower water safely.
- The lower basin opens toward a Furnace Golem. Its fight is optional for reaching the coast, the friendly forager or the lightning-flower pond.
- Head through the eastern wooded side of the basin, then follow the passage southwest through the cliffs to Cerulean Coast grace. The blue-flowered field beyond confirms you have reached the coast.
- From Cerulean Coast, travel west along the coast to Cerulean Coast West and activate the grace.
- From Cerulean Coast grace, head south into the open blue-flowered field where the dragon appears.
- Defeat this Ghostflame Dragon for the stone. Its summoned skeletons are part of the encounter, rather than separate stone drops.
Ancient Dragon Senessax
Jagged Peak
Starting Site of Grace: Jagged Peak Mountainside
- Pass through Dragon's Pit, defeat the Ancient Dragon-Man and follow the eastern route up Jagged Peak.
- Continue past the fighting drakes and rolling boulders into the cave occupied by Ancient Dragon Senessax.
- Defeat Senessax for both an ordinary and a Somber Ancient Dragon Smithing Stone. Bayle does not need to be defeated.
Lower cliff path near the summit approach
Jagged Peak
Starting Site of Grace: Jagged Peak Mountainside
- From Jagged Peak Mountainside, look northeast for the narrow path occupied by electrified oozes.
- Follow the ledge and carefully drop to the lower path where it continues around the cliff.
- Continue through the oozes to the corpse at the end for the Somber stone. The ordinary stone in the higher cave is a different pickup.
Broken stairs on Spiral Rise's lower side route
Enir-Ilim
Starting Site of Grace: Spiral Rise
- Reach Enir-Ilim after burning the sealing tree beyond Romina. Activate Spiral Rise.
- Go down from the grace and take the side stairs toward the lower circular room, rather than continuing up the main boss route.
- Pass the Curseblade ambush and go through the doorway beyond it. Loot the corpse at the end of the broken stairs for the stone.
Notes
- One stone upgrades a special armament from +9 to its maximum +10, plus the blacksmith's rune fee. The earlier nine Somber ranks must already be complete.
- These are finite rewards and pickups per Journey. Somberstone Miner's Bell Bearing [5] only makes Somber Smithing Stone [9] unlimited, not this final material.
- The ordinary Ancient Dragon Smithing Stone is for +25 on a different upgrade path. Neither final material replaces the other.
- Latenna's later reward requires accepting her request while she is alive. Collecting her ashes after missing that conversation does not preserve the same quest reward.
- Millicent's needle route requires helping her at the final gold summon sign and later defeating Malenia. Challenging her with the red sign gives a different outcome and closes that route.
- The DLC Ghostflame Dragons and Ancient Dragon Senessax add further guaranteed opportunities. Resting does not turn their one-time final-upgrade rewards into repeatable farming drops.
- One copy is consumed per special armament taken from +9 to +10. Upgrading a paired armament finishes that one item and its paired moveset, rather than requiring one stone per visible blade.
- Cannot be left for another player. Buying unlimited Somber Smithing Stone ranks does not unlock an unlimited final stone.
- Latenna’s special interaction at Apostate Derelict is a quest summon. Her normal Spirit Ash cannot substitute for the dialogue you missed before reaching Castle Sol.
- The ordinary stone dropped by the lightning dragon near Dragon Temple Rooftop and this Somber stone in the gazebo are different rewards. You can collect both on the same route.