Development preview — content and features are still being refined.
 Items
Items · Items
Stonesword Key
Items
Use it at a matching imp statue to remove that statue's fog seal. Some seals need one key and others need two; the empty sockets and interaction prompt tell you what is still required.
Reference values
- Type
- Key
About this item
Use it at a matching imp statue to remove that statue's fog seal. Some seals need one key and others need two; the empty sockets and interaction prompt tell you what is still required.
Inserted keys are consumed permanently. Leaving the area, dying or resting does not return them, but the opened seal stays open during the journey.
A statue with one socket already filled only needs its remaining key. Do not assume every two-imp statue always consumes two new keys from your inventory.
Technical details
- facts:
- Entry 1:
- group: Item Type
- label:
- value: Key
- Entry 2:
- group: Effect
- label:
- value: Use to break one imp statue seal
- Entry 1:
In-game description
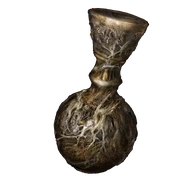
A sword-shaped stone key.
Breaks the seal on imp statues, but remains embedded in the statue after use, meaning it can only be used once as an item.
Think well before using one.
Where to find
Character-creation keepsake
Starting area
- Choose Stonesword Key as your keepsake when creating a character.
- This starts you with two keys.
Twin Maiden Husks
Roundtable Hold
Starting Site of Grace: Table of Lost Grace
Before you go
- Have 4,000 runes per item.
- Have access to Roundtable Hold.
- Visit the Twin Maiden Husks after reaching Roundtable Hold.
- Buy up to three Stonesword Keys from their limited stock for 4,000 runes each.
Bridge of Sacrifice body
Weeping Peninsula
Starting Site of Grace: Bridge of Sacrifice
- From Agheel Lake South, follow the main road southeast to Bridge of Sacrifice. The bridge is the narrow guarded crossing into Weeping Peninsula, not the broken northern bridge beside Stormveil.
- Use the low walls for cover from the ballista and move past its soldiers. Loot the corpse on the bridge for a Stonesword Key; defeating every guard is unnecessary.
Dragon-Burnt Ruins tower
Limgrave
Starting Site of Grace: Agheel Lake South
- From Agheel Lake South, ride north into the shallow lake toward Dragon-Burnt Ruins. Search the ruined tower on the surface for the corpse guarded by a rat.
- Loot the corpse for the key. You do not need to enter the rat-filled cellar or open the chest that sends you to Sellia Crystal Tunnel.
Notes
- Use it at a matching imp statue to remove that statue's fog seal. Some seals need one key and others need two; the empty sockets and interaction prompt tell you what is still required.
- Inserted keys are consumed permanently. Leaving the area, dying or resting does not return them, but the opened seal stays open during the journey.
- A statue with one socket already filled only needs its remaining key. Do not assume every two-imp statue always consumes two new keys from your inventory.
- The ordinary key does not open the special sending gates that need an Imbued Sword Key. It also does not replace an Academy Glintstone Key, a quest key or a boss-locked doorway.
- Choosing it as a starting keepsake gives two keys. That is enough for one two-key seal or two separate one-key seals, not unlimited early dungeon access.
- The Twin Maiden Husks sell three for 4,000 runes each. Merchant stock and world pickups are limited individually, although many copies are scattered across the Lands Between.
- A seal can hide a full dungeon or a dangerous room rather than an immediate safe reward. Opening Fringefolk Hero's Grave near the starting grave does not make its chariot route suitable for an unprepared character.
- Unused ordinary keys carry into the next journey, while seals reset and must be opened again. The listed keepsake, shop and Limgrave pickups are selected early options, not every copy.