Reference values
- Type
- Talismans
- Weight
- 1.1
Effects
Raises FP restored by the Flask of Cerulean Tears by 30%, compared with 20% from the basic talisman.
The refill still stops at maximum FP. Spend enough FP before drinking to receive the benefit of the larger refill.
It does not increase maximum FP, reduce costs or improve the recovery from Blessed Blue Dew Talisman, nearby enemy deaths or critical attacks.
Technical details
Flask Focus Restoration
- Value
- 1.3
- Calculation
- multiplicative
- Effect type
- positive
In-game description
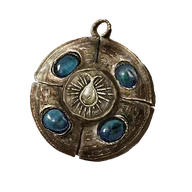
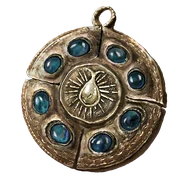
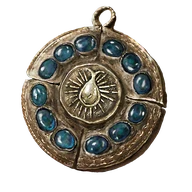
A cerulean-colored talisman patterned after an Erdtree seed.
Greatly boosts FP restoration from the Flask of Cerulean Tears.
The Erdtree seed of this talisman was presumed to be an object of myth. This age-old artifact also depicts the Two Fingers, perhaps harking back to the birth of the Erdtree.
Where to find
Finger Ruins of Dheo hanging bell
Hinterland
Starting Site of Grace: Fingerstone Hill
Before you go
- Hole-Laden Necklace.
- O Mother gesture.
- Reach Shadow Keep, Back Gate.
- To enter the Realm of Shadow, defeat Starscourge Radahn and Mohg, Lord of Blood, then touch the withered arm in Mohg's arena at Mohgwyn Palace.
- From Highroad Cross in Scadu Altus, follow the road east to Moorth Ruins and activate the grace beside the cross.
- Pass through the large stone arch east-southeast of the grace. At the house ahead, turn left toward the leaning tower. Avoid the large open shaft behind the house, which is too deep for a direct drop.
- Find the smaller gap between the broken building and the rock wall in front of the leaning tower. Drop onto the balcony-like ledge, turn right past the dogs and follow the cave inward.
- In the open chamber at the end, take the back-left ledges down onto the lower roof. Look for the small shrine guarded by three Inquisitors and collect Golden Arcs from the chest inside.
- To continue east, drop from the lower roof to the ground and take the cave beside the building on the left. Follow it to the long ladder and climb out of the well at Bonny Village grace.
- Go east through Bonny Village, watching for the large cleaver-wielding villagers, and cross the two suspension bridges. The second brings you to Bridge Leading to the Village grace.
- Follow the road north through the woods and around its bend to Church District Highroad grace. The northern road continues toward Shadow Keep; your destination is the cathedral south of this junction.
- Follow the road south through the woods to the large cathedral in the lake. Enter through its main doors and activate Cathedral of Manus Metyr grace.
- Speak to Count Ymir on the throne and accept his guidance. He gives you the Hole-Laden Necklace and first Ruins Map. You do not need to buy a spell to receive them.
- From Highroad Cross in Scadu Altus, follow the road east to Moorth Ruins and activate the grace beside the cross.
- Pass through the large stone arch east-southeast of the grace. At the house ahead, turn left toward the leaning tower. Avoid the large open shaft behind the house, which is too deep for a direct drop.
- Find the smaller gap between the broken building and the rock wall in front of the leaning tower. Drop onto the balcony-like ledge, turn right past the dogs and follow the cave inward.
- At the open chamber, use the back-left ledges to reach the lower roof. The shrine below is a landmark; its chest is optional.
- To continue east, drop from the lower roof to the ground and take the cave beside the building on the left. Follow it to the long ladder and climb out of the well at Bonny Village grace.
- Go east through Bonny Village, watching for the large cleaver-wielding villagers, and cross the two suspension bridges. The second brings you to Bridge Leading to the Village grace.
- Follow the road north through the woods to Church District Highroad grace. Take the northwestern road through the entrance tunnel and activate Church District Entrance inside Shadow Keep. This eastern entrance leads to the flooded district, rather than the main-gate Hippopotamus arena.
- Jump from the entrance ledge onto the first roof below. Follow its northwestern edge and jump from the raised roof section to the stone wall opposite, rather than taking the southwestern log platforms toward different loot.
- Follow the wall around and climb its northeastern rise. Jump to the next roof northwest, where a Fire Knight patrols. Clear it or make enough room to continue safely.
- Cross toward the next large church and jump onto the sloping stone support on your left. Walk southwest up that support to the high roof, then use the broken roof opening to drop onto the central beam below.
- Follow the beam to the adjoining upper corridor and drop through the opening in its floor onto the raised church passage. Stay above the water and continue northwest; the Prayer Room door is a separate side destination.
- Pass the small side room holding a Rune of an Unsung Hero and continue into the corridor patrolled by two Fire Knights. The first left exit leads toward the drainage wheel, while the later left exit leads to the Storehouse lift.
- Take the later left exit in the Fire Knight corridor, cross to the lift and ride it up into the rear storehouse. Use the doorway on the left to reach Storehouse, Back Section grace. The earlier left exit goes to the drainage wheel instead.
- Go west across the small wooden bridge and climb the ladder on its right. At the top, go east up the stone stairs, watching the Fire Knight above.
- Continue northeast past the bookshelves toward the room with Fire Serpent. Use the hole in the southern wall, turn right outside and climb the wooden walkway and stairs to Storehouse, Loft grace.
- From Storehouse, Loft, ride the small northern lift up to the rafters. Go west-northwest across the beams toward the ladder, clearing the bat before you climb.
- At the upper level, follow the beams southwest around the central support, then look east toward the huge suspended wooden gear. Clear the next bat before lining up the drop.
- Drop onto the huge suspended gear, then make a running jump to the adjoining beam and climb its ladder. The spell on the gear is optional; do not jump toward the distant floor below.
- Clear the Fire Knight by the upper lift platforms. Instead of using the opposite-moving interior cages for the hidden Spirit Ash, find the nearby ladder on the western side and climb down.
- At the bottom, go around the corner toward the second ladder northeast of the first. Clear the bat before climbing down, then go through the doorway to the outside.
- Take the exterior lift on the right down. Follow the wooden walkway and stairs southeast to the large stone lift, then ride it down to Shadow Keep, Back Gate grace.
- If you still need O Mother, return to Bonny Village. Cross the dry riverbed into its eastern half and go north to the headless statue beneath the tree near the cliff. Collect the gesture from the corpse at its base, then return to Back Gate.
- At Back Gate, enter the small room southeast of the grace rather than walking out into the Gaius arena. Perform O Mother directly in front of Marika's statue. It moves to reveal the passage to Hinterland grace.
- Follow the road east through Hinterland, passing the two Tree Sentinels if you do not want to fight. Cross Hinterland Bridge and continue toward Fingerstone Hill. Shaman Village is a separate side path.
- Descend southeast into Finger Ruins of Dheo. Use the tall stone fingers as cover from the purple binding projectiles and work toward the hanging bell at the center.
- With the Hole-Laden Necklace in your inventory, use Sound hanging bell. Cerulean Seed Talisman +1 is awarded here. Neither Messmer nor Commander Gaius is required for this route.
Notes
- Raises FP restored by the Flask of Cerulean Tears by 30%, compared with 20% from the basic talisman.
- The refill still stops at maximum FP. Spend enough FP before drinking to receive the benefit of the larger refill.
- It does not increase maximum FP, reduce costs or improve the recovery from Blessed Blue Dew Talisman, nearby enemy deaths or critical attacks.
- Can be worn with a Cerulean Amber Medallion, which increases the size of the FP pool. Cannot be worn with the basic Cerulean Seed Talisman.
- Sounding the hanging bell at the Finger Ruins of Dheo awards it. Killing the enemies around the ruins does not, and neither Commander Gaius nor Metyr is required for the bell interaction.
 Talismans