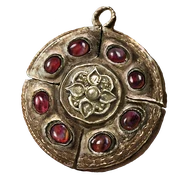
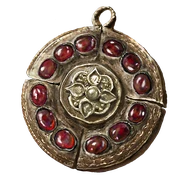
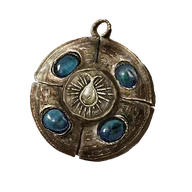
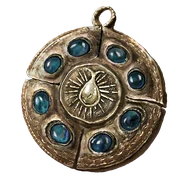
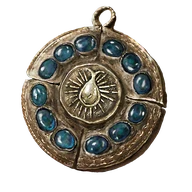
Reference values
- Type
- Talismans
- Weight
- 0.9
Effects
Adds 230 Focus, the strongest Clarifying Horn Charm bonus. This raises resistance to Sleep and Madness buildup.
It does not add Mind, FP or spell slots. Focus also does not reduce the direct damage of a Frenzied Flame attack just because that attack inflicts Madness.
A larger resistance bar can still fill. The charm does not cure Sleep or Madness after activation and does not protect against the other buildup ailments.
Technical details
Focus
- Value
- 230
- Calculation
- additive
- Effect type
- positive
In-game description
Ceremonial accoutrement worn by hornsent.
Vastly raises focus.
(Focus governs resistance to sleep and madness.)
Horns are sublime artifacts to hornsent, and their presence confirms the belief that they are a chosen people.
Only the repeated sprouting of fresh horns can create a tangled horn, which is viewed as an irrefutable symbol of primacy.
Where to find
Lamenter's Gaol lower sewer
Charo's Hidden Grave
Starting Site of Grace: Lamenter's Gaol
Before you go
- Reach Charo's Hidden Grave.
- From Castle Front, follow the road southeast toward Pillar Path Waypoint. At the fork, use the lower road toward Igon rather than climbing to the Suppressing Pillar.
- Continue south-southwest past the broken dragon statues. An Ancient Dragon-Man invades along this approach. The cave entrance is on the left near the end of the path, marked by a fire.
- Activate Dragon's Pit grace and follow the lit passage down. Watch for skeletons below the first ledge and around the next corner. Strike their glowing remains after knocking them down to stop them getting back up.
- In the large cavern with the pillars, follow the left-hand ledge down and take the passage beside the distant crossbow skeleton. Continue onto the sloping stairs in the next chamber.
- Take the downward route toward the large altar and pit. The stairs going up lead to an optional Magma Wyrm; that fight is not needed to reach the exit.
- At the bottom, approach the message beside the deep chasm. Walk straight off this lowest ledge into the pit to land safely by the boss mist. Do not jump from the higher rooms or aim toward the side walls.
- Defeat the Ancient Dragon-Man behind the mist. Open the large doors at the back of the arena instead of using the return-to-entrance exit, then follow the tunnel to Dragon's Pit Terminus grace.
- Leave Dragon's Pit Terminus and descend to the lake bed with a Jagged Peak Drake. You can ride past the drake; follow the southern canyon toward the enormous dead dragon.
- Pass the dragon statues and emerge beside the ruined structure north of Grand Altar of Dragon Communion. The huge stone bowl and dead dragon identify the altar.
- At the altar, head west over the dead dragon and continue west-southwest toward the red flowers. This leads into the upper hidden grave, not the blue-flowered coast below.
- The entrance meets the lowest section of a shallow river. The river climbs northwest through several pools separated by small waterfalls.
- Continue northwest up the river past the Mariner pools. At the upper end, follow the red-flowered trail on the western bank to Charo's Hidden Grave grace.
- From Charo's Hidden Grave, continue northwest through the red-flowered graveyard toward the cliff entrance of Lamenter's Gaol. Enter and activate its grace.
- From the gaol grace, follow the passage to the first fork. The right-hand gate is locked, so take the left passage and check the second cell on the right.
- Deal with the enemies in that cell and open its chest for Gaol Upper Level Key. Return to the first fork and use it on the locked gate.
- Open the upper gate and climb down its ladder into the icy room. The first cell on the right contains Chilling Perfume Bottle and a rushing Jar Innards enemy; the sewer route is on the left side of the main room.
- Enter the left-side opening and drop into the rat tunnel. Follow it past the first pair of rats to the larger chamber with a rat on a ledge and a giant rat opposite.
- After clearing enough room, take the left branch to the dead end. Another giant rat and smaller rat guard the corpse beside the sewer grate.
- Loot Clarifying Horn Charm +2. Backtrack to the larger chamber and use the other branch to find the ladder and door returning to the icy room.
- The Gaol Lower Level Key and Lamenter boss are farther into the dungeon. Neither is needed for this charm.
Notes
- Adds 230 Focus, the strongest Clarifying Horn Charm bonus. This raises resistance to Sleep and Madness buildup.
- It does not add Mind, FP or spell slots. Focus also does not reduce the direct damage of a Frenzied Flame attack just because that attack inflicts Madness.
- A larger resistance bar can still fill. The charm does not cure Sleep or Madness after activation and does not protect against the other buildup ailments.
- Cannot be equipped with an earlier Clarifying Horn Charm. A compatible Mottled Necklace can add more Focus.
- The sewer branch opens after Gaol Upper Level Key and the first ladder. Take the rat chamber's left dead end for the corpse, then the other branch for the return ladder.
- The lower key and Lamenter boss are unnecessary. Chilling Perfume Bottle is a different nearby pickup in the first cell of the icy room.
 Talismans