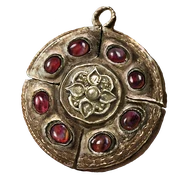
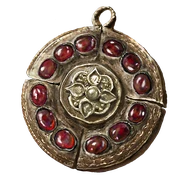
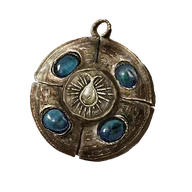
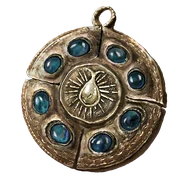
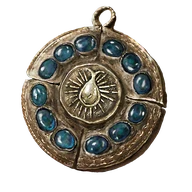
Reference values
- Type
- Talismans
- Weight
- 0.8
Effects
Extends the invulnerable portion of eligible dodge rolls, but makes you take 30% more damage while equipped.
The defensive penalty applies outside the roll too, including while standing, blocking or casting. It is not limited to the moment when you mistime a dodge.
It does not increase roll distance, lower equipment weight or turn a heavy roll into a medium roll.
Technical details
Absorption
- Value
- 0.7
- Calculation
- multiplicative
- Effect type
- negative
Extended Roll Iframes Enabled
- Value
- 1
- Calculation
- additive
- Effect type
- positive
In-game description
A talisman fashioned from feathers that embody the aspects of various creatures.
Said to have grown on the human body long ago.
Improves the effectiveness of dodge rolls, but increases damage taken at all times.
A vestige of the crucible of primordial life. Born partially of devolution, it was considered a signifier of the divine in ancient times, but is now increasingly disdained as an impurity as civilization has advanced.
Where to find
Auriza Hero's Grave lower side room
Capital Outskirts
Starting Site of Grace: Auriza Hero's Grave
- From Outer Wall Battleground in the Capital Outskirts, follow the road east and down beneath the capital approach bridge. Stay in the low valley and take the southern dungeon entrance for Auriza Hero's Grave, not Auriza Side Tomb to the north.
- Ride the lift down and activate the grace. The sealed room straight ahead is an optional weapon pickup. You do not need a Stonesword Key for the chariot route.
- Take the western stairs to the first chariot ramp. Trigger the chariot, then retreat until it passes. Move between the side recesses rather than trying to outrun it for the whole slope.
- At the narrow archway between the ramps, drop off the side into the lower room. Clear the Basilisks without standing in their Death Blight clouds, then follow the western passage and stairs.
- Continue through the next Basilisk rooms to the archway overlooking two chariot lanes. Stay back from its lip, since a chariot can catch you even while you are looking out.
- Work down the slope using the recesses and switching lanes after a chariot passes. At the short flat landing, wait for another opening before continuing toward the corpse hanging over the deep shaft near the bottom.
- Look below the hanging corpse and drop onto the wooden beam directly underneath. Walk along the beams and lower yourself one level at a time; do not jump straight to the floor.
- From the lower beams, find the thin stone arch beneath them. Drop onto the arch, follow it to solid ground beside a skeleton and climb the ladder there.
- Stop before stepping onto the next chariot ramp. Wait for it to travel downhill, then run uphill into the room on the eastern side containing a fire-breathing pillar.
- Hit the pillar once to raise it. Leave it raised so its glowing summoning mark moves onto the upper track. Return to the entrance grace and repeat the approach to the two-chariot hall.
- Stay in cover as you approach the new summoning mark. The newly summoned chariot crashes into the others, automatically awarding the four regular Tree Sentinel pieces and Holy Ground.
- The Crucible Knight pair is a separate boss encounter and is not required for this reward. Once destroyed, these chariots stay gone for the rest of this Journey.
- After the collision, return down the beam route and stone arch, climb the ladder and reach the separate ramp where you found the pillar. The chariots no longer block its lower end.
- Go down the ramp and take the passage on the left at the bottom. Follow it downstairs to the Omen guarding the corpse and collect the talisman.
- Do not move the other flame pillar reached by the nearby lift until after the collision. Moving that one too early can change the summoning mark and prevent the intended crash.
Notes
- Extends the invulnerable portion of eligible dodge rolls, but makes you take 30% more damage while equipped.
- The defensive penalty applies outside the roll too, including while standing, blocking or casting. It is not limited to the moment when you mistime a dodge.
- It does not increase roll distance, lower equipment weight or turn a heavy roll into a medium roll.
- A better roll window does not protect you through the entire animation. You can still be hit during the vulnerable parts, and a failed dodge is more costly because of the damage penalty.
- Its extra roll invulnerability does not stack with Windy Crystal Tear or Talisman of All Crucibles. The damage penalties can still combine, so using them together makes a failed dodge more costly without adding another roll improvement.
- The separate Fine Crucible Feather Talisman concerns backsteps. Do not treat rolling and backstep improvements as the same effect.
- The pickup is in an Omen-guarded side room in Auriza Hero's Grave. The Crucible Knight boss pair is not required.
 Talismans