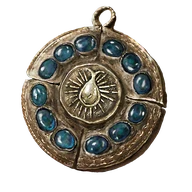
Reference values
- Type
- Talismans
- Weight
- 1.5
Effects
Raises maximum HP by 3.5%, maximum stamina by 8.5% and maximum equip load by 6.5%.
The bonuses increase health, stamina capacity and carrying capacity. They do not increase stamina recovery, damage negation or fixed flask restoration.
Healing based on maximum HP can increase with the larger health pool. This is different from directly boosting every healing effect.
Technical details
Maximum Equip Load
- Value
- 1.065
- Calculation
- multiplicative
- Effect type
- positive
Maximum Health
- Value
- 1.035
- Calculation
- multiplicative
- Effect type
- positive
Maximum Stamina
- Value
- 1.085
- Calculation
- multiplicative
- Effect type
- positive
In-game description
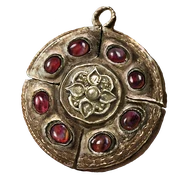
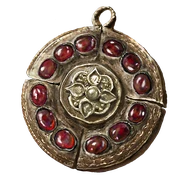
A talisman depicting a special blessing of the Erdtree.
Raises maximum HP, stamina, and equip load.
It is said that when the Age of the Erdtree began, such blessings were personally bestowed upon their recipients by Queen Marika herself.
Where to find
Chest in the Cathedral of the Forsaken
Leyndell
Starting Site of Grace: Forsaken Depths
Before you go
- In Leyndell, Royal Capital, start at Avenue Balcony. Descend the northwestern stairs and go through the door. Follow the railing west, then drop left onto the lower rooftops.
- Drop off the right side of the roof, turn back north and find the well behind the broken wall. Climb its ladder, open the gate in the lower passage and take the next ladder down.
- Follow the damp corridor northeast into the rat-filled sewer entrance. Go through the southeastern doorway and descend the ladder into the large Omen hallway.
- Head northeast along the hallway and enter the first room on the left, opposite the summoning statue. Activate Underground Roadside grace.
- Leave Underground Roadside and go northeast along the Omen hallway to the open floor grate. Drop into it, follow the rat tunnel northwest and take the side pipe on the right rather than the flower-filled route to Dung Eater's cell.
- Follow the slug-filled pipe. Drop through its first floor opening into the dark room, leave through the door on the left and follow the next tunnel. At the slug-blocked bend, go left and drop through the next opening beside the corpse with Rainbow Stone Arrows.
- In the lower chamber, watch for the ambusher near your landing and the Revenant farther inside. Use the tunnel in the western corner, continue through the open metal gate and follow the bends past the slugs to the square room with an Omen and ladder.
- Climb the ladder and turn right to pull the lever, opening a shortcut back to Underground Roadside. Watch for two more Omen by the statue. Take the nearby doorway into the broken spiral-stair chamber.
- Turn left and drop to the lower section of the curved stairs. Follow the short flight down and enter the passage on the right. Farther along, the downward ladder by the ledge leads to Nomad Ashes; continue into the other pipe route for Mohg.
- In the Basilisk pipes, pass the first right turn with a door that opens from the other side. Take the next right into the Omen's room. Climb its ladder, cross the wooden bridge past the Imp and open the doors back toward Underground Roadside.
- From that opened bridge, climb onto the upper pipe and follow it to the end. Drop onto the lower pipe and reach the wooden walkway by the corpse with Golden Rune (10). Enter the doorway and kick down the ladder to make another shortcut.
- Drop onto the pipe below this platform, then through the opening in its top. Inside, take the northeastern direction from your landing. Follow the pipe as it bends southeast, then northeast to the fork beside Golden Rune (11).
- Take the left fork and drop through its floor opening after the small rat. The route straight toward the giant rat loops to an earlier area. The correct lower landing is beside a Commoner and Smithing Stone (5).
- Open the nearby gate for a shortcut, then follow the passage northeast. Climb down the ladder to the room with living jars and take its lift down to Forsaken Depths grace.
- From Forsaken Depths, continue down the stairs into Mohg, the Omen's arena. Defeat him and activate Cathedral of the Forsaken grace. His direct reward is Bloodflame Talons; the chest by the altar contains Erdtree's Favor +1.
- Open the chest beside the altar after Mohg is defeated to collect Erdtree's Favor +1. The hidden passage behind the altar and the Three Fingers are unnecessary for this talisman.
Notes
- Raises maximum HP by 3.5%, maximum stamina by 8.5% and maximum equip load by 6.5%.
- The bonuses increase health, stamina capacity and carrying capacity. They do not increase stamina recovery, damage negation or fixed flask restoration.
- Healing based on maximum HP can increase with the larger health pool. This is different from directly boosting every healing effect.
- The talisman weighs 1.5, and that weight still counts toward equip load. Raising the carrying limit does not remove equipment weight.
- Can be paired with compatible Amber Medallions and an Arsenal talisman. Cannot be equipped with either other Erdtree's Favor variant.
- The reward is in a chest after Mohg, the Omen in the sewers. Mohg, Lord of Blood in Mohgwyn Palace is a different boss, and the descent to the Three Fingers is not required for this chest.
 Talismans