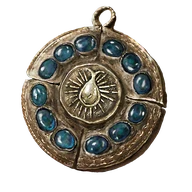
Reference values
- Type
- Talismans
- Weight
- 0.6
Effects
Adds invulnerability to eligible backsteps, but makes you take 15% more damage while equipped.
A backstep is the evasive action used with no movement direction held. Holding backward and dodging performs a roll instead, which uses different rules.
The incoming-damage penalty applies while standing, attacking or casting too. It is not limited to a failed backstep.
Technical details
Backstep Iframes Enabled
- Value
- 1
- Calculation
- additive
- Effect type
- positive
Absorption
- Value
- 0.85
- Calculation
- multiplicative
- Effect type
- negative
In-game description
A talisman fashioned from thin feathers that embody the aspects of various creatures.
Said to have grown on the human body long ago.
Improves backsteps but increases damage taken at all times.
Hornsent view the Crucible as sacred for the refinement wrought through its evolutionary gifts. Most prominently, their tangled horns.
Where to find
Upper branch inside the eastern ruins
Ancient Ruins of Rauh
Starting Site of Grace: Rauh Ancient Ruins, East
- Enter the Realm of Shadow after defeating Starscourge Radahn and Mohg, Lord of Blood, by touching the withered arm in Mohg's arena.
- From Highroad Cross in Scadu Altus, follow the main road north to Shadow Keep's southern gate. Ride the entrance lift and activate Shadow Keep Main Gate grace.
- Defeat Golden Hippopotamus in the plaza. This is the front-door route; the flooded Church District provides a different way into the keep.
- From Main Gate Plaza, leave through the west-northwest doorway, pass through the armory and climb the stairs. Continue up the wooden steps to the dining hall, where two Black Knights guard the route.
- Leave the dining hall through its southeastern exit to the upper rampart. Follow the rampart past the burning boats and watch for the small Shadow Militiamen hiding beside them.
- Take the stairs leading north-northeast toward the large lift, passing the Fire Knight in front of it. Ride up and activate Storehouse, First Floor grace.
- At Storehouse, First Floor, take the western side passage and lift down to the lower jar rooms. This is the West Rampart branch, rather than the stairs climbing toward Messmer.
- Follow the hallway through the rooms with living jars and the larger jar-filled ward. Watch for the smaller enemies waiting beside doorways, then use the western exit and stairs to reach West Rampart grace.
- Cross the long bridge west toward the Ancient Ruins of Rauh. Salza waits at the far end and calls down fire as you approach. Use the bridge's sheltered sections to interrupt his view, or ride Torrent to close the distance.
- Defeat Salza at the western gate to receive Rain of Fire and Salza's Hood together. Messmer and Romina are not required for this selected route.
- Go through the doorway behind Salza. Take the doorway on the right, follow the stairs to the lift and ride down to Viaduct Minor Tower grace.
- Leave by the southwestern stairs and follow the path west as it curves downhill. Turn northwest between the lit braziers and large pillars to enter the covered ruins. This is the upper ruin route, separate from Rauh Base below.
- Watch for the Curseblade beside the pillar near the pot-carrying shadow enemy. Continue northwest, look right for the large double doors and open them.
- Descend the stairs into the scorpion chamber. Draw the large scorpion away from the smaller ones dropping from the ceiling, then clear the next corner. More scorpions drop beside the corpse there.
- Continue west, then southwest down the ramp to the next chamber. Open the second set of double doors on its southwestern wall.
- Pass the fixed material pickup behind the doors and follow the corridor northwest past the snails. Drop through the large square opening over the spiritspring; this is the intended descent into the lower hall.
- From the landing below the large spiritspring, go northwest to the T-junction with the statue. Turn right, northeast, into the room filled with large roots.
- Climb the roots, turn left along the upper branch and loot the corpse holding Fine Crucible Feather Talisman. You do not need to continue to the exterior knight or Romina.
Notes
- Adds invulnerability to eligible backsteps, but makes you take 15% more damage while equipped.
- A backstep is the evasive action used with no movement direction held. Holding backward and dodging performs a roll instead, which uses different rules.
- The incoming-damage penalty applies while standing, attacking or casting too. It is not limited to a failed backstep.
- It does not directly strengthen the attack performed after a backstep. Backstep protection and attack-damage bonuses are separate effects.
- Crucible Feather Talisman improves rolls instead. Neither talisman changes equipped weight or turns a heavy roll into a medium roll.
- The corpse is on the branches inside Rauh's ruins. It is not a reward for defeating Romina or the nearby Divine Beast Warrior.
 Talismans