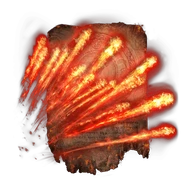
In-game description
One of the greatest Dragon Communion incantations.
Harnesses the fearsome power of Bayle the Dread.
Channels the form of the dread dragon to emit a mighty roar accompanied by a heatwave burst, causing violent eruptions of fire in the area.
Even after being consumed, the throbbing heart of Bayle continues to resist its subjugation, never weakening. One day, the fire within will consume the very body and soul of its Communion devourer. One day.
Where to find
Grand Altar of Dragon Communion
Jagged Peak
Starting Site of Grace: Jagged Peak Summit
Before you go
- To enter the Realm of Shadow, defeat Starscourge Radahn and Mohg, Lord of Blood, then touch the withered arm in Mohg's arena at Mohgwyn Palace.
- Defeat Bayle the Dread.
- From Castle Front, follow the road southeast toward Pillar Path Waypoint. At the fork, use the lower road toward Igon rather than climbing to the Suppressing Pillar.
- Continue south-southwest past the broken dragon statues. An Ancient Dragon-Man invades along this approach. The cave entrance is on the left near the end of the path, marked by a fire.
- Activate Dragon's Pit grace and follow the lit passage down. Watch for skeletons below the first ledge and around the next corner. Strike their glowing remains after knocking them down to stop them getting back up.
- In the large cavern with the pillars, follow the left-hand ledge down and take the passage beside the distant crossbow skeleton. Continue onto the sloping stairs in the next chamber.
- Take the downward route toward the large altar and pit. The stairs going up lead to an optional Magma Wyrm; that fight is not needed to reach the exit.
- At the bottom, approach the message beside the deep chasm. Walk straight off this lowest ledge into the pit to land safely by the boss mist. Do not jump from the higher rooms or aim toward the side walls.
- Defeat the Ancient Dragon-Man behind the mist. Open the large doors at the back of the arena instead of using the return-to-entrance exit, then follow the tunnel to Dragon's Pit Terminus grace.
- From Dragon's Pit Terminus, descend to the first drake's lake bed. Use the northeastern archway and follow the path uphill as it bends southeast. The drake fight is optional.
- Continue along the narrow cliff path until you reach a spiritspring on the east side. This is the first spiritspring on the ascent, before the bridge to Foot of the Jagged Peak.
- Use the spiritspring to jump east, then cross the bridge south-southeast and activate Foot of the Jagged Peak grace.
- Follow the southern uphill path over the rocks to the two fighting drakes. You can skirt their arena to continue east without defeating them.
- Take the eastern canyon, climb using the next two spiritsprings and follow the valley uphill. Two boulders roll down the slope ahead; use the rocks on the right for cover before continuing.
- At the top of the boulder slope, turn east-northeast toward Ancient Dragon Senessax. You can ride past the dragon and take the northern uphill exit instead of fighting.
- Climb past the dead dragons to Jagged Peak Mountainside grace. Lightning strikes along the upper mountain, so move away from the marks that appear on the ground.
- From Jagged Peak Mountainside, climb southwest through the dead dragons to the spiritspring on the left and jump south. Follow the high cliff path southwest, then southeast, using jumps across the breaks rather than dropping to the lower painting viewpoint.
- Use the next spiritspring to jump east. Continue east uphill into the canyon, then turn back and take the right-hand uphill branch toward the third spiritspring. Jump east again and activate Jagged Peak Summit before entering Bayle's arena.
- Enter Bayle's arena from Jagged Peak Summit and defeat Bayle the Dread to receive his heart. This reward does not depend on summoning Igon.
- Return to Dragon's Pit Terminus and take the southern canyon from the drake basin to Grand Altar of Dragon Communion, beside the enormous dead dragon.
- Use the altar's Dragon Communion menu and exchange Heart of Bayle for Bayle's Tyranny. Bayle's Flame Lightning is the alternative; the heart cannot be duplicated and only one is available per journey.
Notes
- Requires 49 Arcane, uses two memory slots and costs 46 FP. It has no Faith requirement of its own, but you still need a usable sacred seal and that seal's requirements.
- Damage follows the casting seal's Incantation Scaling. Arcane is the entry requirement, not proof that every seal makes the spell scale only with Arcane.
- The opening burst deals Fire and Lightning damage, followed by smaller heat eruptions around the area. It has no Physical talon contact like Bayle's Flame Lightning.
- The main burst uses 325% of Incantation Scaling as Fire and 210% as Lightning before bonuses and defenses. Each later heat contact uses 50% as Fire and 20% as Lightning.
- The first burst gives 25 stance damage and each smaller heat contact 2. A target moving out of the area does not receive every later hit.
- Talisman of the Dread improves its eligible magma damage by 15% against enemies and 10% against other players. Gelmir Glintstone Staff does not boost it as a magma sorcery.
- Fire and Lightning bonuses improve their corresponding portions, with Fire contributing more to this spell. Strengthening one type does not increase every part of the combined hit.
- The long preparation and recovery need a clear opening. The eruptions can catch a group, but scenery and movement still matter; the heat is not guaranteed to pass through walls.
- Dragon Communion Seal gives its separate 15% school bonus while active. Rock Heart's timed Dragon Communion bonus adds 20%; together those give 38% more eligible damage before other bonuses.
- Flock's Canvas Talisman improves the incantation. Godfrey Icon does not because it cannot be charged, and Shard of Alexander is for weapon skills.
- Roar Medallion does not improve this spell. The presence of a dragon or a roar animation is not enough to make every Dragon Communion attack eligible.
- Heart of Bayle buys one choice at Grand Altar of Dragon Communion. Choosing this spell leaves Bayle's Flame Lightning for another journey; ordinary Dragon Hearts and remembrance duplication cannot supply a second Bayle heart.
 Incantation