Development preview — content and features are still being refined.
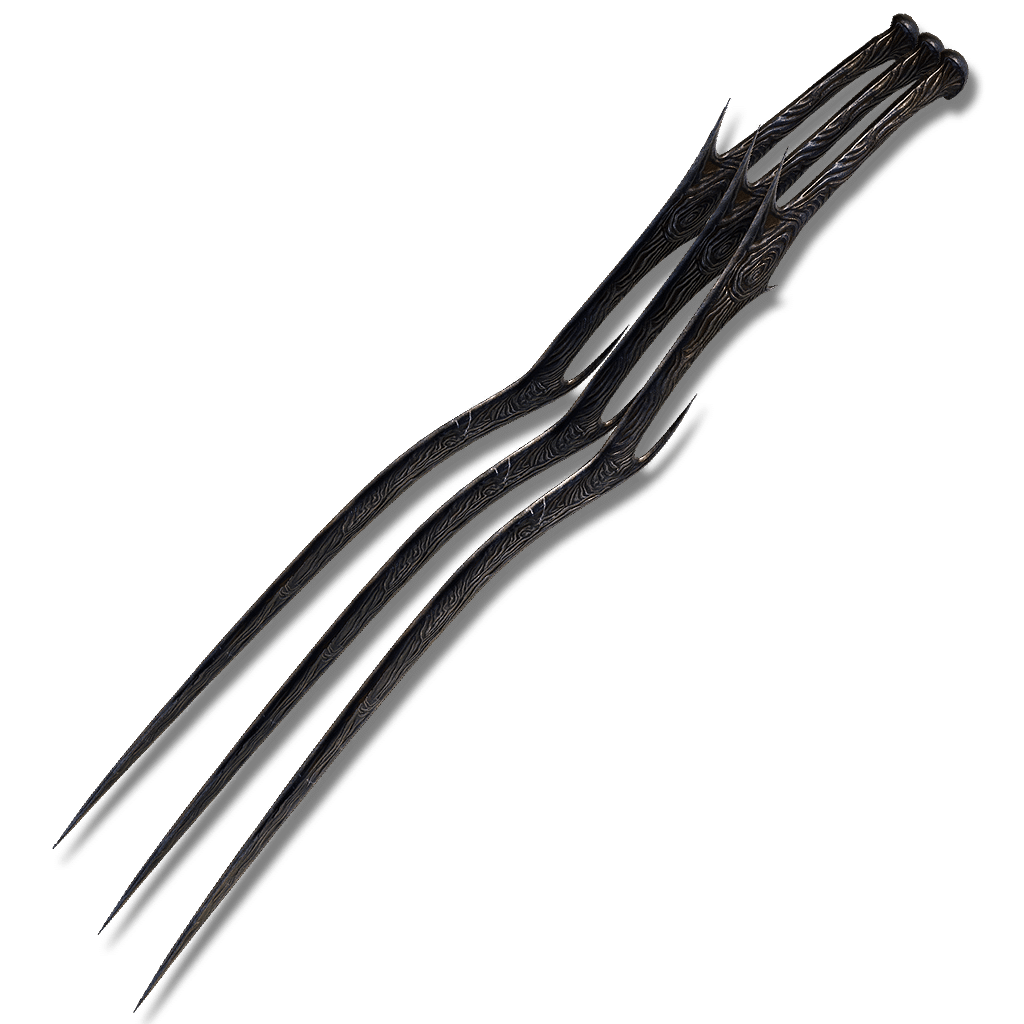 Claw
Weapons · Claw
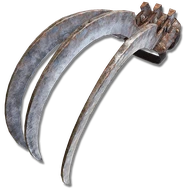
Claws of Night
Pierce / SlashSomber Smithing Stone—Unique skill
Claws of a bottomless black from which no light can escape. Wielded by Anna, Swordhand of Night.
Attack rating—At your attributes
Weight3Equip load units
Requires8Str20Dex
Passive buildup—At your attributes
Attack & scalingUpdates as you edit
In-game description
Claws of a bottomless black from which no light can escape. Wielded by Anna, Swordhand of Night.
Engraved with a smithscript enabling strong attack to launch all three claws at a target. The blades are only semicorporeal, and cannot be fully guarded against.
Skill
Scattershot (Claws)FP 11 / 11 · Unique skill
Employ smithing arts to conjure multiple copies of the claws in both hands and throw them all at once. Follow up with an additional input to throw again.
Where to find
Map pending
LocationFinger Ruins of Miyr beneath Cathedral of Manus MetyrMap location pending
Scadu Altus
Starting Site of Grace: Cathedral of Manus Metyr
Before you go
- To enter the Realm of Shadow, defeat Starscourge Radahn and Mohg, Lord of Blood, then touch the withered arm in Mohg's arena at Mohgwyn Palace.
- Progress Count Ymir's quest far enough for him to leave his throne.
- To enter the Realm of Shadow, defeat Starscourge Radahn and Mohg, Lord of Blood, then touch the withered arm in Mohg's arena at Mohgwyn Palace.
- From Highroad Cross in Scadu Altus, follow the road east to Moorth Ruins and activate the grace beside the cross.
- Pass through the large stone arch east-southeast of the grace. At the house ahead, turn left toward the leaning tower. Avoid the large open shaft behind the house, which is too deep for a direct drop.
- Find the smaller gap between the broken building and the rock wall in front of the leaning tower. Drop onto the balcony-like ledge, turn right past the dogs and follow the cave inward.
- In the open chamber at the end, take the back-left ledges down onto the lower roof. Look for the small shrine guarded by three Inquisitors and collect Golden Arcs from the chest inside.
- To continue east, drop from the lower roof to the ground and take the cave beside the building on the left. Follow it to the long ladder and climb out of the well at Bonny Village grace.
- Go east through Bonny Village, watching for the large cleaver-wielding villagers, and cross the two suspension bridges. The second brings you to Bridge Leading to the Village grace.
- Follow the road north through the woods and around its bend to Church District Highroad grace. The northern road continues toward Shadow Keep; your destination is the cathedral south of this junction.
- Follow the road south through the woods to the large cathedral in the lake. Enter through its main doors and activate Cathedral of Manus Metyr grace.
- Speak to Count Ymir on the throne and accept his guidance. He gives you the Hole-Laden Necklace and first Ruins Map. You do not need to buy a spell to receive them.
- From Castle Front, ride south to the crossroads, turn east and follow the road to the next fork. Take the right-hand dirt track, then the left fork downhill toward the southeast.
- Pass the bloodfiends and descend into the shallow poison area. Follow the lower path down toward the river rather than climbing toward the fort; watch for militia and poison traps along the descent.
- At the bottom is a shallow pool with a giant crab. Turn southwest into the opening in the cliff, continue through the cave past the Revered Spirit Ash chamber and activate Ellac River Cave grace.
- Leave by the southern cave exit and turn south along the river. Use Torrent to cross the successive rock ledges beside the waterfall, landing on the nearby rocks rather than jumping to the valley floor.
- Continue down the ledge path past the stone birds, watching for the living ones to attack. Drop down the short rock steps to Ellac River Downstream grace.
- From Downstream, continue south beside the lower falls. Cross the long rock pillar toward the east and use its far side to reach the lower water safely.
- The lower basin opens toward a Furnace Golem. Its fight is optional for reaching the coast, the friendly forager or the lightning-flower pond.
- Head through the eastern wooded side of the basin, then follow the passage southwest through the cliffs to Cerulean Coast grace. The blue-flowered field beyond confirms you have reached the coast.
- Ride south through the blue-flowered field past the huge stone coffins. Circle the Ghostflame Dragon rather than fighting if you only want the map.
- Continue south toward Cerulean Coast Cross. Before the cross, look northeast for the descending rock ledges toward the beach below, where giant Fingercreepers gather. Use the ledges rather than jumping straight from the high cliff.
- Follow the beach east to the huge stone coffin wedged between the cliffs. Ride up its sloping surface, turn left at the top and activate Finger Ruins of Rhia grace.
- Descend through the finger-shaped stones toward the hanging bell in the middle of the ruins. The wormlike enemies fire purple projectiles that bind you in place; keep the stone fingers between you and their shots as you move.
- With the Hole-Laden Necklace in your inventory, interact with the bell using Sound hanging bell. Crimson Seed Talisman +1 is awarded immediately. No boss fight is required.
- Return to Ymir at the cathedral and finish his new dialogue. Receive Beloved Stardust and Ruins Map (2nd); the talisman is his follow-up reward, separate from the Crimson Seed reward at Rhia.
- From Highroad Cross in Scadu Altus, follow the road east to Moorth Ruins and activate the grace beside the cross.
- Pass through the large stone arch east-southeast of the grace. At the house ahead, turn left toward the leaning tower. Avoid the large open shaft behind the house, which is too deep for a direct drop.
- Find the smaller gap between the broken building and the rock wall in front of the leaning tower. Drop onto the balcony-like ledge, turn right past the dogs and follow the cave inward.
- At the open chamber, use the back-left ledges to reach the lower roof. The shrine below is a landmark; its chest is optional.
- To continue east, drop from the lower roof to the ground and take the cave beside the building on the left. Follow it to the long ladder and climb out of the well at Bonny Village grace.
- Go east through Bonny Village, watching for the large cleaver-wielding villagers, and cross the two suspension bridges. The second brings you to Bridge Leading to the Village grace.
- Follow the road north through the woods to Church District Highroad grace. Take the northwestern road through the entrance tunnel and activate Church District Entrance inside Shadow Keep. This eastern entrance leads to the flooded district, rather than the main-gate Hippopotamus arena.
- Jump from the entrance ledge onto the first roof below. Follow its northwestern edge and jump from the raised roof section to the stone wall opposite, rather than taking the southwestern log platforms toward different loot.
- Follow the wall around and climb its northeastern rise. Jump to the next roof northwest, where a Fire Knight patrols. Clear it or make enough room to continue safely.
- Cross toward the next large church and jump onto the sloping stone support on your left. Walk southwest up that support to the high roof, then use the broken roof opening to drop onto the central beam below.
- Follow the beam to the adjoining upper corridor and drop through the opening in its floor onto the raised church passage. Stay above the water and continue northwest; the Prayer Room door is a separate side destination.
- Pass the small side room holding a Rune of an Unsung Hero and continue into the corridor patrolled by two Fire Knights. The first left exit leads toward the drainage wheel, while the later left exit leads to the Storehouse lift.
- Take the later left exit in the Fire Knight corridor, cross to the lift and ride it up into the rear storehouse. Use the doorway on the left to reach Storehouse, Back Section grace. The earlier left exit goes to the drainage wheel instead.
- Go west across the small wooden bridge and climb the ladder on its right. At the top, go east up the stone stairs, watching the Fire Knight above.
- Continue northeast past the bookshelves toward the room with Fire Serpent. Use the hole in the southern wall, turn right outside and climb the wooden walkway and stairs to Storehouse, Loft grace.
- From Storehouse, Loft, ride the small northern lift up to the rafters. Go west-northwest across the beams toward the ladder, clearing the bat before you climb.
- At the upper level, follow the beams southwest around the central support, then look east toward the huge suspended wooden gear. Clear the next bat before lining up the drop.
- Drop onto the huge suspended gear, then make a running jump to the adjoining beam and climb its ladder. The spell on the gear is optional; do not jump toward the distant floor below.
- Clear the Fire Knight by the upper lift platforms. Instead of using the opposite-moving interior cages for the hidden Spirit Ash, find the nearby ladder on the western side and climb down.
- At the bottom, go around the corner toward the second ladder northeast of the first. Clear the bat before climbing down, then go through the doorway to the outside.
- Take the exterior lift on the right down. Follow the wooden walkway and stairs southeast to the large stone lift, then ride it down to Shadow Keep, Back Gate grace.
- If you still need O Mother, return to Bonny Village. Cross the dry riverbed into its eastern half and go north to the headless statue beneath the tree near the cliff. Collect the gesture from the corpse at its base, then return to Back Gate.
- At Back Gate, enter the small room southeast of the grace rather than walking out into the Gaius arena. Perform O Mother directly in front of Marika's statue. It moves to reveal the passage to Hinterland grace.
- Follow the road east through Hinterland, passing the two Tree Sentinels if you do not want to fight. Cross Hinterland Bridge and continue toward Fingerstone Hill. Shaman Village is a separate side path.
- Descend southeast into Finger Ruins of Dheo. Use the tall stone fingers as cover from the purple binding projectiles and work toward the hanging bell at the center.
- With the Hole-Laden Necklace in your inventory, use Sound hanging bell. Cerulean Seed Talisman +1 is awarded here. Neither Messmer nor Commander Gaius is required for this route.
- Return to Ymir at Cathedral of Manus Metyr after sounding Dheo's bell. Finish his new dialogue to receive Ruins Map (3rd).
- Rest or reload the cathedral until Ymir leaves his throne. Examine the throne to reveal the hidden ladder and climb down to Finger Ruins of Miyr.
- Follow the underground path north toward the hill with the hanging bell. Defeat Swordhand of Night Anna when she invades; her reward is Claws of Night.
Notes
- Both physical and Magic damage scale with Dexterity. Intelligence does not improve the Magic part, and raising Strength above the requirement does not add damage through attribute scaling.
- Requires 8 Strength and 20 Dexterity, weighs 3.0 and has a critical rating of 110. One copy supplies both claws when two-handed.
- Heavy attacks throw the claws instead of using the ordinary claw heavy attack. They offer a ranged option without consuming arrows or bolts, but their damage falls off at greater distance.
- Press dodge while charging a heavy attack to perform its feint. This gives the weapon another way to attack while retreating, rather than committing to the full charged throw.
- The fixed Scattershot skill throws a spreading fan of claws for 11 FP. Use the skill again for a second throw costing another 11 FP. Close targets can be struck by more of the spread.
- The skill's physical damage is Pierce. Its individual projectiles lose damage at longer range, and the current skill does not cause a headshot stun against other players.
- Has 45 innate Blood Loss buildup. Arcane does not raise that value because these claws have no Arcane scaling; a susceptible enemy must still receive enough buildup to bleed.
- Some damage passes through an enemy's guard. This is partial guard bypass, not a guarantee that every shield user receives the same damage as an unguarded target.
- Smithing Talisman strengthens the thrown heavy attacks, and Axe Talisman strengthens their fully charged version. Shard of Alexander strengthens the skill; those are different attack categories.
- Upgrade with Somber Smithing Stones to +10. The skill and affinity cannot be changed, and grease or weapon enchantments cannot be applied.
- Defeating Anna below the cathedral awards the claws. Jolán's later Iris choice is a separate reward, and you do not need to defeat Metyr to collect this weapon.
Related Equipment
Advertisement
Reserved · 300 × 250