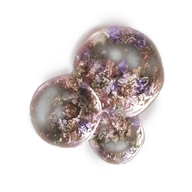
Reference values
- Type
- Crystal Tear
- FP cost
- 0
- Maximum held
- 1
- Maximum stored
- 1
- Consumed when used
- No
About this item
Temporarily increases damage dealt by summoned spirits for three minutes.
It improves the spirit's attacks rather than increasing the damage of your own equipped weapon.
You still need a valid summoning area, the Spirit Calling Bell and enough FP or HP for the Spirit Ash you choose.
Technical details
- category: Crystal Tear
- dlc:
- effects: None recorded
- fp cost: 0
- id: 2011060
- is consumed: No
- max held: 1
- max stored: 1
In-game description
A crystal tear formed slowly over the ages, where the scattered sap of the Scadutree pools deep within the furnace golems.
Can be mixed in the Flask of Wondrous Physick.
The resulting concoction temporarily increases the attack power of spirits.
Where to find
Armored Furnace Golem on the western cliffs
Charo's Hidden Grave
Starting Site of Grace: Charo's Hidden Grave
Before you go
- Enter the Realm of Shadow after defeating Starscourge Radahn and Mohg, Lord of Blood, then touch the withered arm in Mohg's arena.
- For Hefty Furnace Pots, collect Greater Potentate's Cookbook [2] at Run-Down Traveler's Rest below Ellac Greatbridge. Each pot needs an empty Hefty Cracked Pot, two Redflesh Mushrooms, two Embers of Messmer and one Furnace Visage.
- From Castle Front, follow the road southeast toward Pillar Path Waypoint. At the fork, use the lower road toward Igon rather than climbing to the Suppressing Pillar.
- Continue south-southwest past the broken dragon statues. An Ancient Dragon-Man invades along this approach. The cave entrance is on the left near the end of the path, marked by a fire.
- Activate Dragon's Pit grace and follow the lit passage down. Watch for skeletons below the first ledge and around the next corner. Strike their glowing remains after knocking them down to stop them getting back up.
- In the large cavern with the pillars, follow the left-hand ledge down and take the passage beside the distant crossbow skeleton. Continue onto the sloping stairs in the next chamber.
- Take the downward route toward the large altar and pit. The stairs going up lead to an optional Magma Wyrm; that fight is not needed to reach the exit.
- At the bottom, approach the message beside the deep chasm. Walk straight off this lowest ledge into the pit to land safely by the boss mist. Do not jump from the higher rooms or aim toward the side walls.
- Defeat the Ancient Dragon-Man behind the mist. Open the large doors at the back of the arena instead of using the return-to-entrance exit, then follow the tunnel to Dragon's Pit Terminus grace.
- Leave Dragon's Pit Terminus and descend to the lake bed with a Jagged Peak Drake. You can ride past the drake; follow the southern canyon toward the enormous dead dragon.
- Pass the dragon statues and emerge beside the ruined structure north of Grand Altar of Dragon Communion. The huge stone bowl and dead dragon identify the altar.
- At the altar, head west over the dead dragon and continue west-southwest toward the red flowers. This leads into the upper hidden grave, not the blue-flowered coast below.
- The entrance meets the lowest section of a shallow river. The river climbs northwest through several pools separated by small waterfalls.
- Continue northwest up the river past the Mariner pools. At the upper end, follow the red-flowered trail on the western bank to Charo's Hidden Grave grace.
- Continue northwest to Charo's Hidden Grave, then head west beyond its grace to the armored Furnace Golem.
- Use the spiritspring beside the western cliffs to get above its basket. Throw Hefty Furnace Pots into the open top until the golem dies and awards the tear.
Notes
- Temporarily increases damage dealt by summoned spirits for three minutes.
- It improves the spirit's attacks rather than increasing the damage of your own equipped weapon.
- You still need a valid summoning area, the Spirit Calling Bell and enough FP or HP for the Spirit Ash you choose.
- This is separate from the permanent Spirit Ash upgrades performed by Roderika.
- Rest at a Site of Grace and choose Mix Wondrous Physick to use this tear. Drinking the flask uses its charge; resting refills it without consuming the tear.
- The spirit-damage increase is 7.5%. It does not raise the spirit's upgrade level, give it more HP or remove the area restrictions on summoning.
- The 7.5% bonus applies to the spirit’s damage, including a suitable Mimic Tear summon. It is different from assuming every ordinary Physick effect on you is copied onto the mimic.
- Use it as part of the summoning preparation for a fight. It does not enable a second summon after the first has died or extend the area where summons are allowed.
- It does not heal an already injured spirit. Healing support and Revered Spirit Ash Blessing remain separate from this temporary damage effect.
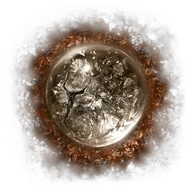
 Crystal Tear