Development preview — content and features are still being refined.
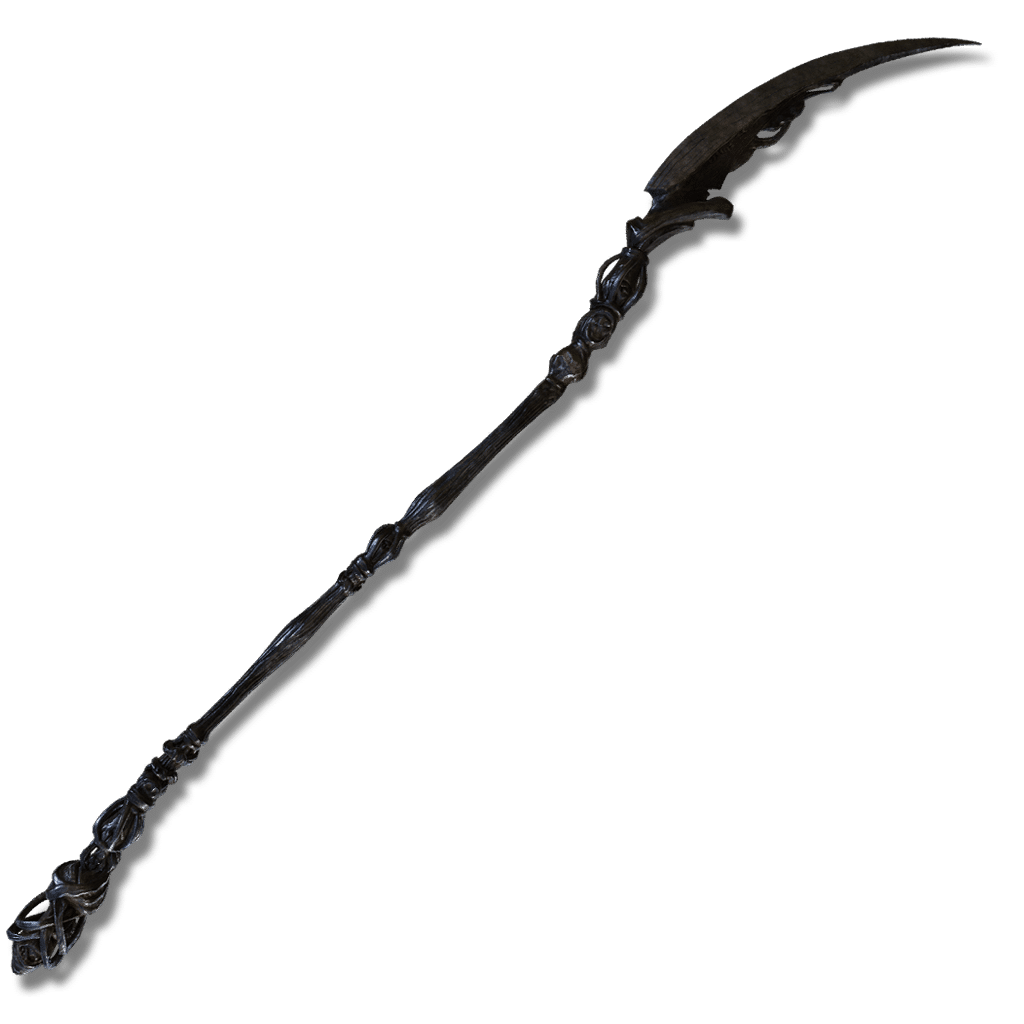 Halberd
Weapons · Halberd
Spirit Glaive
Pierce / SlashSomber Smithing Stone—Unique skill
Sharp blade sculpted into a twisted shape. A glaive that has seen many years of use in the gravesite.
Attack rating—At your attributes
Weight6.5Equip load units
Requires14Str17Dex16Int
Passive buildup—At your attributes
Attack & scalingUpdates as you edit
In-game description
Sharp blade sculpted into a twisted shape.
A glaive that has seen many years of use in the gravesite.
Said to serve as a medium for communion with spirits.
Skill
Rancor SlashFP 12 / 12 · Unique skill
Spin around, slashing foes while summoning vengeful spirits which chase down foes. Additional input allows for a follow-up attack.
Where to find
Map pending
LocationCorpse at the end of the northern path between Gravebird statuesMap location pending
Charo's Hidden Grave
Starting Site of Grace: Charo's Hidden Grave
Before you go
- To enter the Realm of Shadow, defeat Starscourge Radahn and Mohg, Lord of Blood, then touch the withered arm in Mohg's arena at Mohgwyn Palace.
- Reach Charo's Hidden Grave through Dragon's Pit and the Grand Altar of Dragon Communion.
- From Castle Front, follow the road southeast toward Pillar Path Waypoint. At the fork, use the lower road toward Igon rather than climbing to the Suppressing Pillar.
- Continue south-southwest past the broken dragon statues. An Ancient Dragon-Man invades along this approach. The cave entrance is on the left near the end of the path, marked by a fire.
- Activate Dragon's Pit grace and follow the lit passage down. Watch for skeletons below the first ledge and around the next corner. Strike their glowing remains after knocking them down to stop them getting back up.
- In the large cavern with the pillars, follow the left-hand ledge down and take the passage beside the distant crossbow skeleton. Continue onto the sloping stairs in the next chamber.
- Take the downward route toward the large altar and pit. The stairs going up lead to an optional Magma Wyrm; that fight is not needed to reach the exit.
- At the bottom, approach the message beside the deep chasm. Walk straight off this lowest ledge into the pit to land safely by the boss mist. Do not jump from the higher rooms or aim toward the side walls.
- Defeat the Ancient Dragon-Man behind the mist. Open the large doors at the back of the arena instead of using the return-to-entrance exit, then follow the tunnel to Dragon's Pit Terminus grace.
- Leave Dragon's Pit Terminus and descend to the lake bed with a Jagged Peak Drake. You can ride past the drake; follow the southern canyon toward the enormous dead dragon.
- Pass the dragon statues and emerge beside the ruined structure north of Grand Altar of Dragon Communion. The huge stone bowl and dead dragon identify the altar.
- At the altar, head west over the dead dragon and continue west-southwest toward the red flowers. This leads into the upper hidden grave, not the blue-flowered coast below.
- The entrance meets the lowest section of a shallow river. The river climbs northwest through several pools separated by small waterfalls.
- Continue northwest up the river past the Mariner pools. At the upper end, follow the red-flowered trail on the western bank to Charo's Hidden Grave grace.
- From Charo's Hidden Grave grace, pass northwest under the stone arch into the flooded graveyard. Turn right toward the eastern bank, keeping away from the centre if you want to avoid the Death Rite Bird.
- Follow the eastern shore beneath the cliff overhang. Beyond the northern gaol branch, look for the rising path between the inactive Gravebird statues.
- Climb that path north to the corpse at its end and collect Spirit Glaive. The lower side path leads to a crafting-material pickup, not the weapon.
Notes
- Requires 14 Strength, 17 Dexterity and 16 Intelligence and weighs 6.5. Its physical damage scales more strongly with Dexterity than Strength; Intelligence increases its separate Magic damage.
- Its normal hits deal both Physical and Magic damage. The weapon does not have innate Frostbite buildup on its ordinary attacks.
- Rancor Slash costs 12 FP to move forward with two spinning slashes and release pursuing spirits. Press the strong-attack input for the extra follow-up, which costs another 12 FP.
- The blade strikes use the weapon's attack power. The pursuing skulls deal Magic damage that scales with Intelligence and weapon upgrade level, so Dexterity investment does not improve every part of the skill in the same way.
- Each skull applies 30 Frostbite buildup. Let the skulls reach the target before deciding the attack missed; they can connect after the blade swings have finished.
- The follow-up keeps you committed to another attack. Use it when the enemy leaves an opening rather than automatically extending every skill use.
- Shard of Alexander can improve the skill's damage. Godfrey Icon does not apply because Rancor Slash cannot be charged, and neither talisman raises its Frostbite buildup.
- Upgrade it with Somber Smithing Stones to +10. Rancor Slash is fixed; compatible Ashes of War, grease and outside weapon enchantments cannot be applied to this weapon.
- The weapon is a corpse pickup. You do not need to defeat the nearby Death Rite Bird, the Tibia Mariner or the boss in Lamenter's Gaol to collect it.
Related Equipment
Advertisement
Reserved · 300 × 250