Reference values
- Type
- Essential
- FP cost
- 0
- Maximum held
- 10
- Consumed when used
- Yes
About this item
Consumes one shard to restore 2 FP per second for 60 seconds, up to about 120 FP if none is wasted at your maximum. It costs no FP to use and is gradual recovery rather than an instant Cerulean flask.
The effect follows you after using the shard. You do not have to stay beside the original pickup or a glowing stone on the ground.
It can keep working while you spend FP on spells or skills. Using it while already at full FP wastes recovery ticks until you spend enough FP to make room.
Technical details
- category: Essential
- dlc:
- effects:
- Entry 1:
- attribute: Focus Points
- duration: 60
- model: additive
- tick interval: 1
- type: positive
- value: 2
- fp cost: 0
- id: 1290
- is consumed: Yes
- max held: 10
In-game description
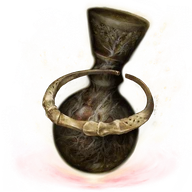
An ephemeral sliver that gives off a pale blue glow.
What remains of a passing flash of starlight.
Use to gradually recover FP.
A prized item that was once used in the Eternal City as an ingredient in intoxicating draughts.
Where to find
Stone astrolabe southwest of Stormhill Shack
Limgrave
Starting Site of Grace: Stormhill Shack
- Follow the road up through Stormgate to Stormhill Shack.
- From the shack, head southwest across the high ground toward the cliff edge.
- Look for the large stone bowl or astrolabe facing the sky. Pick up the Starlight Shard beside it.
- Collect the glowing item beside the stone bowl. This is a fixed pickup, so returning after a rest does not provide another copy from the same bowl.
Cathedral of Manus Celes cluster
Liurnia of the Lakes
Starting Site of Grace: Moonlight Altar
Before you go
- Complete Ranni’s underground route far enough to reach Moonlight Altar.
- Start at Caria Manor in northwestern Liurnia. Defeat Royal Knight Loretta and enter Three Sisters behind the manor. Visit Ranni at the top of Ranni's Rise and agree to serve her. Speak to the spirits downstairs, then return to Ranni to finish the conversation.
- Defeat Starscourge Radahn at Redmane Castle. Return to southern Mistwood and find the new crater near Fort Haight, marked by floating rocks. Descend using its ledges and enter Nokron, Eternal City.
- Work across Nokron's rooftops to the streets and continue to Mimic Tear. Defeat it and cross the long bridge beyond its arena. Leave the bridge on the left into the woods, then follow the cliff to Ancestral Woods grace.
- Jump from the cliff beside that grace onto the roof below. Follow the rooftops and narrow building ledges into Night's Sacred Ground. Continue across the broken stone arch into the church, descend inside, and leave onto the lower street. Follow that street to the enormous seated figure and open the chest underneath it for Fingerslayer Blade.
- Return the blade to Ranni at her tower. Before doing this, finish any remaining Seluvis rewards you want. Rest after speaking to Ranni, then visit Renna's Rise, the northern tower in Three Sisters. Climb it and use the sending gate to Ainsel River Main.
- Collect Miniature Ranni from the coffin near where you arrive. Rest at Ainsel River Main and select Talk to miniature Ranni repeatedly until she answers. Finish her dialogue.
- Follow the river through Uhl Palace Ruins, using cover against the hanging creature's projectiles. Continue through the ant tunnel to Nokstella. Follow the river at ground level through the city and take the lift in the small building at the far end to Nokstella Waterfall Basin.
- Go through the cave beyond Waterfall Basin and defeat the Baleful Shadow in the open red-lit area. Ranni gives you Discarded Palace Key. Return to Raya Lucaria Grand Library, where you defeated Rennala, and unlock the chest beside her for Dark Moon Ring.
- Return to the Baleful Shadow area and take the lift beyond it to Lake of Rot. Bring a way to remove Scarlet Rot. Cross toward the southwestern entrance to Grand Cloister, stepping on the raised platforms' switches to create places to stop.
- At Grand Cloister, descend the stone ledges to the lower floor. Watch for the Pests below. Follow the water left to the coffin beside the waterfall and choose to rest in it.
- Defeat Astel, Naturalborn of the Void, then pass through the sealed exit with Dark Moon Ring in your inventory. Take the lift up to Moonlight Altar.
- From the lift exit on Moonlight Altar, follow the plateau northeast to Cathedral of Manus Celes. Glintstone Dragon Adula guards the approach; defeat it or reach the cathedral safely.
- Search the cathedral’s floor and immediate surroundings for the Starlight Shards. These are individual pickups, separate from the quest interaction below the broken floor.
Notes
- Consumes one shard to restore 2 FP per second for 60 seconds, up to about 120 FP if none is wasted at your maximum. It costs no FP to use and is gradual recovery rather than an instant Cerulean flask.
- The effect follows you after using the shard. You do not have to stay beside the original pickup or a glowing stone on the ground.
- It can keep working while you spend FP on spells or skills. Using it while already at full FP wastes recovery ticks until you spend enough FP to make room.
- Using another shard does not multiply the recovery rate. Plan around one ongoing 2-FP-per-second effect instead of consuming several for a sudden refill.
- Can carry 10, with additional copies kept in storage. A Cerulean flask, Sacred Tear upgrade or casting-tool upgrade does not change the shard's fixed recovery rate.
- Seluvis uses the same shards as puppet currency. Keep the copies needed for the puppets you want before spending your early supply on recovery.
- Amber Starlight is a different quest item and cannot replace ordinary Starlight Shards for either FP recovery or puppet purchases.
- Fixed astrolabe pickups do not return when you rest. Cathedral of Manus Celes has a larger cluster later in Ranni's route, on the Moonlight Altar plateau rather than the lower lake floor.
- The Moonlight Altar route gives a later cluster around Cathedral of Manus Celes. Reaching the cathedral from the lower Liurnia map requires Ranni’s quest and the lift beyond Astel.
- A selected fixed pickup is the safest early supply to plan around. Ordinary astrolabe copies do not return after resting, and using them for FP removes the same copies you could spend on puppets.
- The effect restores FP, not flask charges. It cannot make a greyed-out spell usable until enough FP has actually recovered for that spell’s cost.
 Essential