Reference values
- Type
- Ashes of War
- Default affinity
- Standard
- FP cost
- 0 FP
- Light follow-up
- 13 FP
- Heavy follow-up
- 13 FP
- Skill
- Igon's Drake Hunt
About this Ash of War
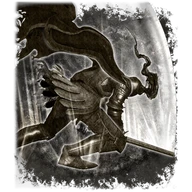
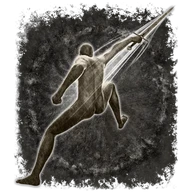
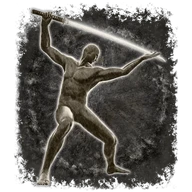
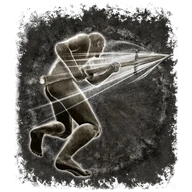
Hold the skill input to ready the greatbow, then press a light or heavy attack to fire from the corresponding ammunition slot. Entering the stance costs no FP; each empowered shot costs 13 FP and one greatarrow.
The shot uses 155% of the weapon's attack power before defenses and other modifiers. Its damage follows the equipped bow and ammunition, rather than a separate Faith or Arcane spell scaling.
Holding the stance longer does not charge the shot for more damage. Godfrey Icon does not boost it.
Technical details
- Skill ID
- 4210
- Default affinity
- Standard
- Armament categories
- Greatbow
- Recorded affinities
- Standard
- useMagicPoint_L2
- 0
- useMagicPoint_R1
- 13
- useMagicPoint_R2
- 13
In-game description
This Ash of War grants no affinity to an armament, but imparts the following skill:
"Igon's Drake Hunt: Skill of Igon, drake warrior. Ready the bow before unleashing a twisted shot with a great bellow that considerably enhances its power."
Usable on greatbows.
Where to find
Igon's quest reward attached to his greatbow
Jagged Peak
Starting Site of Grace: Foot of the Jagged Peak
Before you go
- Summon Igon during the successful Bayle attempt.
- From Castle Front, follow the southeast road toward Pillar Path Waypoint. Take the lower branch toward Igon, speak to him beside the road and leave him alive.
- Continue south-southwest past the broken dragon statues. An Ancient Dragon-Man invades along this approach. The cave entrance is on the left near the end of the path, marked by a fire.
- Activate Dragon's Pit grace and follow the lit passage down. Watch for skeletons below the first ledge and around the next corner. Strike their glowing remains after knocking them down to stop them getting back up.
- In the large cavern with the pillars, follow the left-hand ledge down and take the passage beside the distant crossbow skeleton. Continue onto the sloping stairs in the next chamber.
- Take the downward route toward the large altar and pit. The stairs going up lead to an optional Magma Wyrm; that fight is not needed to reach the exit.
- At the bottom, approach the message beside the deep chasm. Walk straight off this lowest ledge into the pit to land safely by the boss mist. Do not jump from the higher rooms or aim toward the side walls.
- Defeat the Ancient Dragon-Man behind the mist. Open the large doors at the back of the arena instead of using the return-to-entrance exit, then follow the tunnel to Dragon's Pit Terminus grace.
- From Dragon's Pit Terminus, descend to the first drake's lake bed. Use the northeastern archway and follow the path uphill as it bends southeast. The drake fight is optional.
- Continue along the narrow cliff path until you reach a spiritspring on the east side. This is the first spiritspring on the ascent, before the bridge to Foot of the Jagged Peak.
- Use the spiritspring to jump east, then cross the bridge south-southeast and activate Foot of the Jagged Peak grace.
- From Foot of the Jagged Peak, follow the southern path uphill to the two fighting drakes. Defeat the one with the boss health bar, then speak to Igon just beyond the battlefield until he gives you his Furled Finger.
- Take the eastern canyon, climb using the next two spiritsprings and follow the valley uphill. Two boulders roll down the slope ahead; use the rocks on the right for cover before continuing.
- At the top of the boulder slope, turn east-northeast toward Ancient Dragon Senessax. You can ride past the dragon and take the northern uphill exit instead of fighting.
- Climb past the dead dragons to Jagged Peak Mountainside grace. Lightning strikes along the upper mountain, so move away from the marks that appear on the ground.
- From Mountainside grace, climb southwest and use the spiritspring. Follow the narrow upper path southwest, jumping the gaps and avoiding the lightning marks.
- Use the next spiritspring to reach the upper cave. Follow the rising passage and use the final spiritspring to reach Jagged Peak Summit grace.
- Enter Bayle's arena southeast of the summit. His gold summon sign is inside, near the entrance. Summon Igon during the attempt in which you defeat Bayle if you want the special Ash on his reward bow. He does not need to survive the fight.
- Return to Foot of the Jagged Peak and climb back toward the two-drake battlefield. Loot Igon where he gave you his finger for his greatbow, regular armor and bell bearing. The special Ash is attached to the bow when you completed the required summon.
- At a grace or Hewg, open Ashes of War to remove or transfer Igon's Drake Hunt from the greatbow. It is an applied Ash, not an additional loose pickup on the ground.
Notes
- Hold the skill input to ready the greatbow, then press a light or heavy attack to fire from the corresponding ammunition slot. Entering the stance costs no FP; each empowered shot costs 13 FP and one greatarrow.
- The shot uses 155% of the weapon's attack power before defenses and other modifiers. Its damage follows the equipped bow and ammunition, rather than a separate Faith or Arcane spell scaling.
- Holding the stance longer does not charge the shot for more damage. Godfrey Icon does not boost it.
- The accompanying bellow can stagger nearby eligible enemies and pressure a raised guard, but it is not a second damaging dragon-breath spell. Roar Medallion does not boost this skill despite the shout.
- Shard of Alexander increases the skill's damage by 15%. Matching-ammunition bonuses from Igon's Greatbow and the harpoon's dragon bonuses have their own conditions.
- Can be used on compatible Greatbows with Standard affinity. Greatbows with fixed skills cannot use it, and it cannot be applied to Light Bows, ordinary Bows or ballista weapons.
- Receive it attached to Igon's quest-reward bow after summoning him during the successful Bayle attempt. His sign is inside the arena; owning the finger without using the sign is not enough.
- Igon does not need to survive as a summon. Killing him early or defeating Bayle without the required summon can leave you without this Ash for the journey.
 Ashes of War