Reference values
- Type
- Spirit Ashes
About this spirit
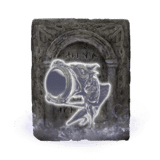
Costs 60 FP and summons one small cannon-mouthed Imp. It is smaller than the giant Imp guarding the route to the chest.
Its shells provide ranged explosive support and can knock down susceptible enemies. Large bosses do not necessarily react like smaller humanoids.
Summon it with a clear view of the fight. Walls, low ceilings and other obstructions can stop its shells before they reach the target.
Technical details
Separate summoning cost and upgrade fields are not recorded for this spirit. The description and notes contain the reviewed information.
In-game description
Ashen remains in which spirits yet dwell. Use to summon the spirit of a large-mouthed imp.
The spirit of this old imp, said to be fashioned after a dragon, has a big mouth that serves as a cannon and allows it to fire shells from the rear of the battlefield.
Where to find
Chest behind the giant cannon Imp in Darklight Catacombs
Scadu Altus
Starting Site of Grace: Darklight Catacombs
- To enter the Realm of Shadow, defeat Starscourge Radahn and Mohg, Lord of Blood, then touch the withered arm in Mohg's arena at Mohgwyn Palace.
- For the main Shadow Keep approach, defeat the Golden Hippopotamus and activate Main Gate Plaza grace. Follow the left-hand route through the keep to the upper courtyard lined with burning boats. Watch for the Militiamen hiding beside them.
- At the southeastern end of the boat courtyard, find the ladder beside the outer railing and descend to the water. Walk behind the waterfall and take the second ladder down to the painting room.
- Strike the false wall beside the Domain of Dragons painting. Follow the revealed passage and rest in the stone coffin to arrive at Castle Watering Hole.
- Head south past Ruins of Unte, avoiding the active Furnace Golem. Follow the eastern, left-hand cliff beside the waterfall to Recluses' River Upstream grace.
- Continue south along the cliff ledges. Where the route changes sides, jump across to the western, right-hand bank and follow it down to Recluses' River Downstream grace. Clear nearby Man-Flies before attempting the drops.
- Use the large gravestones projecting from the cliff to descend to the river below, then continue south to the next descent. Take the lower gravestones one at a time to the wooded valley filled with stone coffins.
- Follow the valley's eastern cliff, keeping the wall on your left, to the catacomb doors marked by two pale flames. Enter Darklight Catacombs and ride the entrance lift to its grace. Bring a lantern or torch.
- From the dungeon grace, take the right-hand doorway beside the Yellow Fulgurbloom. Follow the descending stairs through the Imp rooms. At the lower doorway, deal with the cannon-mouthed Imp before crossing its line of fire.
- The passage behind the stairs leads to the first light-switch lever. Pull it to make the ledges easier to see, then return through the cannon Imp's doorway to the balcony.
- For the main route, take the balcony's left-hand doorway, pass the sorcerer room and descend the ramp to the first internal stone lift. Ride it down. This is separate from the lift at the dungeon entrance.
- In the next main room, take the stairs on the right and follow the left railing toward the next staircase. Look for the narrow broken section at the top of those stairs.
- Look down through the gap and drop carefully onto the thin ledge below. Turn back toward the doorway in the wall instead of dropping into the pit.
- Enter the guarded armor room, then take its ladder down beside the sorcerer. Go through the next door, watching for another sorcerer on the right, and drop to the lower room. Continue east to the next descending lift.
- The next chamber has an enormous cannon Imp on a raised platform. Use pillars for cover while approaching the platform's base, where its shots cannot reach directly beneath it. Clear the smaller Imps nearby.
- From the platform's base, run north to the side doorway and pull the lever inside. This turns on the lights and lowers the giant Imp's platform.
- Return and defeat the giant Imp, then drop from the southern side of its lowered platform onto the ledge behind it. Enter the small room and open the chest for Bigmouth Imp Ashes. The giant Imp's upgrade-material drop is separate from these ashes.
- The room's ladder and tunnel return you toward the main stairway. You do not have to defeat Jori to collect the ashes.
Notes
- Costs 60 FP and summons one small cannon-mouthed Imp. It is smaller than the giant Imp guarding the route to the chest.
- Its shells provide ranged explosive support and can knock down susceptible enemies. Large bosses do not necessarily react like smaller humanoids.
- Summon it with a clear view of the fight. Walls, low ceilings and other obstructions can stop its shells before they reach the target.
- It is less suited to chasing a fast enemy across the arena. Keep the fight where its firing position remains useful instead of expecting it to replace a mobile melee summon.
- Upgrade it with Grave Glovewort. The cannon does not consume your own ammunition inventory.
- Lower the giant cannon Imp's platform in Darklight Catacombs, then take the lower ledge to the chest behind it. Jori is optional for these ashes.
- Its explosions can interrupt or knock down smaller targets, but do not guarantee that a boss will stagger. Keep enemies away from its firing position when possible.
 Spirit Ashes