Reference values
- Type
- Spirit Ashes
- Summoning cost
- 77 FP
- Upgrade material
- Grave Glovewort
About this spirit
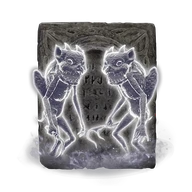
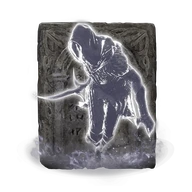
Costs 77 FP and summons two Claymen using bubble sorceries. Both share one summoning cost and upgrade level.
Their bubbles deal magic damage, including a larger projectile with an area-damage role. They are not a fast physical-melee summon despite carrying close-range weapons.
The bubbles and the casters move slowly. A clear firing lane and a target occupied elsewhere give them more time to contribute.
Technical details
- FP Cost
- 77
- HP Cost
- 0
- Upgrade Material
- Grave Glovewort
- Type
- Spirit Ashes
In-game description
Ashen remains in which spirits yet dwell.
Use to summon the spirits of two claymen.
Bowed with age, these spirits are sluggish but hard to stagger.
The warped remains of priests who searched for revelation in service of the ancient dynasty, they employ two sorceries that produce smaller and larger bubbles.
Where to find
Corpse beside the upper Uhl Palace waterfall
Ainsel River Main
Starting Site of Grace: Ainsel River Main
- Reach the western Liurnia road and follow it north through Kingsrealm Ruins. Strike the illusory wall blocking the road at the northern end, then continue past Iji at Road to the Manor.
- Ride toward the large manor while avoiding the magical strikes falling along the approach. Activate Main Caria Manor Gate grace at the entrance.
- Inside, follow the courtyard path northwest toward the building in the far corner. Fingercreepers hide among the plants and beneath the ground; do not stop on a buried hand.
- Enter the building with the seated spirit and climb its stairs to Manor Lower Level grace.
- Take the elevated walkways east and continue straight along the main route at the first junction. Spectral soldiers appear along the bridges. Reach the far building and take its lift up to Manor Upper Level.
- Leave the upper grace, pass the wolves in the garden and climb the main stone stairway toward the Troll Knight and sorcerers.
- Continue up the stairs beyond the troll and Pages to the large circular courtyard. Defeat Royal Knight Loretta, then activate Royal Moongazing Grounds grace.
- Leave through the rear exit into Three Sisters. Ranni's Rise is the western tower; climb to Ranni and agree to serve her.
- Speak to the servant projections downstairs, including Seluvis, then return to finish Ranni's conversation. Go to Seluvis's Rise, the tower southwest of hers.
- Defeat Starscourge Radahn at the Radahn Festival in Redmane Castle. His defeat opens the starfall crater in Limgrave; it is not the sealed Siofra River overlook reached from the Four Belfries.
- Return to the Mistwood near Fort Haight and find the new crater marked by floating rocks. Use the descending ledges and openings to enter Nokron, Eternal City.
- Follow the rooftops down into Nokron's streets, then continue to the Mimic Tear boss. Defeat it and cross the long bridge beyond the arena.
- Leave the bridge on the left where it opens into woodland. Follow the western cliff to Ancestral Woods grace, overlooking the lower rooftops.
- From beside the grace, drop to the roof below. Follow the roofs and narrow building ledges, fighting or avoiding the Silver Tears, until you can cross the broken stone arch into the large church.
- Descend to the church's lower floor and watch the enormous rolling ball. Leave through the main doorway and go down to Night's Sacred Ground grace.
- Follow the lower street past the Silver Tears toward the enormous seated skeleton. Climb the stairs below its throne and open the chest for Fingerslayer Blade. The nearby locked side room for Mimic Tear Ashes is not needed for this chest.
- Return the blade to Ranni at her tower. Before doing this, finish any remaining Seluvis rewards you want. Rest after speaking to Ranni, then visit Renna's Rise, the northern tower in Three Sisters. Climb it and use the sending gate to Ainsel River Main.
- At Ainsel River Main, activate the grace and follow the river south into the open Uhl Palace ruins. Use the walls for cover from the hanging creature's stone volleys.
- Before taking the ant tunnel toward Nokstella, search the southeastern edge of this upper area. Loot the corpse at the top of the waterfall for Clayman Ashes.
- Stay on the upper waterfall ledge rather than jumping to the lower river. The ordinary Ainsel River Well enters the lower region and does not give this approach.
Notes
- Costs 77 FP and summons two Claymen using bubble sorceries. Both share one summoning cost and upgrade level.
- Their bubbles deal magic damage, including a larger projectile with an area-damage role. They are not a fast physical-melee summon despite carrying close-range weapons.
- The bubbles and the casters move slowly. A clear firing lane and a target occupied elsewhere give them more time to contribute.
- Fast targets can move past their projectiles or rush the Claymen before they finish casting. Their slow pursuit makes them less suited to chasing a mobile enemy around a large arena.
- Upgrade the group with Grave Glovewort rather than Ghost Glovewort.
- The corpse is beside the upper Uhl Palace waterfall in Ainsel River Main. The ordinary Ainsel River Well enters the lower section and does not provide this approach.
- They cast Oracle Bubbles and Great Oracular Bubble. Their blue projectiles deal Magic damage, rather than gaining a different damage type from your equipped weapon.
- Their resistance to lighter interruptions does not make them immune to being knocked down. The slow projectile and casting animations remain a limitation against fast enemies.
- Upgrades through Roderika to +10 with Grave Glovewort, finishing with a Great Grave Glovewort. Reinforcement does not increase the summoning payment.
- Requires Spirit Calling Bell and an area where the rebirth-monument icon allows summoning. The ash remains reusable, but you cannot repeatedly replace fallen spirits during the same encounter.
 Spirit Ashes