Reference values
- Type
- Spirit Ashes
- Summoning cost
- 66 FP
- Upgrade material
- Grave Glovewort
About this spirit
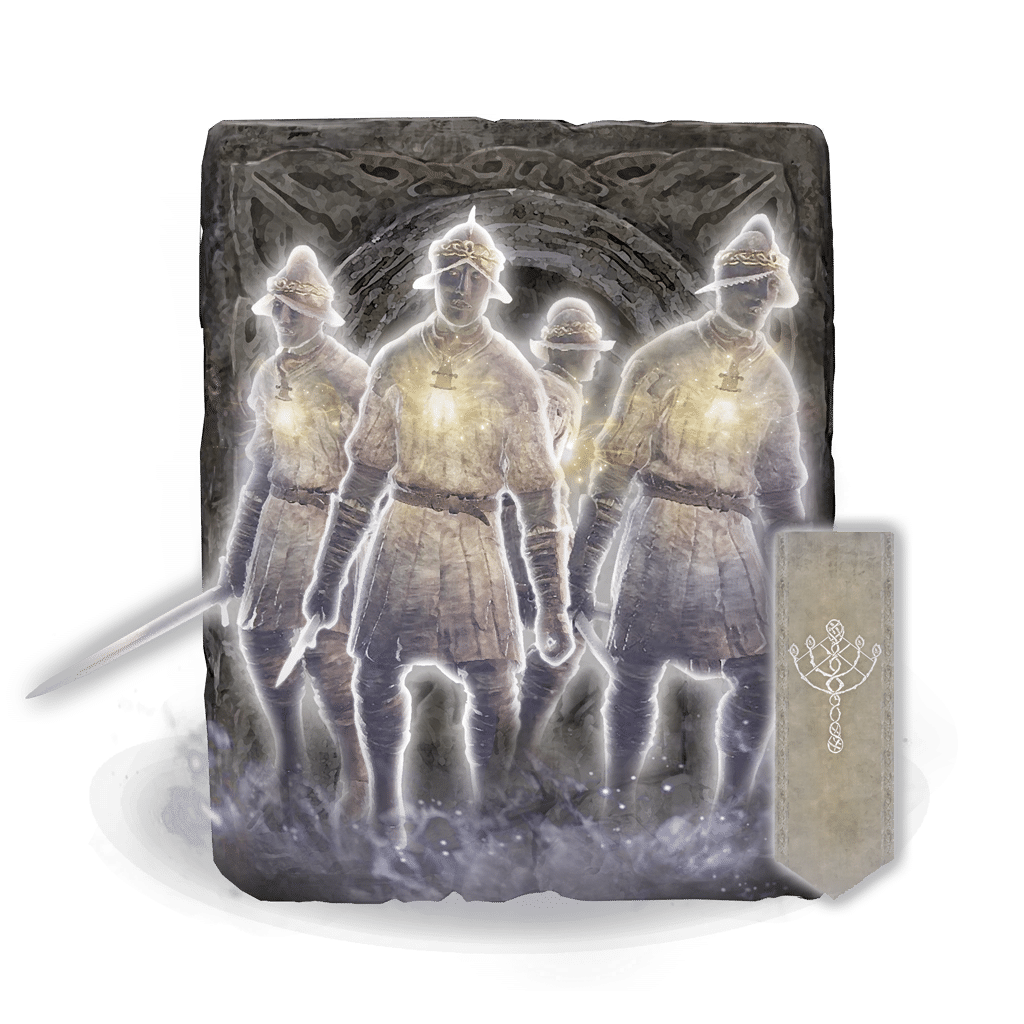
Summons four lightly armored Haligtree foot soldiers. Their name does not mean four heavily armored Haligtree Knights appear.
They use small blades and throw Poison pots. Poison still needs enough buildup on a susceptible enemy; one opening volley does not guarantee a proc.
When badly wounded, they perform a sacrificial Holy explosion. This is a final attack that removes that member of the group, rather than free repeated explosions from a surviving soldier.
Technical details
- FP Cost
- 66
- HP Cost
- 0
- Upgrade Material
- Grave Glovewort
- Type
- Spirit Ashes
In-game description
Ashen remains in which spirits yet dwell.
Use to summon the spirits of four Haligtree soldiers.
Spirits of common soldiers who carry the sacred light. When weakened, they explode to deliver a last-ditch attack.
This was the bitter revelation discovered by the desperate soldiers who awaited the return of their lord to the rotted Haligtree.
May the flash of our deaths guide Miquella's return.
Where to find
Northern balcony beneath a golden chalice
Elphael, Brace of the Haligtree
Starting Site of Grace: Prayer Room
- Obtain the right Haligtree Secret Medallion half from Albus in the Village of the Albinaurics. He is disguised as a pot on the uphill path, before the bridge leading toward the Omenkiller.
- Obtain the left half from the tower beyond Commander Niall at Castle Sol in the northern Mountaintops. After winning, continue behind his arena, ride the lift and loot the rooftop corpse.
- Return to Grand Lift of Rold with both halves and switch to the secret-medallion prompt. The ordinary Rold Medallion sends you to a different destination.
- Take the main stairs through Hidden Path to the Haligtree and leave into Consecrated Snowfield. Continue north through the blizzard, following the road toward Inner Consecrated Snowfield, then on to Ordina, Liturgical Town.
- Activate Ordina's grace and find the evergaol seal toward the back of town. Enter it to light the four statues. Invisible assassins patrol the streets and Albinauric archers fire from the rooftops.
- From the evergaol seal, go left down the stairs and left again to light the street-level statue. Head toward the second stairs leading toward the town grace, but take the path around the building on their right instead of going down.
- Climb the ladder around that building and the next ladder to its rooftop statue. After lighting it, drop from the eastern side onto the red roof, cross the connected rooftops and climb the next pair of ladders to another statue.
- Go down those ladders and return to the evergaol courtyard. Pass the right side of the building, drop to the snowy ground and head west around the next building to the last pair of ladders. Light the fourth statue to lift the seal.
- Back in ordinary Ordina, climb the long northern staircase and use the sending gate at its top. Activate Haligtree Canopy when you arrive.
- From Haligtree Canopy, head east along the branch, climb over the pink mushroom near the envoy and turn south at the junction. Continue past the patrolling envoy to the next junction, then follow its northeastern branch to the end and look southeast for the branch below.
- Drop onto that branch. The larger envoy is to the east; return west toward your landing and look south for the mushroom cluster with a corpse. Descend onto the mushrooms, keeping clear of the edges and using them as cover from bubbles.
- Go north along the branch past the envoys to the ant patrol. Draw the ants onto a wider section before fighting, then turn back south and take the first broad branch east-southeast.
- At its next junction, turn southwest uphill. Just beyond the smaller branch on your left, drop south onto the broad branch below. At the fork, use the southern branch, then turn right onto the thin branch before its far tip.
- Follow the thin branch over the next branch, turn northeast onto that one and climb as it curves north. Pass the envoy and turn southeast toward the next envoy, then return west to the large junction.
- Take the northwestern mushroom ledge with the Preserving Boluses corpse. Drop southwest onto the mushrooms below, then southwest again onto the main branch.
- Head north-northeast. Beyond the branch sticking vertically up on your left, use the mushroom patch on the right to drop onto the branch beneath. Follow it to the larger branch, turn left and continue north-northeast, then northwest at the junction toward the huge envoy firing bubbles.
- Near that huge envoy, drop onto the broad branch below. Follow it north through the rot flowers to the trunk. The stone platform on its left has a ladder; descend it and take the stairs to Haligtree Town grace.
- From Haligtree Town, go northwest down the stairs past the Misbegotten. Continue toward the building below, watching for the enemies waiting beside the doorway and under its stairs.
- Inside, go down the stairs to the lower room. From its northern side, jump north-northeast to the next platform, then turn left across the wooden bridge. Go through the building and out its window.
- Cross the pavilion, keeping clear of the large Misbegotten, and enter the building southwest. Leave southwest across the wooden bridge to Haligtree Town Plaza grace.
- Go south from the plaza and jump to the roof. Cross to its northeastern side, drop onto the branch and continue toward the ants. Turn back toward the building beside that branch and enter it.
- Leave southeast and watch for Spiritcaller Snails around the outside. Their Crystalian summons disappear when their snail dies. Continue southeast and jump to the next roofs, then use the ladders at their eastern side to reach the lower walkway.
- Enter the building southeast of the lower ladder and pass the two Misbegotten. Across the bridges ahead, two battlemages guard the way; use the buildings for cover and draw them apart.
- Cross east to the next building. Its northwestern bridge leads to a lift back up to Haligtree Town. Ride it once to open the shortcut, then return down for a much shorter boss run.
- From the lower lift landing, cross southeast, then turn left onto the northeastern bridge to Loretta's arena. Defeat Loretta, Knight of the Haligtree. The spirit named Royal Knight Loretta in Caria Manor does not unlock this armor.
- After Loretta, activate Haligtree Promenade and leave through its northern gateway. Follow the stairs winding down beside the trunk, then descend the long ladder.
- Enter the tower below and take its lift down. Cross the bridge toward the Cleanrot Knight at the far doorway and activate Prayer Room inside before starting the farm.
- From Prayer Room, follow the outer walkway down its stairs. Take the sloping stone brace on the right near the small chapel to reach the outer wall.
- Follow the wall toward its northern end and the soldiers operating the ballistae. Clear their firing positions before stopping to search.
- Look for the balcony beneath the enormous golden chalice near this end of the wall. Collect the glowing item below it for the ashes. You do not need to defeat Malenia.
Notes
- Summons four lightly armored Haligtree foot soldiers. Their name does not mean four heavily armored Haligtree Knights appear.
- They use small blades and throw Poison pots. Poison still needs enough buildup on a susceptible enemy; one opening volley does not guarantee a proc.
- When badly wounded, they perform a sacrificial Holy explosion. This is a final attack that removes that member of the group, rather than free repeated explosions from a surviving soldier.
- Poison buildup and the Holy burst are separate effects. An enemy resistant to Holy can still be susceptible to Poison, and an immune enemy cannot be poisoned by simply throwing more pots.
- Their early pressure can be useful, but the self-destruction makes them less dependable when you need a living companion throughout a long later phase.
- The ashes are a fixed balcony pickup beneath the golden chalice on Elphael's northern outer wall. Malenia is unnecessary, though the selected approach requires reaching Elphael past Loretta.
- Costs 66 FP for the whole summon. Upgrade with Grave Glovewort through +10 at Roderika's spirit tuning, rather than using Ghost Glovewort or reinforcing the ashes at a blacksmith.
- The ashes are reusable. You need the Spirit Calling Bell and an area where the rebirth-monument icon allows Spirit Ashes; owning enough FP does not allow summoning everywhere.

 Spirit Ashes