Development preview — content and features are still being refined.
 Torch
Weapons · Torch
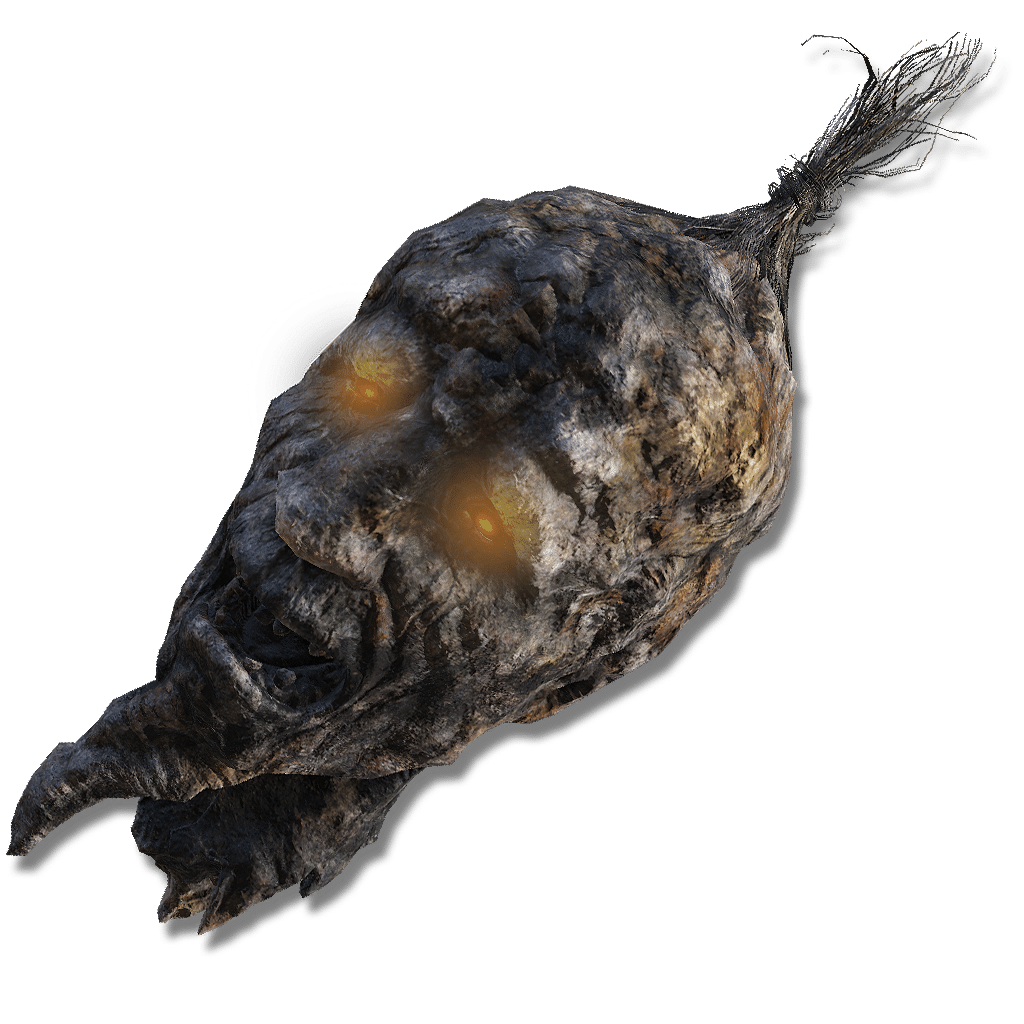
Lamenting Visage
A stone lantern carved to resemble a lamenting human head, the eyes vacantly beaming out light. Can be raised up when equipped in the left hand, illuminating more of the surrounding area.
Attack & scalingUpdates as you edit
In-game description
A stone lantern carved to resemble a lamenting human head, the eyes vacantly beaming out light. Can be raised up when equipped in the left hand, illuminating more of the surrounding area.
The unusual expression somehow imparts a sense of contentment. The languid ease of one who needs not sight.
Skill
Swing the head while covering the eyes, unleashing a wail of lamentation while temporarily making the user of this skill harder to see. To those who seek happiness, blindness is bliss.
Where to find
Charo's Hidden Grave
Starting Site of Grace: Lamenter's Gaol
Before you go
- To enter the Realm of Shadow, defeat Starscourge Radahn and Mohg, Lord of Blood, then touch the withered arm in Mohg's arena at Mohgwyn Palace.
- Access the Realm of Shadow and reach Lamenter's Gaol.
- Find both gaol keys inside the dungeon.
- From Castle Front, follow the road southeast toward Pillar Path Waypoint. At the fork, use the lower road toward Igon rather than climbing to the Suppressing Pillar.
- Continue south-southwest past the broken dragon statues. An Ancient Dragon-Man invades along this approach. The cave entrance is on the left near the end of the path, marked by a fire.
- Activate Dragon's Pit grace and follow the lit passage down. Watch for skeletons below the first ledge and around the next corner. Strike their glowing remains after knocking them down to stop them getting back up.
- In the large cavern with the pillars, follow the left-hand ledge down and take the passage beside the distant crossbow skeleton. Continue onto the sloping stairs in the next chamber.
- Take the downward route toward the large altar and pit. The stairs going up lead to an optional Magma Wyrm; that fight is not needed to reach the exit.
- At the bottom, approach the message beside the deep chasm. Walk straight off this lowest ledge into the pit to land safely by the boss mist. Do not jump from the higher rooms or aim toward the side walls.
- Defeat the Ancient Dragon-Man behind the mist. Open the large doors at the back of the arena instead of using the return-to-entrance exit, then follow the tunnel to Dragon's Pit Terminus grace.
- Leave Dragon's Pit Terminus and descend to the lake bed with a Jagged Peak Drake. You can ride past the drake; follow the southern canyon toward the enormous dead dragon.
- Pass the dragon statues and emerge beside the ruined structure north of Grand Altar of Dragon Communion. The huge stone bowl and dead dragon identify the altar.
- At the altar, head west over the dead dragon and continue west-southwest toward the red flowers. This leads into the upper hidden grave, not the blue-flowered coast below.
- The entrance meets the lowest section of a shallow river. The river climbs northwest through several pools separated by small waterfalls.
- Continue northwest up the river past the Mariner pools. At the upper end, follow the red-flowered trail on the western bank to Charo's Hidden Grave grace.
- From Charo's Hidden Grave, continue northwest through the red-flowered graveyard toward the cliff entrance of Lamenter's Gaol. Enter and activate its grace.
- From the gaol grace, follow the passage to the first fork. The right-hand gate is locked, so take the left passage and check the second cell on the right.
- Deal with the enemies in that cell and open its chest for Gaol Upper Level Key. Return to the first fork and use it on the locked gate.
- Unlock the upper gate and climb down its ladder. In the icy chamber, pass the first cell and continue toward the northern side, watching for Jar Innards emerging from their pots.
- Climb the natural icy slope on the east side and go through the doorway. Continue into the next rooms until the weak floor collapses into the bottom level.
- Clear the shades and leave the fallen cell. Go up the stairs and note the first side passage, which leads toward Call of Tibia and the hidden lower cell.
- For the key, continue upstairs to the next doorway on the right. Follow its passage, jump the small gap and enter the large chamber of Living Jars.
- Descend into the jar chamber and clear the large jars around the chest. Open it for Gaol Lower Level Key; the Hefty Cracked Pot on the mound is a separate pickup.
- Return over the gap to the lower staircase. Enter the first side passage above the fallen cell and follow it to the small room containing Call of Tibia.
- Strike or roll into the dead-end wall beyond the doorway to reveal the hidden gate. Use Gaol Lower Level Key to open it.
- Loot Lamenting Visage and the separate Shadow Realm Rune (4) from the bodies inside. Lamenter's Mask is the boss reward farther along a different route, rather than this lantern.
Notes
- Deals pure physical Strike damage and scales only with Strength. It does not gain Fire, Magic or Faith damage from the light shining out of the carved face.
- Unlike ordinary flaming torches, it has no Fire component for burning enemies or exploiting the Fire weakness of a physically resistant slime. Its main extra uses are light, guarding and stealth.
- When raised in the left hand, it lights farther ahead and also guards. A successful block allows a guard counter with your right-hand weapon's heavy attack.
- Its Standard guard blocks only 29% physical and 17% of each elemental damage type, with 29 starting Guard Boost. This is emergency protection, rather than the full physical blocking of a proper metal shield.
- Blindfold of Happiness costs 10 FP and makes you harder for enemies to see for 15 seconds. It is a visibility effect, rather than invulnerability or an attack that damages everything hearing the wail.
- The skill does not silence footsteps. Crepus's Vial, Assassin's Approach or Soft Cotton can complement it when you need quiet movement as well as reduced visibility.
- The skill is fixed. You cannot replace it with another Ash of War or apply No Skill just to pass the skill input through to your right-hand weapon.
- Upgrade with Somber Smithing Stones to +10. Grease and weapon enchantments cannot be applied.
- Requires only 9 Strength and weighs 2.0. The gaol's lower key is needed for the hidden room, while defeating Lamenter is unnecessary.
Related Equipment

Advertisement